Silver dollar pancakes что это
Обновлено: 09.05.2024
Silver Dollar Pancakes is a recipe cooked on the basic Griddle. It requires two Flour and one Milk and takes 5 minutes to craft.
Ingredients
- 1 cup all-purpose flour (spooned and leveled)
- 1 teaspoon sugar
- 1 1/2 teaspoons baking powder
- 1/4 teaspoon coarse salt
- 1 cup whole milk
- 2 tablespoons unsalted butter, melted
- 1 large egg
In a small bowl, whisk together flour, sugar, baking powder, and salt. In a medium bowl, whisk together milk, butter, and egg. Add flour mixture to milk mixture and whisk until just moistened (batter should have some lumps).
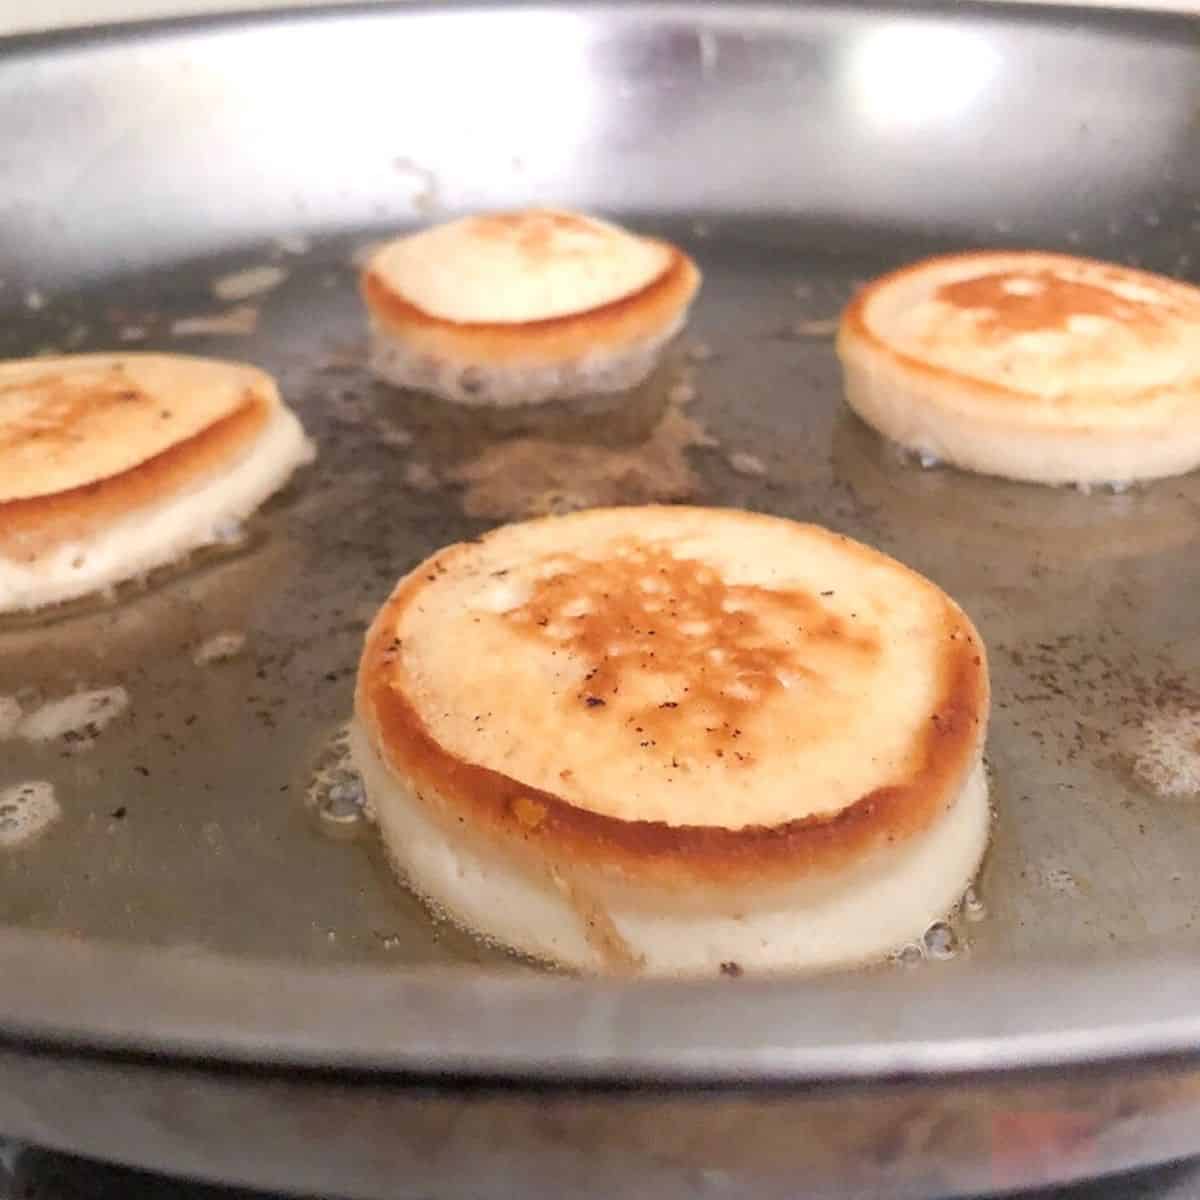
Heat a large nonstick or cast-iron skillet over medium. With a paper towel coated in butter, lightly grease skillet. Working in batches, drop batter by tablespoonfuls into skillet. Cook until bubbles appear on top and a few have burst, 2 minutes. Flip and cook until browned on underside, 1 minute. Repeat with more butter and remaining batter, wiping skillet clean between batches. Serve with desired toppings.
Recipe Summary test
Chance Ingredient [ ]
Eating Silver Dollar Pancakes at a neighbor's restaurant has a chance to yield Milk.
Silver Dollar Pancakes
These mini pancakes are so much more than a delicious breakfast. Use these silver dollar pancakes as the base for a variety of sweet or savory appetizers or desserts.
Serving Your Pancakes
Although I could eat these cute little pancakes ANY time of day, I love them in the mornings since our family is always on the go. My little ones love them because they don't need forks or even maple syrup to enjoy them.
For Brunch!
Brunch is one of my most favorite meals of the day! Pancakes for brunch is encouraged so why not serve these with some bagels, these healthy banana walnut muffins and some fresh fruit!
At A Bridal or Baby Shower!
Serving Tip* Make your mini pancakes ahead of time and add them to a chafing dish or an electric food warmer to keep them warm throughout the entire party!
Slumber Parties!
Slumber parties are so fun but can be hectic! Make these mini pancakes with the kids and keep them warm for a late night snack or serve these in the morning with some whipped cream and fruit!
Expert Tips
I have tested these mini silver dollars over and over and OVER again. Little did I know how temperamental pancake batter was! But have no fear, they are not difficult to make. Just follow my tips are they will turn out perfectly every time!
- Use butter and don't be stingy!! I don't think people understand how much butter is used for those yummy 'diner pancakes' we all have come to love. Butter will make your pancakes delicious period. Don't skimp. The more fat in your pan, the CRISPIER the edges. (You can always use olive oil if you want to cut down on the fat.)
- Start your skillet on medium low heat! High heat is never smart. The pancake will burn before the inside cooks!
- Use a non-stick skillet to prevent your little pancakes from sticking!
- Be patient. Don't mess with your small pancakes until they're ready to flip! Wait until you see little bubbles in your pancakes. This means they are ready to flip!
- Use a THIN METAL spatula or a little spatula. I find the big plastic spatulas to be too thick. They do not slip underneath the pancake as easily and will mess up your perfect mini pancakes!
- Don't overcook them. They will become dry. After you flip them, they should not take much longer to cook through. Just run a knife through the center to check if they're done!
- Do not over-mix your batter! When you over-mix flour based batters, you create gluten which causes chewier, tougher food, not light and airy like we want. When you add your ingredients to a bowl, mix gently with a whisk! Little lumps of flour in your batter are OKAY.
- Measure your ingredients precisely! When it comes to batters, precision matters. Level out your flour and baking powder! Use an accurate measuring cup for your milk. It WILL make a difference. You want a thicker batter for THICK pancakes!
- Use a mini ice cream scoop! Scooping just a tablespoon of batter will give you perfectly round and consistent cute little pancakes every time! If you don't have this, use a TABLESPOON measure instead!
- Do not use cooking spray! Cooking spray will only lightly coat your pan. In order to get crispy edges, you will need a nice layer of butter or oil on the bottom of your skillet. (1-2 tbsp)
Freezing Tips
These mini pancakes freeze VERY well!
Once your pancakes are fully cooked, add them to a large freezer bag or Tupperware container and freeze them for up to 6 weeks.
- Make sure to squeeze out as much air as you can to prevent from freezer burn.
- FLASH freeze your mini pancakes so they do not stick to one another. This is super helpful when your in a rush in the mornings!
Goals [ ]
There have been two goals requiring Silver Dollar Pancakes:
-
- Cook Silver Dollar Pancakes 2 times - Serve Silver Dollar Pancakes 3 times
Silver Dollar Pumpkin Pancakes

In a large bowl, combine cake flour, salt, baking powder, and sugar. Stir together and set aside.
In a separate bowl, whisk together pumpkin puree, eggs, vanilla, pumpkin pie spice, and milk. Slowly drizzle wet ingredients into dry ingredients, stirring gently with a spoon as you go. Once combined, if mixture needs more moisture, splash in a little more milk. Batter should be pourable.
Heat large skillet or griddle over medium-low to low heat. Smear a little bit of butter over the surface and drop tablespoon-sized amounts of batter onto the pan (more if you want larger pancakes.) Wait a minute or so, then flip to the other side. Pancakes should be light golden brown and set in the middle.
Whip cream with maple syrup (optional) until light and fluffy. Set aside.
Serve silver dollar pancakes in a circular pattern on a large plate, ending with one in the center. Top with butter, sprinkle with chopped nuts, and drizzle with warm syrup. Top the whole thing with the maple whipped cream and serve immediately! (Note: you can drizzle with a little caramel sauce, too!)

In my hometown when I was growing up, there was, inexplicably, a Dutch pancake restaurant called Pannekoeken Huis. I have no idea whether or not my family and I pronounced it correctly, but we just loved heading down to “Panna-kooken-hoos” and chowing down on the delicious breakfast offerings ranging from good ol’ bacon and eggs to big, poufy Pannekoeken that waitresses sporting braids and wooden clogs had to run to deliver to the tables before deflation occurred. Because at Pannenkoeken Huis, if a Pannekoeken fell before the waitress delivered it to the table…well, it was pretty much the end of the world.
Just what a Dutch pancake house was doing in a town of 35,000 in Northeastern Oklahoma is, to this day, a complete mystery to me. All I know is I loved it dearly, I miss it dearly, and I had a lot of memories there.
Oh, and Pannekoeken Huis is now a Chinese buffet. It’s called Hunan and it’s delicious. My younger daughter and I and go there sometimes when I take her over there for soccer practice. We load up our plates, return to the table, then I send her back for seconds because I’m too embarrassed to go myself.
My gosh, what was my point? Oh! I remember: The first time I ever heard of silver dollar pancakes was at Pannekoeken Huis. This is funny to me, because silver dollars are obviously an American currency, so what was a Dutch restaurant doing serving a dish with such an American influence?
These are the answers I hope to someday find in the hereafter.
Anyway, yesterday—because it’s that time of year—I made a batch of pumpkin pancake batter using my Perfect Pancake recipe as the base. But instead of proceeding with standard pancakes, I remembered the old days of Panna-kooken-hoos and went the silver dollar route. I inhaled them, my boys inhaled them, and when Marlboro Man and the girls got home from my older daughter’s soccer game two hours away, they inhaled them, too.
That was quite possibly the longest recipe headnote in the history of recipe headnotes. Until my next recipe headnote, which I think I’ll make longer, just to see if I can one-up myself.
I’m sorry you have to put up with me.

The Cast of Characters: Cake flour, salt, sugar, baking powder, pumpkin puree, eggs, vanilla, whole milk, butter, and maple syrup.
Oh, and heavy cream. Not pictured, because I’m an airhead.
And pecans. Not pictured, because I’m an airhead.
And caramel sauce (optional). Not pictured, because I’m an airhead.
Substitutions
Pancakes are SO versatile! As long as you keep the batter fairly the same, adding a few additional ingredients will help "flavorize" your mini pancakes even more bringing them to another level!
Substitute:
- Buttermilk or cream for your milk if you want a richer pancake.
- Brown sugar for white sugar for a deeper flavor.
- Gluten free flour if you wish.
- Vegan butter or coconut oil for the butter.
Other Add-Ins:
- maple syrup (my favorite thing to do)
- cinnamon or pumpkin pie spice
- chocolate chips
- strawberries
- blueberries
- bananas
- nuts

Pancakes need a leavening agent to help them rise and fluff up! This could be baking powder, baking soda, eggs or a combination of all. Without at least one of these, your pancakes will not be thick or fluffy. If you used baking soda or baking powder and your pancakes are STILL turning out thin, check the EXPIRATION DATES on both! Baking soda and baking powder can go stale after 6 months to a year so make sure they are not expired!
Its also important not to PAT DOWN your pancakes. A lot of chefs press them down which is fine. if you like your pancakes thin. =
You need to add more butter to your pan and SWIRL! The edges need fat to get crispy.
Think about using a nonstick skillet. If you don't have one, use plenty of butter and a thin spatula to flip them. Wait until they brown slightly on the edges before you flip them.
Yield [ ]
Main article: Serving| Yield | |||
|---|---|---|---|
| Level 1 | Level 2 | Level 3 | |
| Servings | 20 Servings | 23 Servings | 25 Servings |
| Coins | 60 Coins | 69 Coins | 75 Coins |
Ingredients and Mastery [ ]
About this table:
- The first line (Mastery) indicates how many times the player must cook this dish for each mastery level. If Level 1 reads "2" and Level 2 reads "5", that means the player must cook the dish twice for the first mastery star and five additional times for the second star.
- The remaining lines indicate how many of each ingredient are required to reach each mastery level.
- Lines with a darker background are the direct ingredients for this recipe.
- Lines with a lighter background are required to craft the direct ingredients.
Reheating Tips
You can reheat your pancakes one of THREE ways:
I highly recommend using the microwave especially if your in a hurry. They come out delicious and take about 1 minute of reheating.
If you want to "RE-CRISP" them, add a pad of butter to a hot skillet and toss them around a bit. You just want to warm them through, not dry them out.
The oven is useful if your reheating them in LARGE batches and if you want to maintain those crispy edges. This is ideal if your hosting a brunch party for a crowd. Oh and don't forget to serve with some butter, fresh fruit and/or maple syrup drizzled over the top of each pancake stack.
If you love this pancake recipe, you must try my Deep Fried Oreos! They taste like a pancake and cookie had a baby. 🙂
Contents
The BEST Thick and Fluffy Silver Dollar Pancakes
Published: Mar 9, 2021 · Modified: Jun 14, 2021 by Aleka Shunk · This post may contain affiliate links.
Share This Recipe!
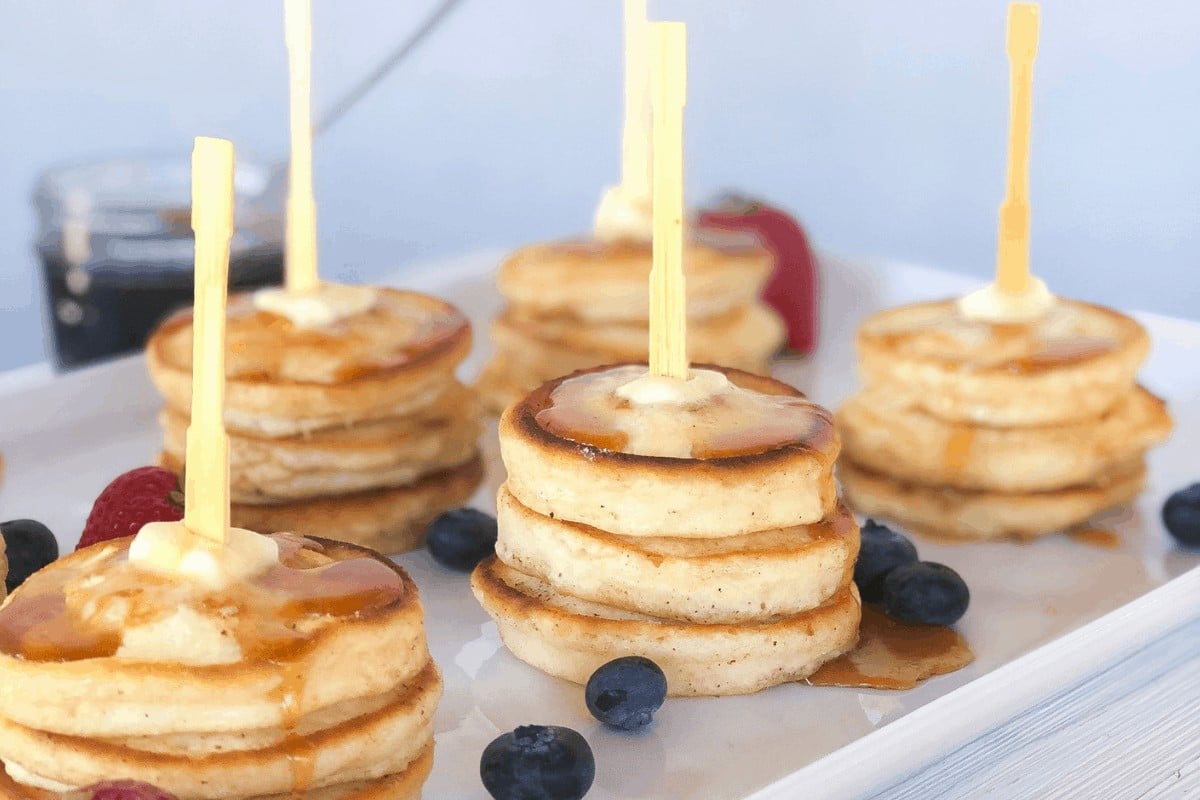
These Thick and Fluffy Silver Dollar Pancakes are the BEST mini pancake recipe out there! It's the crispy edges that make these little guys stand out. The size of a silver dollar, they are easy to skewer and completely bite sized!
![Thick and fluffy mini silver dollar pancakes on a plate skewered with butter and maple syrup drizzled over top.]()
These mini silver dollar pancakes are one of my most popular recipes for good reason. My Starbucks Copycat Egg Bites are another morning favorite!
"Silver dollar" pancakes are called silver dollar because they are simply SMALLER pancakes! Smaller sized pancakes can also be called hotcakes, flapjacks, griddlecakes or mini pancakes. They are often served stacked on top of one another especially in diners.
If you're looking for a fun breakfast idea, get your griddles ready because these mini pancake stacks are not only fun to eat but so tasty! Mini, fluffy and crispy on the edges. what more could the kid in us want?
Have you tried my mini custard tartlets yet? They are a delicious brunch treat!
Gallery
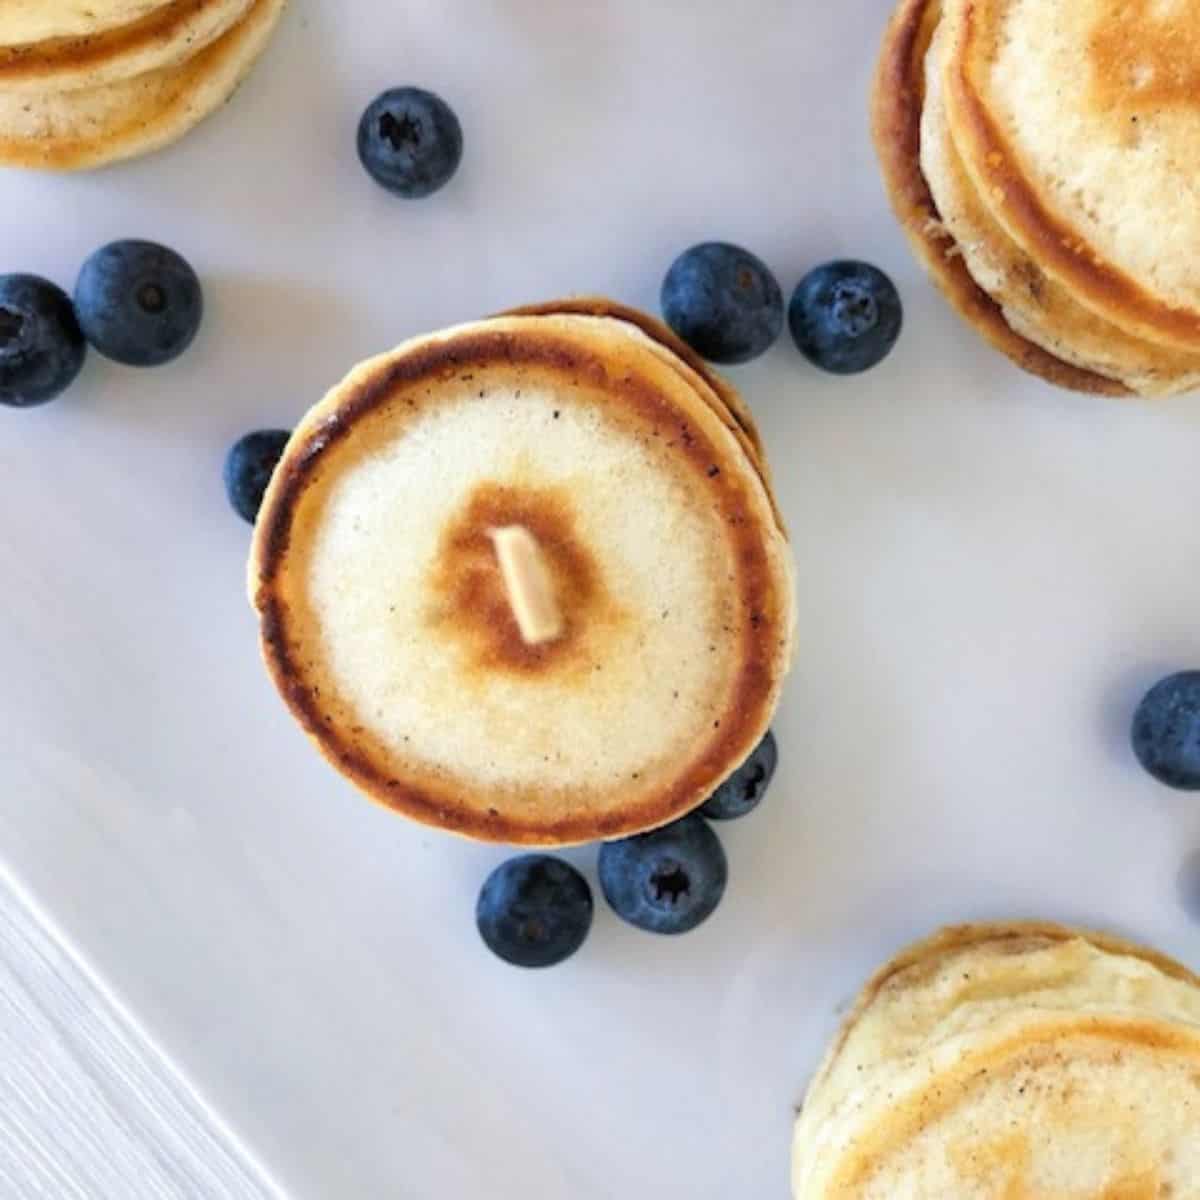
Silver Dollar vs. Regular
What is the different between a "regular pancake" and a silver dollar pancake?
Silver dollar pancakes are simply made smaller in size, usually about 2"-3" in diameter whereas, regular pancakes are at least 6" in diameter.
![overhead shot of mini silver dollar pancakes with blueberries around them.]()
Stack & Skewer Them!
Once you have your silver dollar pancakes, you want to stack those babies! It makes for a cute presentation especially if serving brunch or trying to keep them warm. I like to do this and pop them in the oven on warm heat until guests arrive.
Try to make sure you pancakes are the same size. To do this, I recommend using an ice cream scoop to measure. This will make sure each pancake is the perfect size!
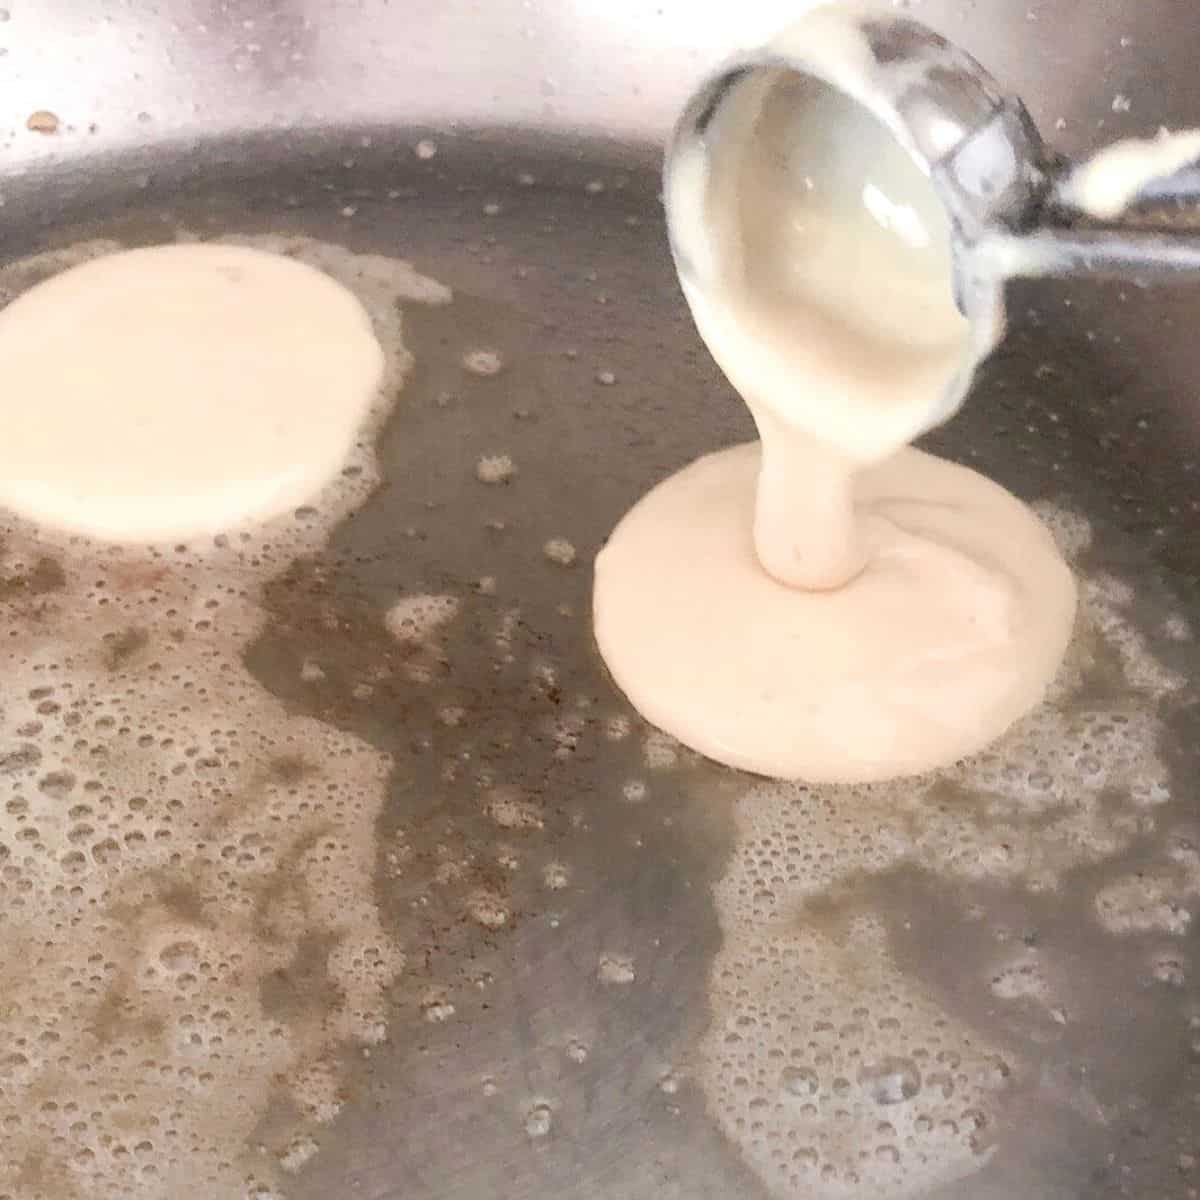
Pancake Skewers
To skewer your pancakes properly, I would use one of the follow items:
![ice cream scooper pouring mini pancakes into a skillet with butter.]()
Читайте также: