Гайд по lua roblox
Обновлено: 04.07.2024
This style guide aims to unify as much Lua code at Roblox as possible under the same style and conventions.
This guide is designed after Google's C++ Style Guide. Although Lua is a significantly different language, the guide's principles still hold.
Guiding Principles
- The purpose of a style guide is to avoid arguments.
- There's no one right answer to how to format code, but consistency is important, so we agree to accept this one, somewhat arbitrary standard so we can spend more time writing code and less time arguing about formatting details in the review.
- You will write your code once. Many people will need to read it, from the reviewers, to any one else that touches the code, to you when you come back to it in six months.
- All else being equal, consider what the diffs might look like. It's much easier to read a diff that doesn't involve moving things between lines. Clean diffs make it easier to get your code reviewed.
- Magical code is really nice to use, until something goes wrong. Then no one knows why it broke or how to fix it.
- Metatables are a good example of a powerful feature that should be used with care.
File Structure
Files should consist of these things (if present) in order:
- An optional block comment talking about why this file exists
- Don't attach the file name, author, or date -- these are things that our version control system can tell us.
- Services used by the file, using GetService
- Module imports, using require
- Module-level constants
- Module-level variables and functions
- The object the module returns
- A return statement!
Requires
-
All require calls should be at the top of a file, making dependencies static.
Use relative paths when importing modules from the same package.
Use absolute paths when importing modules from a different package.
Metatables
Metatables are an incredibly powerful Lua feature that can be used to overload operators, implement prototypical inheritance, and tinker with limited object lifecycle.
At Roblox, we limit use of metatables to a couple cases:
- Implementing prototype-based classes
- Guarding against typos
Prototype-based classes
The most popular pattern for classes in Lua is sometimes referred to as the One True Pattern. It defines class members, instance members, and metamethods in the same table and highlights Lua's strengths well.
First up, we create a regular, empty table:
Next, we assign the __index member on the class back to itself. This is a handy trick that lets us use the class's table as the metatable for instances as well.
When we construct an instance, we'll tell Lua to use our __index value to find values that are missing in our instances. It's sort of like prototype in JavaScript, if you're familiar.
In most cases, we create a default constructor for our class. By convention, we usually call it new .
Methods that don't operate on instances of our class are usually defined using a dot ( . ) instead of a colon ( : ).
We can also define methods that operate on instances. These are just methods that expect their first argument to be an instance. By convention, we define them using a colon ( : ):
At this point, our class is ready to use!
We can construct instances and start tinkering with it:
Further additions you can make to your class as needed:
- Introduce a __tostring metamethod to make debugging easier
- Define quasi-private members using two underscores as a prefix
Add a method to check type given an instance, like:
Guarding against typos
Indexing into a table in Lua gives you nil if the key isn't present, which can cause errors that are difficult to trace!
Our other major use case for metatables is to prevent certain forms of this problem. For types that act like enums, we can carefully apply an __index metamethod that throws:
Since __index is only called when a key is missing in the table, MyEnum.A and MyEnum.B will still give you back the expected values, but MyEnum.FROB will throw, hopefully helping engineers track down bugs more easily.
General Punctuation
- Don't use semicolons ; . They are generally only useful to separate multiple statements on a single line, but you shouldn't be putting multiple statements on a single line anyway.
General Whitespace
- Indent with tabs.
- Keep lines under 120 columns wide, assuming four column wide tabs.
- Luacheck will warn for lines over 120 bytes wide; it isn't accurate with tab characters!
- This is different than normal code; the hope is that short lines help improve readability of comment prose, but is too restrictive for code.
- If your editor has an auto-trimming function, turn it on!
No vertical alignment!
- Vertical alignment makes code more difficult to edit and often gets messed up by subsequent editors.
Use a single empty line to express groups when useful. Do not start blocks with a blank line. Excess empty lines harm whole-file readability.
Use one statement per line. Put function bodies on new lines.
This is especially true for functions that return multiple values. Compare these two statements:
It's much easier to spot the mistake (and much harder to make in the first place) if the function isn't on one line.
This is also true for if blocks, even if their body is just a return statement.
Most of the time this pattern is used, it's because we're performing validation of an input or condition. It's much easier to add logging, or expand the conditional, when the statement is broken across multiple lines. It will also diff better in code review.
Put a space before and after operators, except when clarifying precedence.
Put a space after each commas in tables and function calls.
When creating blocks, inline any opening syntax elements.
Avoid putting curly braces for tables on their own line. Doing so harms readability, since it forces the reader to move to another line in an awkward spot in the statement.
Newlines in Long Expressions
First, try and break up the expression so that no one part is long enough to need newlines. This isn't always the right answer, as keeping an expression together is sometimes more readable than trying to parse how several small expressions relate, but it's worth pausing to consider which case you're in.
It is often worth breaking up tables and arrays with more than two or three keys, or with nested sub-tables, even if it doesn't exceed the line length limit. Shorter, simpler tables can stay on one line though.
Prefer adding the extra trailing comma to the elements within a multiline table or array. This makes it easier to add new items or rearrange existing items.
Break dictionary-like tables with more than a couple keys onto multiple lines.
Break list-like tables onto multiple lines however it makes sense.
- Make sure to follow the line length limit!
For long argument lists or longer, nested tables, prefer to expand all the subtables. This makes for the cleanest diffs as further changes are made.
In some situations where we only ever expect table literals, the following is acceptable, though there's a chance automated tooling could change this later. In particular, this comes up a lot in Roact code ( doSomething being Roact.createElement ).
However, this case is less acceptable if there are any non-tables added to the mix. In this case, you should use the style above.
For long expressions try and add newlines between logical subunits. If you're adding up lots of terms, place each term on its own line. If you have parenthesized subexpressions, put each subexpression on a newline.
- Place the operator at the beginning of the new line. This makes it clearer at a glance that this is a continuation of the previous line.
- If you have to need to add newlines within a parenthesized subexpression, reconsider if you can't use temporary variables. If you still can't, add a new level of indentation for the parts of the statement inside the open parentheses much like you would with nested tables.
- Don't put extra parentheses around the whole expression. This is necessary in Python, but Lua doesn't need anything special to indicate multiline expressions.
For long conditions in if statements, put the condition in its own indented section and place the then on its own line to separate the condition from the body of the if block. Break up the condition as any other long expression.
Blocks
Don't use parentheses around the conditions in if , while , or repeat blocks. They aren't necessary in Lua!
Use do blocks if limiting the scope of a variable is useful.
Literals
Use double quotes when declaring string literals.
- Using single quotes means we have to escape apostrophes, which are often useful in English words.
- Empty strings are easier to identify with double quotes, because in some fonts two single quotes might look like a single double quote ( "" vs '' )
- Single quotes are acceptable if the string contains double quotes to reduce escape sequences.
- If the string contains both single and double quotes, prefer double quotes on the outside, but use your best judgement.
Tables
- Avoid tables with both list-like and dictionary-like keys.
- Iterating over these mixed tables is troublesome.
- This helps clarify what kind of table we're expecting in a given block of code!
Add trailing commas in multi-line tables.
- This lets us re-sort lines with a single keypress and makes diffs cleaner when adding new items.
Functions
-
Keep the number of arguments to a given function small, preferably 1 or 2.
Always use parentheses when calling a function. Lua allows you to skip them in many cases, but the results are typically much harder to parse.
Of particular note, the last example - using the curly braces as if they were function call syntax - is common in other Lua codebases, but while it's more readable than other ways of using this feature, for consistency we don't use it in our codebase.
Declare named functions using function-prefix syntax. Non-member functions should always be local.
When declaring a function inside a table, use function-prefix syntax. Differentiate between . and : to denote intended calling convention.
Comments
- Wrap comments to 80 columns wide.
- It's easier to read comments with shorter lines, but fitting code into 80 columns can be challenging.
Use single line comments for inline notes:
- If the comment spans multiple lines, use multiple single-line comments.
- Sublime Text has an automatic wrap feature (alt+Q on Windows) to help with this!
Use block comments for documenting items:
- Use a block comment at the top of files to describe their purpose.
- Use a block comment before functions or objects to describe their intent.
Comments should focus on why code is written a certain way instead of what the code is doing.
No section comments.
Comments that only exist to break up a large file are a code smell; you probably need to find some way to make your file smaller instead of working around that problem with section comments. Comments that only exist to demark already obvious groupings of code (e.g. --- VARIABLES --- ) and overly stylized comments can actually make the code harder to read, not easier. Additionally, when writing section headers, you (and anyone else editing the file later) have to be thorough to avoid confusing the reader with questions of where sections end.
Some examples of ways of breaking up files:
- Move inner classes and static functions into their own files, which aren't included in the public API. This also makes testing those classes and functions easier.
- Check if there are any existing libraries that can simplify your code. If you're writing something and think that you could make part of this into a library, there's a good chance someone already has.
If you can't break the file up, and still feel like you need section headings, consider these alternatives.
If you want to put a section header on a group of functions, put that information in a block comment attached to the first function in that section. You should still make sure the comment is about the function its attached to, but it can also include information about the section as a whole. Try and write the comment in a way that makes it clear what's included in the section.
The same can be done for a group of variables in some cases. All the same caveats apply though, and you have to consider whether one block comment or a normal comment on each variable (or even using just whitespace to separate groups) would be more readable.
Naming
Yielding
Do not call yielding functions on the main task. Wrap them in coroutine.wrap or delay , and consider exposing a Promise or Promise-like async interface for your own functions.
Pros:
- Roblox's yielding model makes calling asynchronous tasks transparent to the user, which lets users call complicated functions without understanding coroutines or other async primitives.
Cons:
Unintended yielding can cause hard-to-track data races. Simple code involving callbacks can cause confusing bugs if the input callback yields.
Error Handling
When writing functions that can fail, return success, result , use a Result type, or use an async primitive that encodes failure, like Promise .
![]()
И снова рады приветствовать в онлайн школе программирования «Пиксель». Мы находимся на втором уроке, и сегодня нашей главной темой станет — roblox lua. Поехали. Мы разбираем основные этапы по созданию игры в roblox с помощью lua. И в конце вас ждет приятный сюрприз, мы сделаем шутер!
![]()
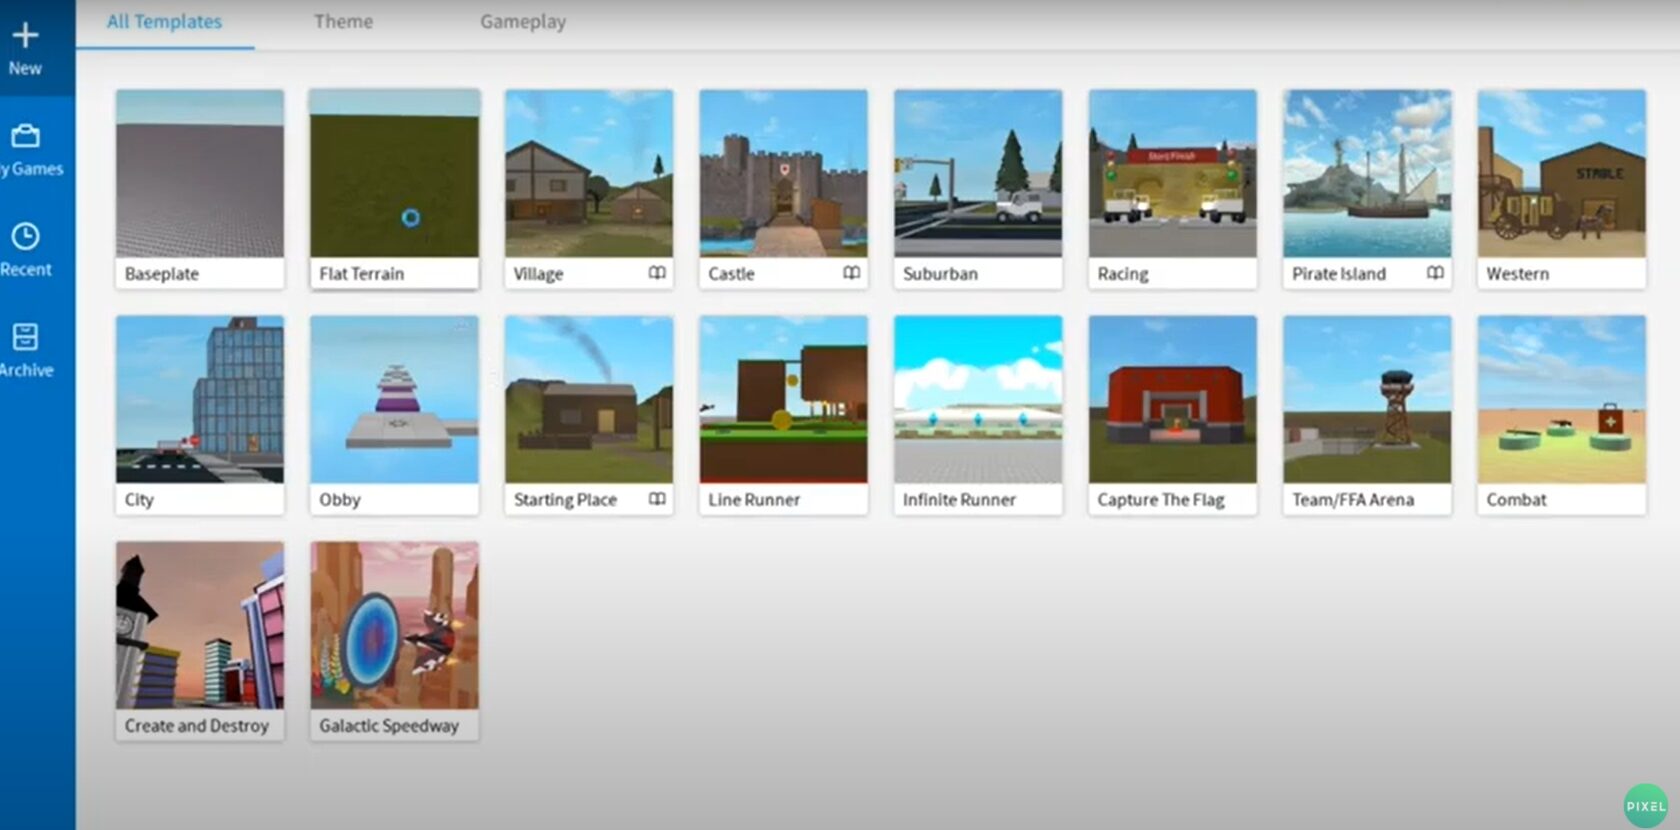
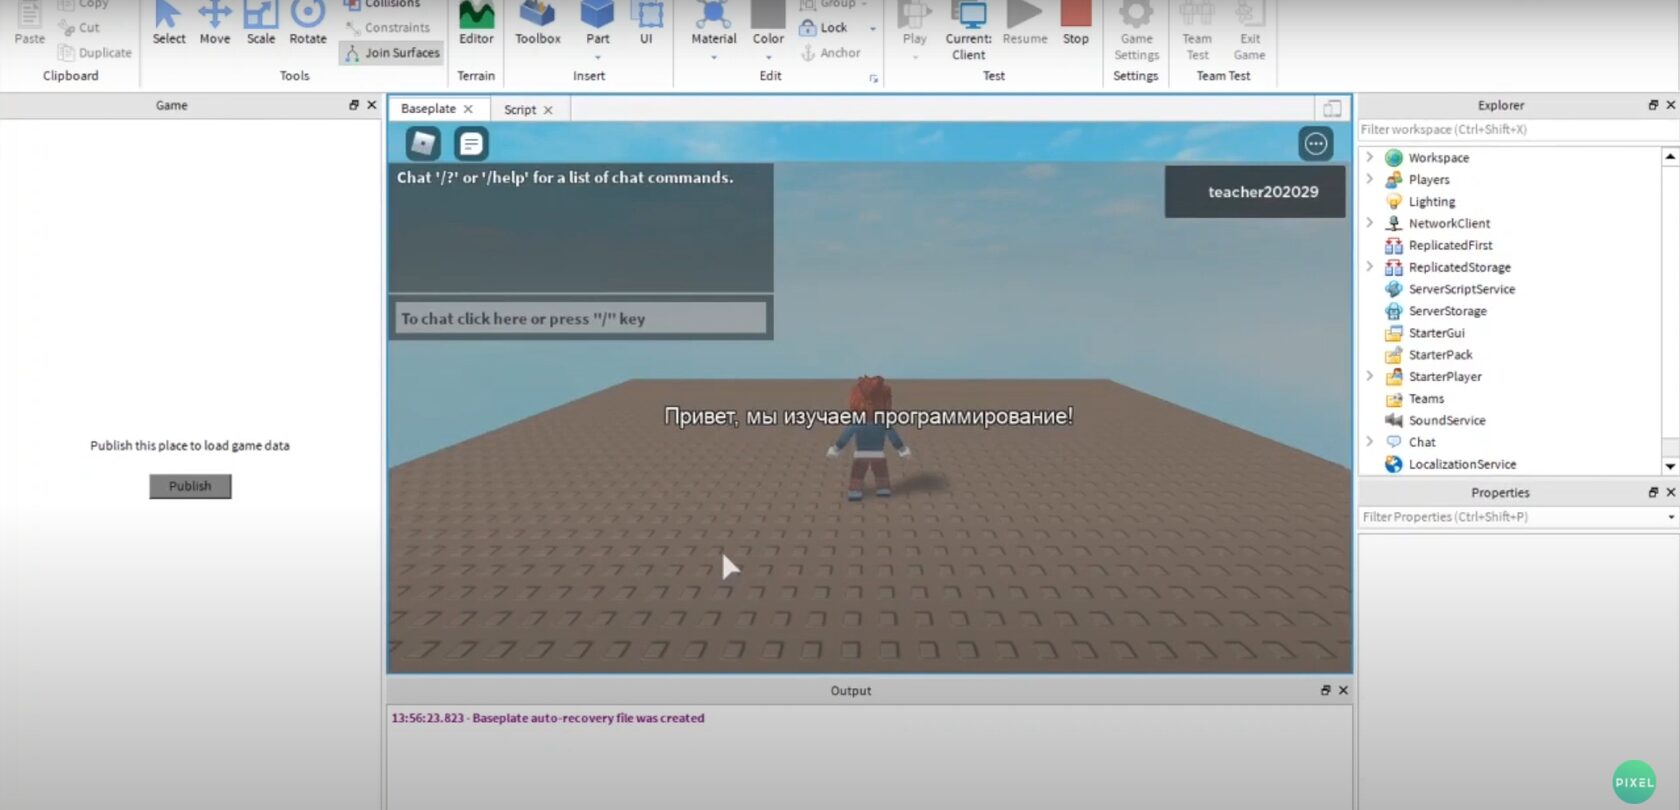
Заходим в интерфейсВ интерфейсе роблокс луа выбираем карту flat terrain. Ждем загрузки. Будем делать место появления нашего персонажа «spawn». Переходим во вкладку «model». Камеру перемещаем так, чтобы видно было нужное место. И жмем «spawn». Если хотите отредактировать, изменить место, то помогут режимы «select» и «move». Они расположены сверху в левом углу экрана. Проверяем работу. Кликаем на вкладку home. И жмем «play», чтобы запустить игру. Вот, так потихоньку осваиваем роблокс и язык программирования lua. Нажали, и видим, что персонаж стоит на месте появления «spawn». Но в одиночку неинтересно бегать по карте.
![roblox lua]()
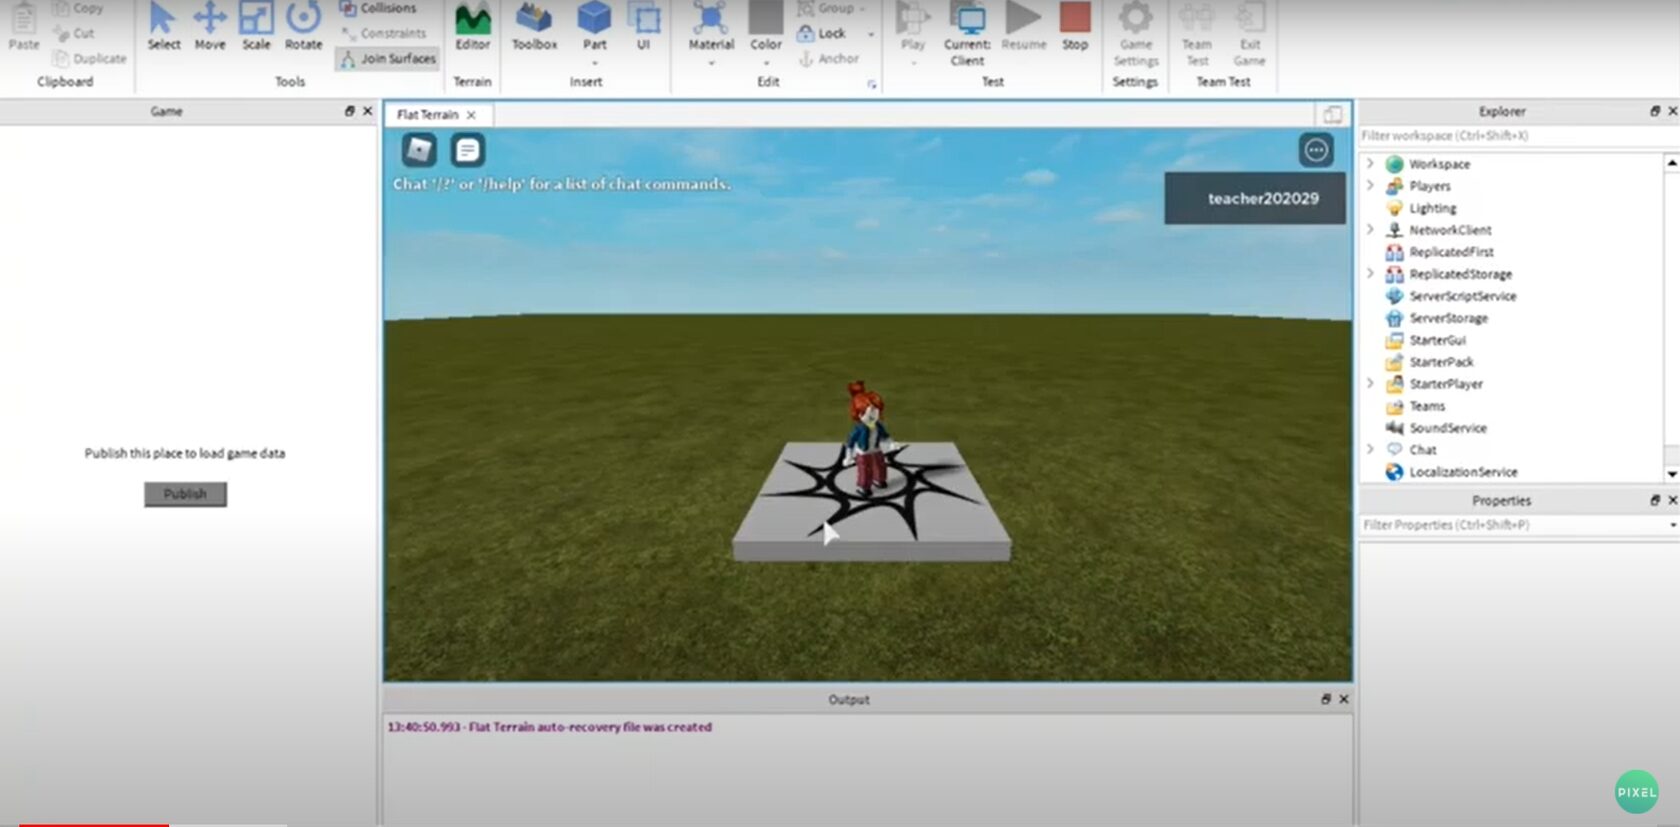
Превращаем игру в шутер!Жмем красный квадрат «stop». Переходим в toolbox и ищем модель врага. В поисковой строке пишем «enemy» (враг). Выбираем любого персонажа и размещаем на карте. Чтобы герой защищался, ему нужно оружие. Давайте найдем. Благо, что язык программирования роблокс студио позволяет это сделать. В поисковую строку вбиваем RPG. Выбираем любое оружие, перетаскиваем поближе к месту «spawn». Жмем «play». Персонаж побежал. Чтобы взять оружие, на него нужно просто наступить. А стрелять будем левой кнопкой мыши, наводя прицел на врага. Если мы его убьем, то скоро он опять возродится.
Давайте уберем эту функцию. Останавливаем игру «stop». Переходим в explorer (в правой части экрана). Видим строчку communist (так называется наш враг). Кликаем и раскрываем его дочерние объекты. Находим скрипт «respawn» и удаляем. Больше наш коммунист не возродится.![]()
Давайте уменьшим урон от его пулей. Нажимаем левой кнопкой мыши на скрипт «control». Появился код. И как вы догадались, это lua язык программирования. Находим 89 строчку (номера строк указаны). Меняем в коде значение 67,5 на 2,5. Таким образом мы уменьшили урон от его пистолета. Но один враг — это не интересно. Давайте сделаем несколько копий. Закрываем скрипт.Множим врагов
Надеемся, понятно, как работает луа язык программирования. Снова в explorer находим communist и кликаем. Воспользуемся комбинацией клавиш ctrl + D. И мы копируем коммунистов. Подвигаем их на поле. Мы получили настоящий шутер. Персонаж может брать оружие, убивать врагов. Если истребить всех, то мы победим.
Переходим к основам
Этот код предназначен для не профессиональных пользователей. Внимание уделяется простате дизайна и легкости обучения. Поэтому он идеально подходит для обучения на начальном этапе. Смотрите наши уроки роблокс или записывайтесь в онлайн школу Пиксель.
Создаем первый скрипт: набор инструкций для компьютера
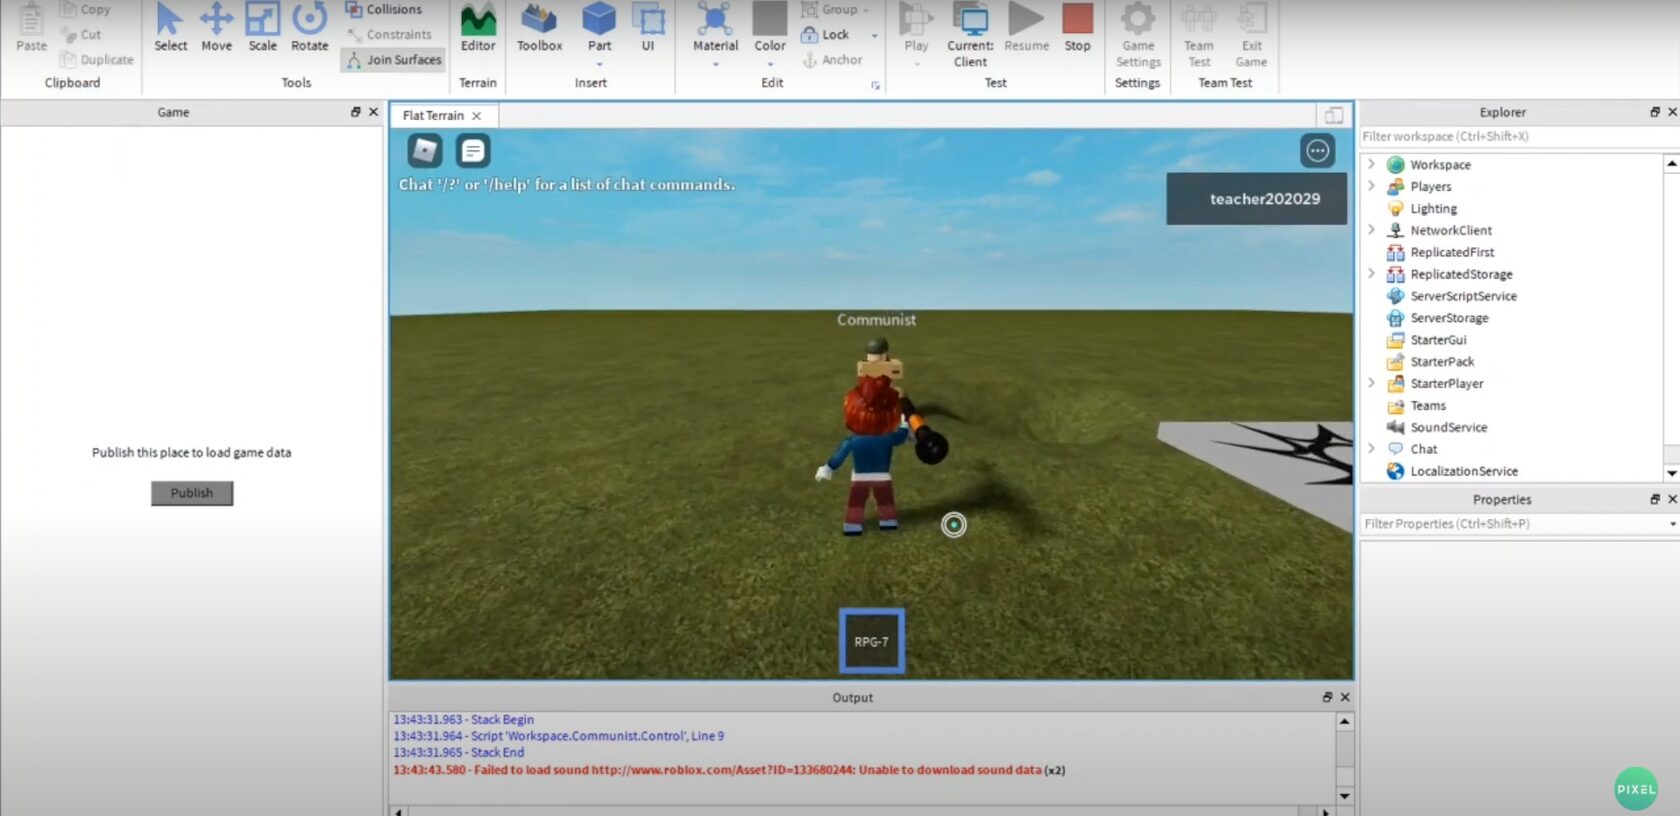
Смотрим главное меню с шаблонами, выбираем Baseplate. Нажимаем на плюсик возле Workspace и выбираем скрипт. Открылся первый скрипт, и в нем строчка — print ("hello world"). Print — это команда с помощью которой мы печатаем в окне Output. Чтобы его увидеть, мы нажимаем на кнопку vew. Далее, кликаем command bar, и окно появится.
- x=10
- y=20
- z=30
- print (x+y+z)
Roblox = "Привет, маленькие кодеры!". Говорим компьютеру, чтобы он нам это напечатал: print (roblox). Кстати, чтобы запустить программу можно нажать на кнопку f5. Теперь в командной строке мы видим наше приветствие. Что мы сделали? Задали символы, написав наш текст. И потом с помощью команды print вывели его на экран. Так, можно создавать реальные объекты на игровой сцене при запуске игры. Используем специальную команду Instance.new
![]()
A = Instance.new. В кавычках указываем название объекта, который создаем. У нас это блок: a = Instance.new ("part"). Укажем, где его создаем: a = Instance.new ("part", Workspace). Будем изменять свойство создаваемых объектов. Давайте начнем с изменения размера объекта. Не забываем, что после имени переменной ставится точка, и прописывается название свойства. Вернемся к размеру: a. size. Так как размер — это трехмерная величина, создадим обращение: a. size= vector 3.new (это обязательное условие для изменения всех трехмерных свойств: размера, местоположения и. т. д).Запишем новые параметры кубика: a. size= vector 3.new (50, 50, 50). Это размеры по трем осям (x, y, z).
Поменяем положение объекта в пространстве: a.position = vector 3.new (0, 100, 0). То есть по оси x и по оси z координаты равны нулю, а по оси y значение 100.- true (истина);
- fols (ложь).
Чтобы сделать рандомный цвет, задаем: a.brickcolor=brickcolor. random
Запускаем
Жмем «play». Видим появилась надпись! И она будет все время висеть на экране. Тут же примостился парящий в воздухе блок с измененными размерами и высотой. Сделаем так, чтобы надпись пропадала через 10 секунд. Жмем «stop», переходим в скрипт. Впишем команду wait (10). Компьютер подождет 10 секунд и удалит надпись. Как? X: remove (10)![язык роблокса]()
Онлайн школа «Пиксель»
Итак, сегодня мы познакомились с roblox lua и создали собственный шутер. Если понравилось, записывайтесь в школу для детей «Пиксель». У нас просто, интересно и полезно.
![]()
Начинаем последовательное изучение Roblox и языка программирования Lua. Короткие видеоуроки будут интересны начинающим ученикам, которые хотят постепенно перейти от простого к сложному.
Roblox Studio — многопользовательская онлайн-платформа, которая позволяет пользователям создавать свои собственные. Мы собрали плейлист пошаговых уроков в этой популярной игровой среде. Будет интересно, поехали!
Уроки Roblox Studio - Создание 3D-игр - Урок 0: Установка Roblox
Уроки Roblox Studio - Создание 3D-игр - Урок 1: Создание карты
Уроки Roblox Studio - Создание 3D-игр - Урок 2: Основы языка Lua. Начинаем делать игру
Уроки Roblox Studio - Создание 3D-игр - Урок 3: Создание игрового уровня. Продолжаем делать игру
Уроки Roblox Studio - Создание 3D-игр - Урок 4: Создание первого уровня игры
Уроки Roblox Studio - Создание 3D-игр - Урок 5: Создание диалогов
Уроки Roblox Studio - Создание 3D-игр - Урок 6: Создание компонентов GUI
Уроки Roblox Studio - Создание 3D-игр - Урок 7: Начинаем создавать 3D-игру
Уроки Roblox Studio - Создание 3D-игр - Урок 8: Продолжаем создавать 3D-игру
Уроки Roblox Studio - Создание 3D-игр - Урок 9: Повтор изученного материала. Создание новой игры
Плейлист видеоуроков постоянно дополняется, подписывайтесь на канал и следите за обновлениями.
Нужен наставник? Записывайся на онлайн-уроки программирования для детей в школе "Пиксель": онлайн-курс Roblox программирование для детей.
![]()
Roblox Studio — многопользовательская онлайн-платформа, которая позволяет пользователям создавать свои собственные игры. На занятиях ученики познакомятся с платформой, изучат основы программирования на языке Lua. Полученные знания и навыки позволят писать различные коды и создавать собственные игры. С помощью среды Roblox Studio ребята изучат основы программирования, познакомятся с такими понятиями, как переменная, функция, цикл и оператор.
- Знакомство со средой Roblox Studio, создание и изменение объектов;
- Знакомство с Terrain и Terrain Editor, а также Spawn. Создание игры Shooter;
- Знакомство с языком программирования Lua. Решение задач по программированию;
- Создание игры LinnerRunner;
- Создания игры типа Obby;
- Знакомство с системой диалогов;
- GUI и создание первого Menu;
- Создания новой игры типа Capture the flag;
- Распределение по командам;
- Создание игры Zombi Mod;
- Создание собственного проекта в Roblox Studio;
- Доработка и защита собственного проекта.
На занятиях ученики более детально изучат платформу Roblox Studio. Основная часть курса посвящена детализированному созданию 3D-объектов, работе с графикой, светом, анимацией, а также созданию собственных моделей. Данный модуль включает в себя программирование на языке Lua. Полученные знания и навыки позволят писать различные коды и самостоятельно создавать уникальные объекты для игр в увлекательной среде Roblox.
Используя полученные навыки 3D-моделирования, ребята смогут создать любой объект для игры.
- Работа с тенями и светом;
- Создание MeshPart в Roblox Studio;
- Создание переключателя света;
- Solid Modeling - Твердотельное моделирование;
- Работа с текстурами и спецэффектами;
- Работа с плагинами;
- Создание телепорта;
- Создание Trail и TextLable на Part;
- Создание анимации персонажа;
- Создание анимации объектов с помощью Beam эффекта;
- Подготовка к проекту;
- Проект.
На занятиях ученики освоят сильные стороны платформы Roblox Studio, получат знания об алгоритмике и оптимизации собственных проектов, познакомятся с физикой игр, а самое главное, ученики смогут воплотить собственные фантазии при создании игр. Разработанные игры ученики смогут загрузить на сайт Roblox.
Читайте также: