
Zelda святилище maka rah
Обновлено: 07.07.2024
Contents
This story is part of a group of stories called
The Legend of Zelda: Breath of the Wild is an enormous open-world game on the Nintendo Switch and Wii U. This guide and walkthrough will show you everything you need to know from the locations and solutions for every shrine to Captured Memories, the best meal in the game, The Master Trials DLC and more.
How to find Maka Rah shrine: Maka Rah is located in western Hyrule, in the Hebra Tower region. Look for Lake Kilsie, the large lake near the far west edge of the map. There are some docks near its central point, and the shrine is visible through a crack in the wall near those docks. (Browse the gallery for the precise location.)
Maka Rah Shrine is one of the many Shrine of Trials from Breath of the Wild.
This story is part of a group of stories called
The Legend of Zelda: Breath of the Wild is an enormous open-world game on the Nintendo Switch and Wii U. This guide and walkthrough will show you everything you need to know from the locations and solutions for every shrine to Captured Memories, the best meal in the game, The Master Trials DLC and more.
How to find Maag No'rah shrine
The most difficult thing about Maag No'rah shrine is finding the darn thing. Maag No'rah shrine is hidden in a cave located in northwest of Ridgeland Tower (or southeast of Hebra Tower).
The easiest way to find it is to travel to an area labeled Maritta Echange Ruins on your map. When you arrive, look at the cliffs to the southwest, and you’ll see a patch of grey rocks. You need to destroy those rocks (with remote bombs or bomb arrows), and climb the cliff to enter Maag No'rah shrine.
It’s tough to find, so use the gallery above to orient yourself.
Maag No'rah shrine
Inside Maag No'rah shrine, just walk to the treasure chest to collect your silver rupee, and meet Maag No'rah to collect your spirit orb.
Themes and Navigation
In the first room of the Shrine, two Torches, one lit and one unlit are on either side of a portcullis. When both torches are lit, the portcullis will rise, leading to room with a rotating hexagonal column partially covered in spikes above a pool of lava.
After Link carefully crosses the column, he can press a Switch at the back of the room to make the room's back wall rise, revealing a room with four Guardian Scouts I in a shallow pool of water. A Switch on a ledge at the back left corner of the room will lift a portion of that room's back wall revealing another Switch and a portcullis.
Activating the Switch will cause the portcullis to rise and unleash a large Spiked Boulder , sending it rolling through a wall of wooden boxes and towards Link. The corridor behind the wall of boxes will pass another pool of lava and lead to yet another Switch and portcullis. Again, the Switch will make the portcullis rise and send a large Spiked Boulder hurtling down a ramp towards Link. A new Spiked Boulder will drop if the previous Spiked Boulder lands in the pool of lava behind the Switch.
On a ledge at the back right of the room with the pool of water is a Treasure Chest containing ten Bomb Arrows. A metallic Treasure Chest containing a Diamond can be found on a ledge above the wall of wooden boxes behind a row of cracked blocks. Another metallic Treasure Chest containing an Ancient Core can be found in a small nook just before the final Switch above the second pool of lava.
Requirements
| Location |
At the center of Lake Kilsie, to the east of the Shrine itself, there is an tall island that sticks out of the water. Use a bomb to break the boulders on the top of this island, creating a wind geyser. Then use the paraglider to fly up and glide directly northwest. You can see an entrance to a cave at the top of the cliff marked by torches. Follow the cave down below and swim across some shallow water through a small passage on the right-side to arrive at the Shrine.
To reach this shrine, look directly west where the cliff face overlooks Lake Kilsie. Some torches will show the entrance to the cave, near the top of the cliff face. Follow the cave to the end to reach the shrine.
Steady Thy Heart
Run ahead and light the torch on the left. This can be done without even wasting an Arrow. Pull out your bow and dip the arrow in the lit torch to light it on fire and use that to light the other torch.
In the next area, patiently wait for the path to present itself and then quick run across the platform, avoiding the spikes.
Defeat the four Guardian Scout I that appear and then use Cryonis on the shallow water. The treasure chest on the right side contains ten Bomb Arrows, and the switch on the left side will open the large door.
Step on the switch ahead and a large spiked ball will come rolling down, crashing through the wooden boxes ahead.
Run up ahead up the ramp and when you are halfway up, turn around to find some more large blocks. Toss a bomb and explode it to get rid of the blocks and then use Magnesis to grab the treasure. Pull it over towards you and open it to get a Diamond.
Up ahead there is a second treasure chest across the lava. Pull it closer and open it to get an Ancient Core.
Step on the switch here and a metal spiked ball will begin to roll down the ramp. Link can get out of the way and allow the spike to fall down, but it will then reappear. Use Magnesis to grab it when it's close and hold it above your head. Run forward to get to the top of the ramp. Then run over to the altar and speak with Maka Rah to get a Spirit Orb.
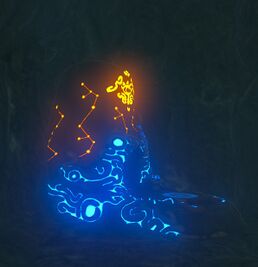
Entrance to the Shrine
Читайте также: