
Тайна немо вулкания прохождение
Обновлено: 01.07.2024
Не плохая игра, интересный сюжет, но все локации иногда трудно проходить в режиме поиска порой из-за слишком мелкого изображения деталей или предметов. Их порой трудно найти не только из-за мелкости, но иногда из-за не четкости и размытости. К тому же становится скучновато.
Игра, вполне, неплоха: сюжет оригинальный, красивые локации, необычные технологические штучки. Но почему-то не цепляет, может, из-за поиска: он мелкий и частый, я с ним замучилась :-((
Хотя поиграть все-таки советую, хоть не призраки, да, вампиры, и то хорошо :-))
Игра не затянула. Нет, вполне на уровне. Но таких каждый день пачками производят. Демки хватило.
никак не могу определить в своем отношении к этой игре.вроде и неплохо,но вот не цепляет и все.либо с ней,либо со мной что-то не так.
Игра хорошая. Прочитав комменты, поиграл её ещё раз, минут 20 и, думаю продолжу. Тем, кто не видит - купите очки, тем, кто время зря теряет - идите работать. Остальным рекомендую.
Меня одолевают сомнения: я проиграла время демоверсии, но так и не ответила на вопрос: играть или нет. Игра очень красивая, в квестовой части - замечательная, но поиска много и он очень неприятный! Вообще не понятно что где лежит, сплошная ломка глаз. Ну почему так?!
Хорошую реализацию убили тупым поиском хлама. А ведь так хорошо прорисовано и сюжет отличный и головоломки тоже на высоте, но этот вездесущий поиск, ох как же он одолел, почему его не могут убрать или заменить на поиск как в Легендах. Просто уже столько лет этот поиск. одно и тоже пялься монитор, в одну картинку и ломай глаза и самое главное что всё это бес толку, без пользы и утомительно.
Перевод текста Virtualija

Спасите Капитана Немо от злодея Дарделла!
Отправляйтесь на секретный остров вулканов и предотвратите опасные эксперименты. Защитите волшебное Колесо Времени, пока Дарделл не опередил вас, чтобы использовать его в своих злодеяниях. Используйте всё свое мастерство, чтобы найти Капитана Немо и спасти остров от вечной тьмы!

Поднимите ПРОВОД (A) и ЦИЛИНДР (B).
Нажмите на сломанную ручку (С).
Соедините ручку ПРОВОДОМ с электричеством.
Спуститесь в люк.
Поднимите ЛОМ (D) и КРЮК (E).

Пройдите в комнату бассейна.
Нажмите на ФОТОГРАФИЮ (F).
Поднимите ВЫКЛЮЧАТЕЛЬ (G) и ФОТОГРАФИЮ.
Поднимите МАСЛЕНКУ (H) и ДВЕРЬ (I).
Поместите ДВЕРЬ в батисферу (K).


Пройдите в открытую дверь.
Нажмите на ящик (N) и откройте его ЛОМОМ.
Поднимите ПЛАВНИК (O).
Нажмите на дерево (P).
Используйте КРЮК, чтобы достать КАБЕЛЬ (Q).

Пройдите вперёд.
Нажмите на дверь (S).
Поднимите ПРОПЕЛЛЕР ВИНТА ( R).

Нажмите на искрящуюся область для поиска предметов.
Переместите плакат (желтый), чтобы увидеть карту.
Удалите вентиль (T) гаечным ключом (U).

Поместите вентиль на дверь и войдите в комнату лифта.
Нажмите на человека (V).
Нажмите на КАРТУ (W).
Поднимите вольтметр (X) и КАРТУ.
Поднимите ЛЕСТНИЦУ (Y) и РЫЧАГ (Z).
Нажмите на заводную рукоятку лифта (A), замените КАБЕЛЬ.
Нажмите на панель (B).

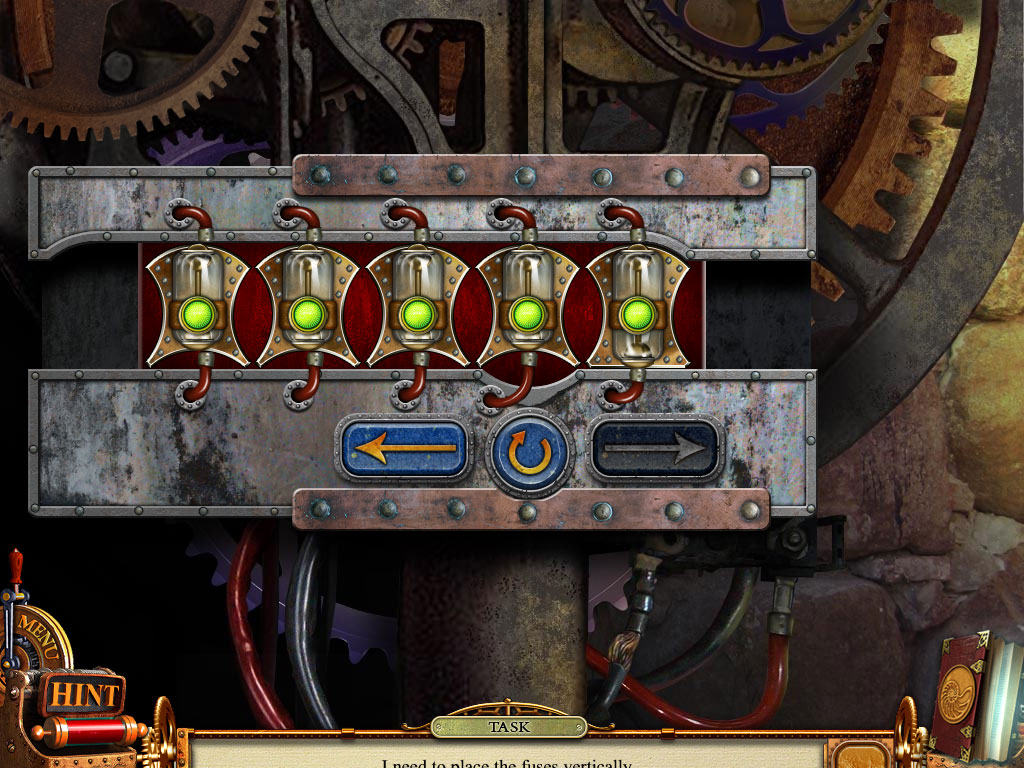
Поместите вольтметр, как показано на скриншоте.
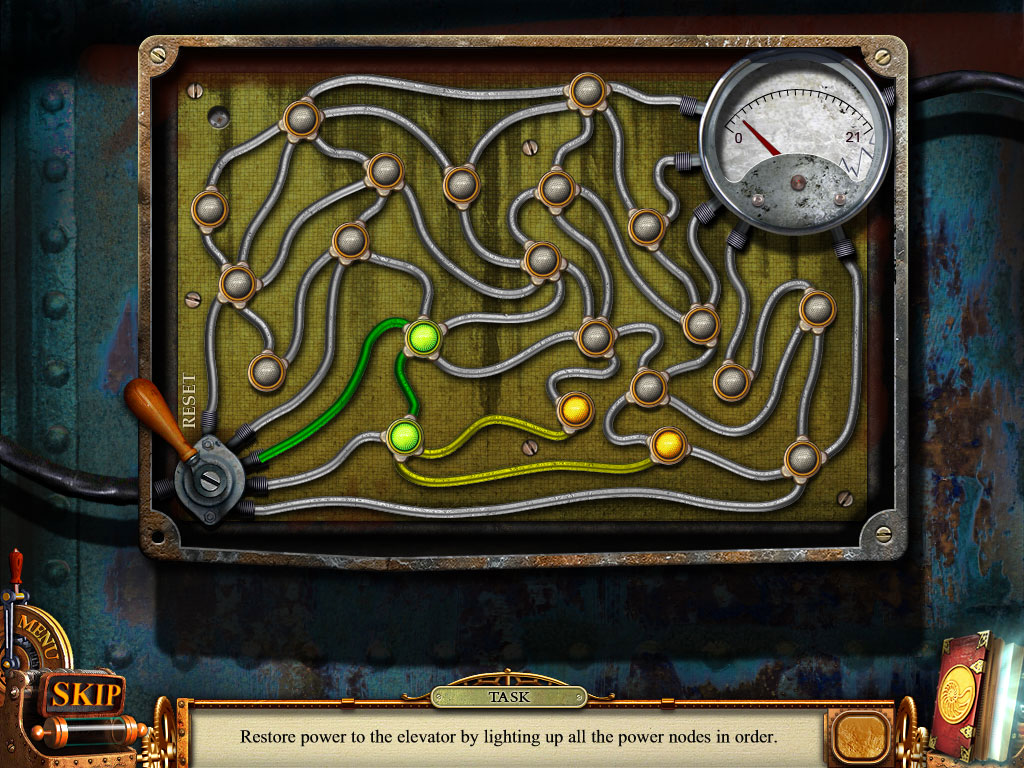
Нажмите на кнопки, как отмечено на скриншоте, чтобы включить огни (1-21).


Нажмите на манипулятор (F).
Поднимите КНОПКУ (G) и ЭЛЕКТРОННУЮ ТРУБУ (H).
Нажмите на телескоп (I) и поместите КНОПКУ, как показано на скриншоте.
Нажимайте на обе кнопки (синий), пока изображение не находится в центре и зеленый свет не зажгётся.
Потяните рычаг (J).
Повторите вышеупомянутые шаги еще два раза.

Нажмите на летающего робота.
Вернитесь в лифт и спуститесь на первый этаж, выйдите из лифта.
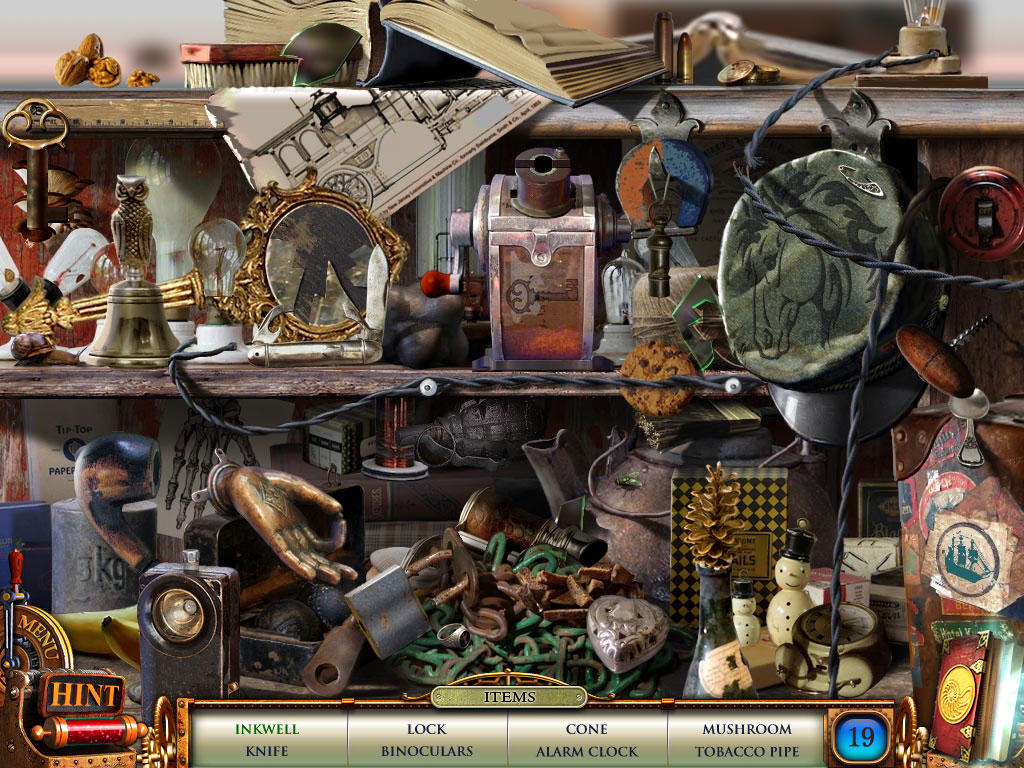
Нажмите на искрящуюся область для поиска предметов.
Откройте ящики (оранжевый), чтобы взять нож и часы.
Поместите шнур (K) на лампу (L).
Поднимите ЧАСТЬ 1 (M).

Нажмите на панель (N) и поместите КНОПКУ.
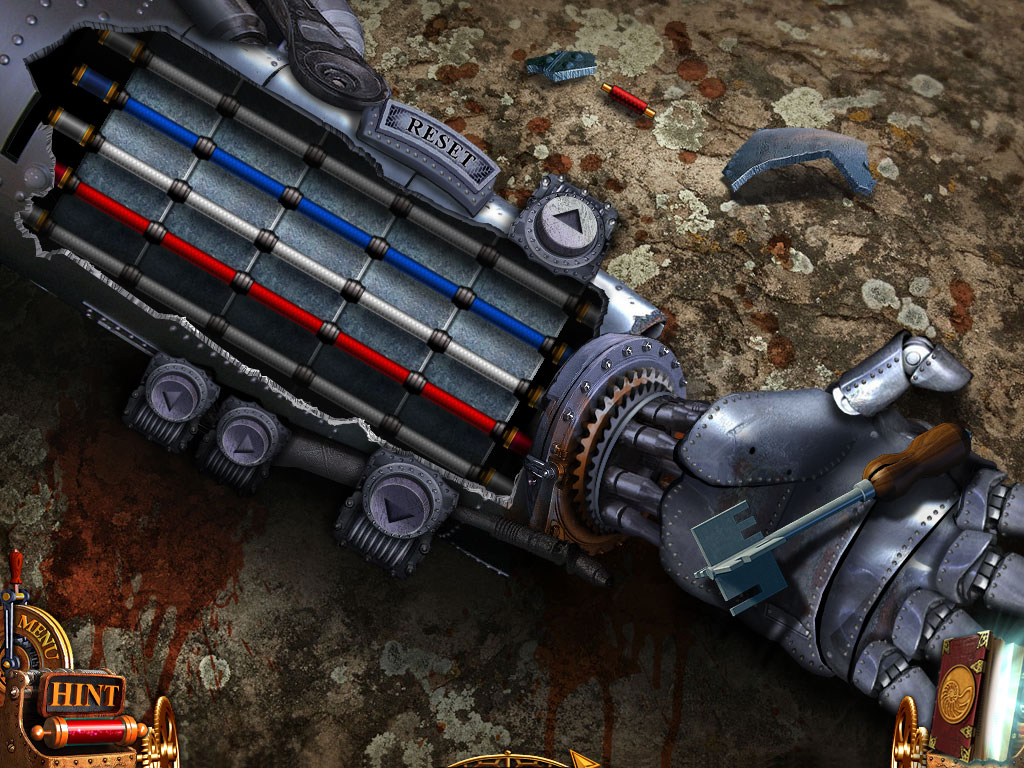
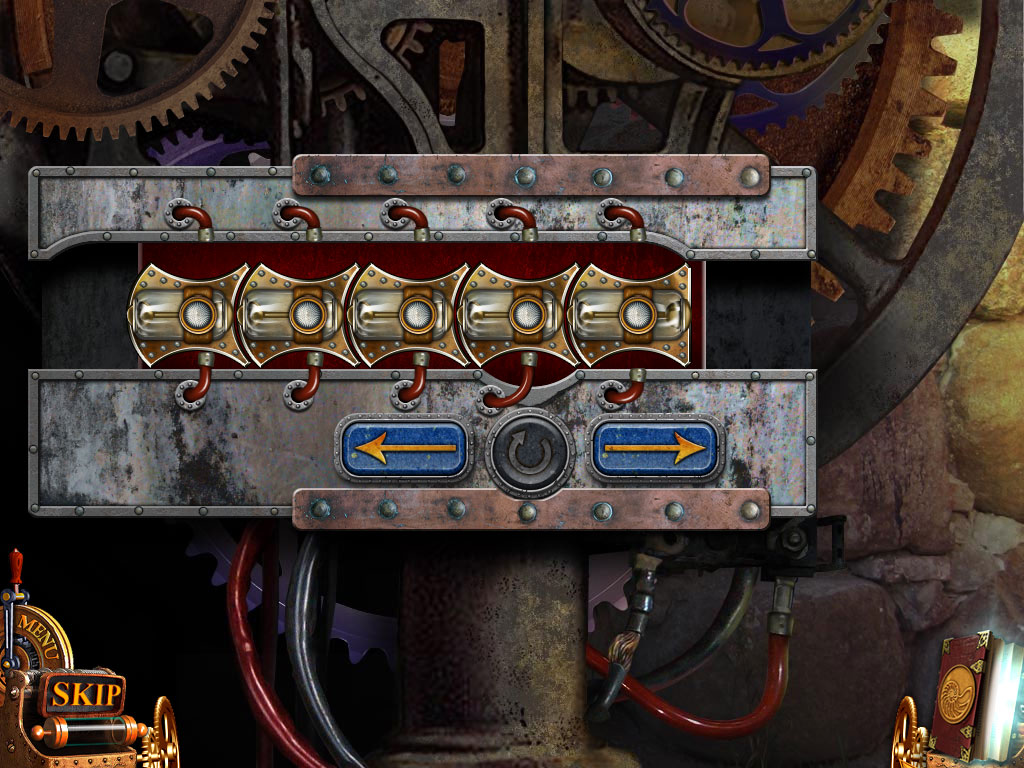
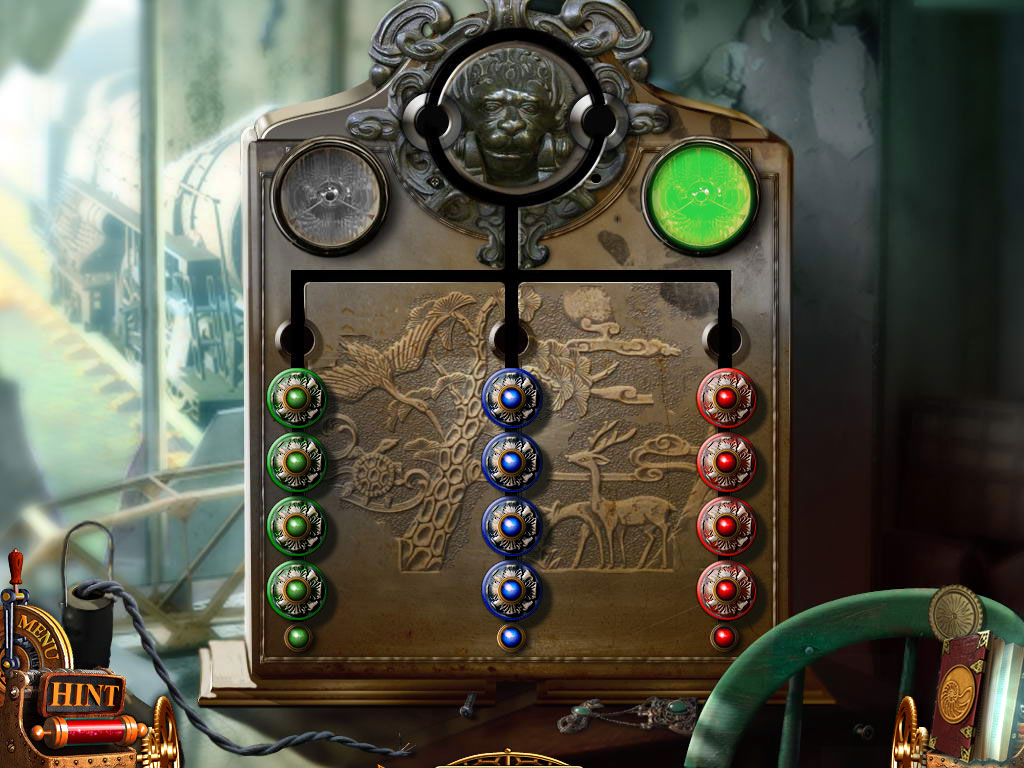
Одно возможное решение этой загадки следующие:
Опустите (зеленый) к положению (2), (красный) к положению (1) и передвиньте кнопкУ (5) к положению (4).
Переместите положение (6) в положение (5), (3) к (6) и (2) к (3).
Переместите положение (5) в (2), (6) к (5) и (3) к (6).
Переместите положение (2) в (3), (1) к (2), (4) к (1) и (5) к (4).
Передвиньте (2) к (5), (1) к (2) и (4) к (1).
Передвиньте (5) к (4), (6) к (5), (3) к (6), (2) к (3) и (1) к (2).
Наконец, переместите (красный) кнопку от (4) к (1) и (зеленый) кнопку от (5) к (4).
Поднимите КОДОВЫЙ (оранжевый) КЛЮЧ.

Вернитесь в комнату бассейна, спуститесь люк и нажмите на искрящуюся область для поиска предметов.
Переместите тряпку ( R), чтобы увидеть IX.
Поместите лопасти вентилятора (S) в вентилятор (T).
Поднимите (синий) ФОНАРЬ.

Пройдите назад из четыре сцены и нажмите на замок ворот (U).
Вставьте КОДОВЫЙ КЛЮЧ, как показано на скриншоте.
Поверните диски в соответствии с рисунком (V), используя стрелки в следующем порядке: 5, 1, 4, 2 и 3.
Пройдите в ворота.

Поднимите пилу (W) и записку (X).
Нажмите на панель выключателей (Y).
Поместите (оранжевый) ВЫКЛЮЧАТЕЛЬ.
Нажмите на выключатели в следующем порядке: 8, 5, 2, 9, 6, 3, 1, 7 и 4.
Как только летающий робот упал, поднимите ГЛАЗ (Z) и ПРОПЕЛЛЕР (A).
Нажмите на летающего робота (B).
Замените ЭЛЕКТРОННУЮ ТРУБУ, ГЛАЗ и ПРОПЕЛЛЕР.
Поднимите ВЕТРОВОЕ СТЕКЛО (С).

Пройдите одну сцену и нажмите на летающего робота.
Войдите в лифт и вернитесь на третий этаж.
Нажмите на руку робота (D), удалите КОГОТЬ (E) пилой, возьмите.

Вернитесь на первый этаж и пройдите четыре сцены.
Спуститесь в люк к комнате бассейна и нажмите на искрящуюся область для поиска предметов.
Откройте дверь, чтобы найти протез ног, пятно и щипцы.
Разбейте стекло (F) молотком (G), чтобы увидеть РЫЦАРЯ, возьмите.

Пройдите три сцены и пройдите в ворота.
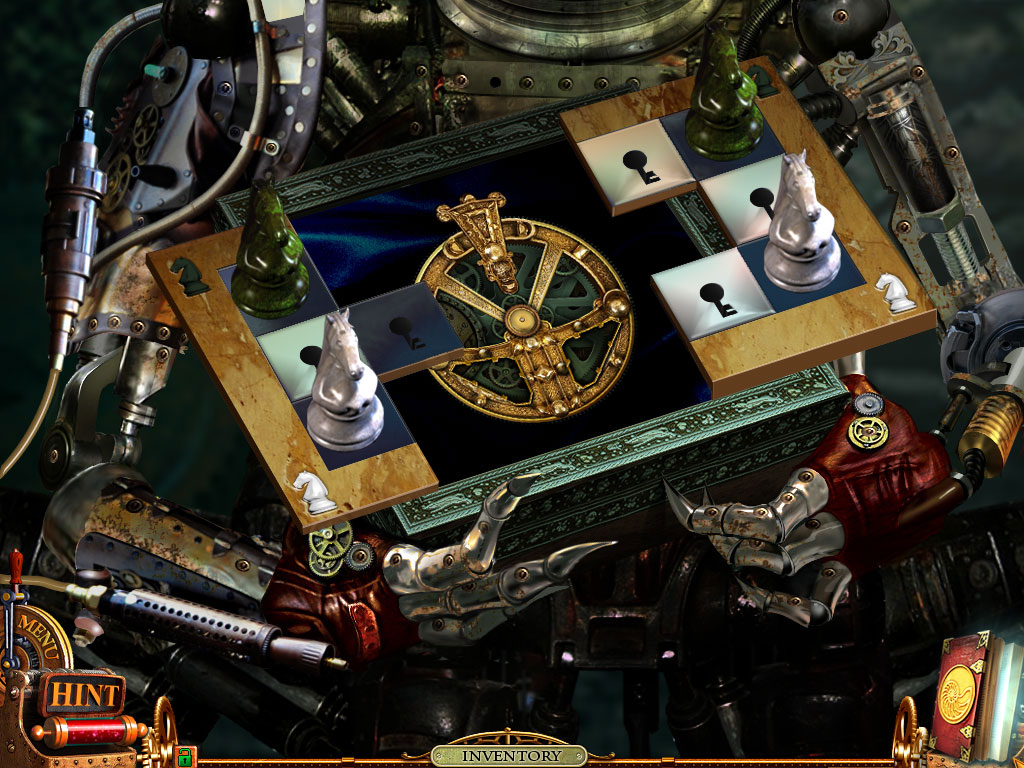
Нажмите на шахматную доску (H) и поместите РЫЦАРЯ.
Одно возможное решение этой загадки следующее:
Передвиньте (J) фигуры к положению (4) и (L) к положению (2).
Передвиньте (J) от (4) до (9), (K) от (7) до (6), (I) от (1) до (8), (K) от (6) до (1), (L) от (2) до (7), (J) от (9) до (2), (I) от (8) до (3), (I) от (3) до (4), (I) от (4) до (9), (L) от (7) до (6), (J) от (2) до (7), (K) от (1) до (8), (L) от (6) до (1) и (K) от (8) до (3).

Поднимите КОЛЕСО ВРЕМЕНИ (M).
Нажмите на летающего робота.
Вернитесь в комнату бассейна.
Поместите ФОНАРЬ, КОГОТЬ, ЛЕСТНИЦУ, ПРОПЕЛЛЕР, ВЕТРОВОЕ СТЕКЛО и ПЛАВНИК на батисферу, как показано на скриншоте.
Войдите в батисферу.

Нажмите на летающего робота.
Нажмите на искрящуюся область для поиска предметов.
Нажмите на краба (N), чтобы увидеть леденец.
Подожгите окуриватель (O) спичками (P) и возьмите изоленту (Q).

Поднимите ЦИЛИНДР ( R), ПРУТ (S), СОЕДИНИТЕЛЬ (T) и ПУСТУЮ МАСЛЕНКУ (U).
Нажмите на камень (V).
Нажмите на замок ворот (W).
Нажмите на кнопки в следующем порядке: 1, 2 и 3.

Пройдите в ворота, чтобы войти в прихожую.
Поднимите ОТКРЫТКУ (X), ЛЕСТНИЦУ ($) и КУВАЛДУ (Y).
Нажмите на телефон (Z) и поместите ЦИЛИНДР, как показано на скриншоте.
Нажмите на дверь (A) и подберите доску (B).
Выйдите из дома и разбейте камень КУВАЛДОЙ.
Поднимите ОТВЕРТКУ (С).

Contents Nemo Secret Vulcania Walkthrough
Chapter 1: Emerald

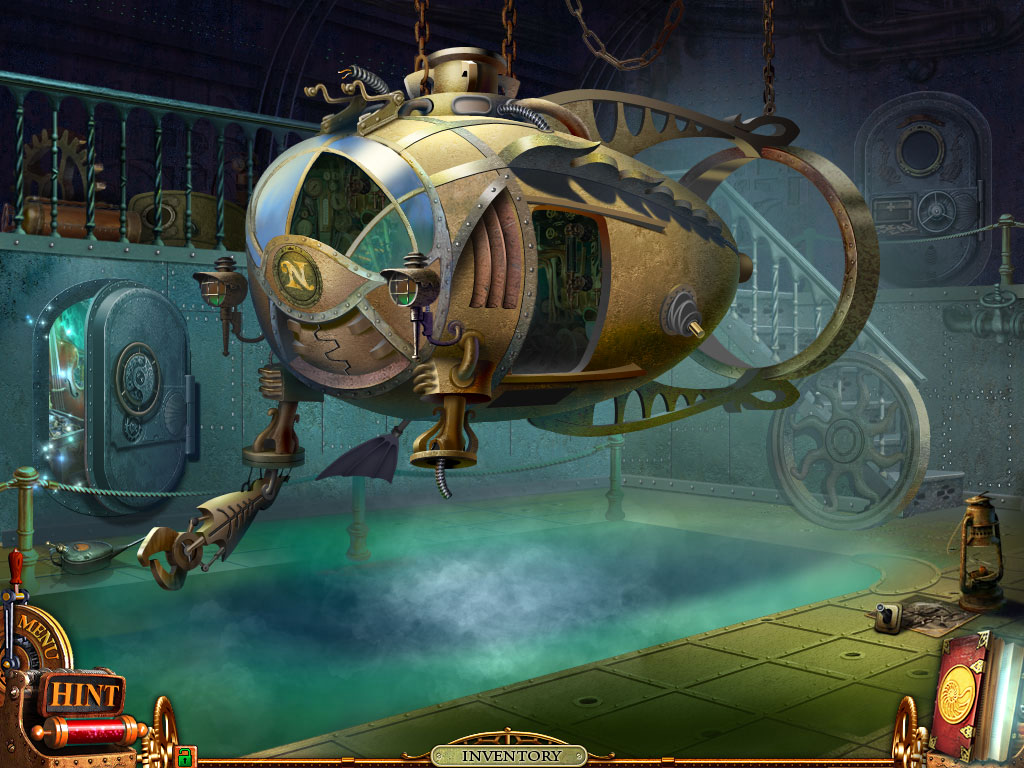
Submarine in the Adventure room
Move across the bridge and open the door. Before entering, make sure you grab the propeller lying on the ground in the left corner.

Attach the valve to the door to reveal the elevator room. Interact with the man in the top hat standing behind his creepy spider robots. In the center of the room is a map, zoom onto it and collect the Voltmeter along with the map. Leaning up against the barrel to the right of the room is an old ladder. Across the room on the chair is a lever. Collect both of these items. At the far back left of the room is cable spool, zoom in so you can replace it with the cable in your inventory.
Right next to the man in the elevator is a panel. Zoom in to wire up the elevator.

Start backing up and stop at the fourth scene. On the far left of this room will be a barred door, zoom in on the gate lock and insert your code key. Use the arrows to match the picture on the lock and go through the gate. Against the shelf unit on the right of the room is a saw and just in front of the saw is a note – collect both. Right next to the ominous skeleton is a switch panel, zoom in for a switch board. Insert the switch from your inventory and pull the switches like so: 8, 5, 2, 9, 6, 3, 1, 7, 4.


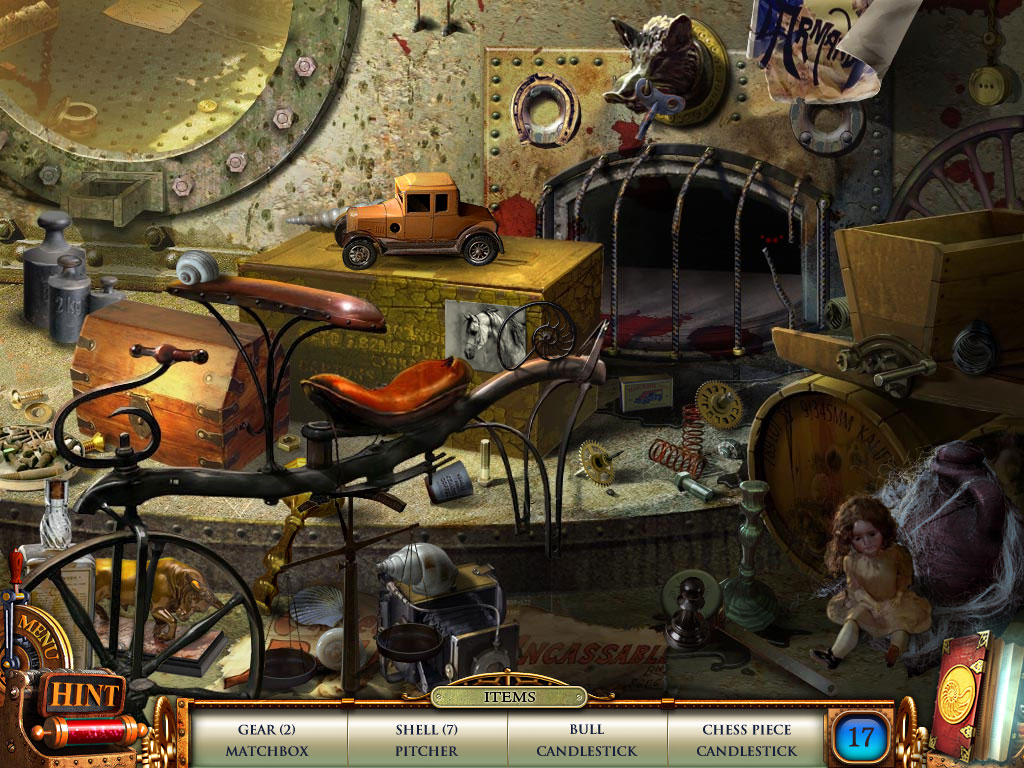
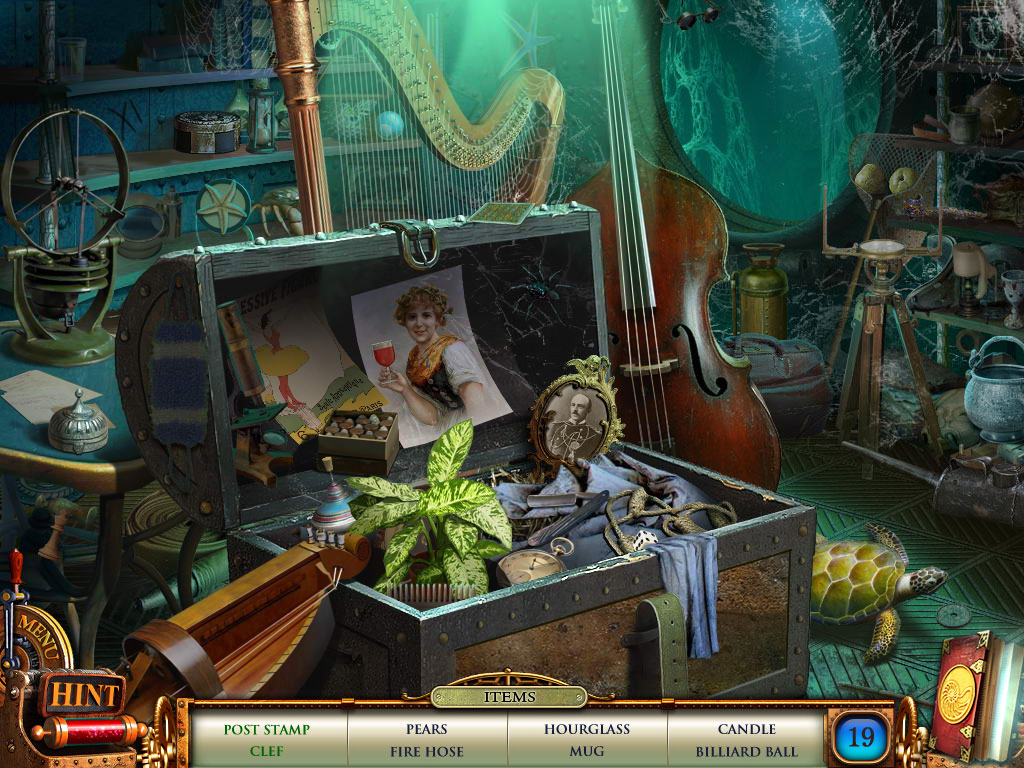
Hidden Object Scene Fireplace in Nemo Secret Vulcania
Chapter 2: Amethyst
Pick up the nippers lying on the middle of the floor. Zoom in on the drawer to open it with pick lock so you can grab the cable and handwheel. Head back down the stairs so you can cut the chain with the nippers to open the cabinet. Put the handwheel on the tank inside and set your empty oil can under the valve. Turn the valve and pick up your new oil can. Head back to the hallway and zoom in on the door. You can use your oil can on the handle to enter the door.
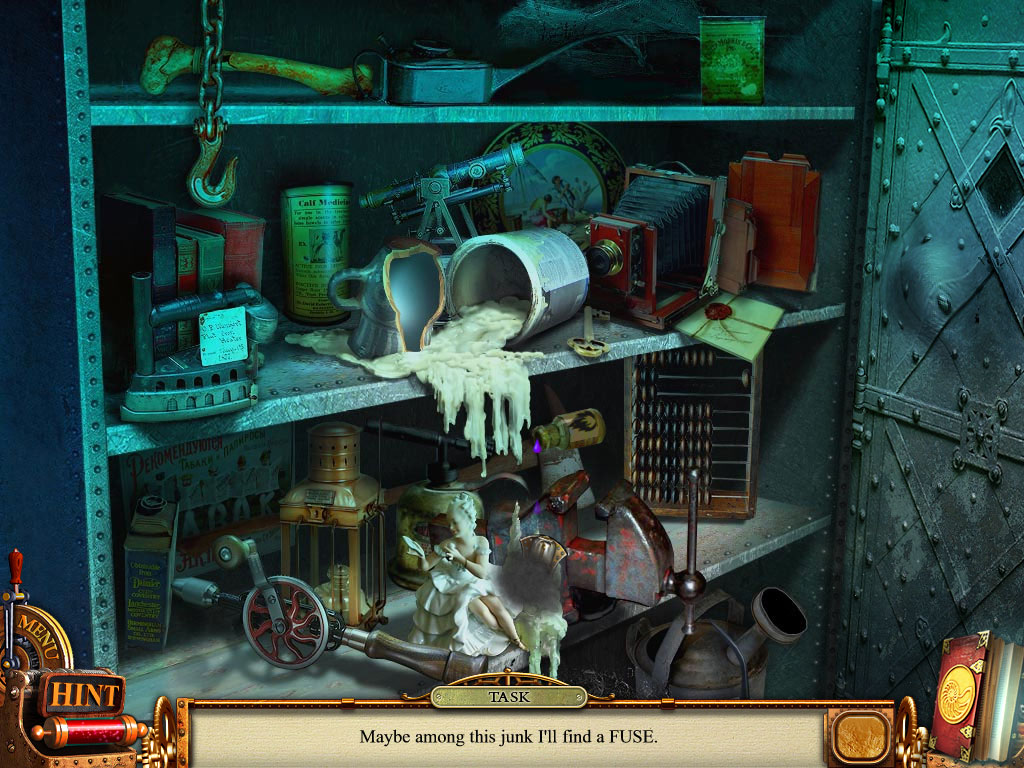
Zoom in the sparkles to enter another HOS. Move the sheet and towel in the center of the room to reveal a sock for a total of 17 items you need to collect. Afterward, move the sheet and towel to the left. Grab the broom behind the ironing board to sweep away the cobwebs, which will reveal a tile for you to grab.
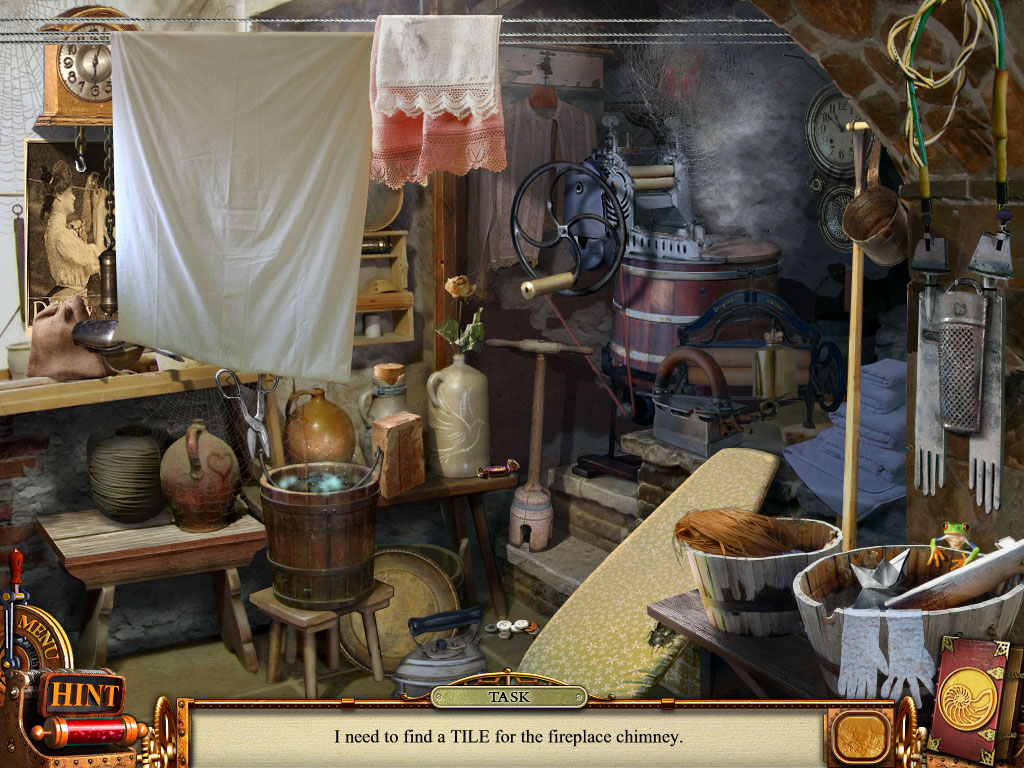
Hidden Object Scene First laundry minigame
Zoom into the tiles above the fireplace for a tile sliding puzzle after you set your tile piece into it.
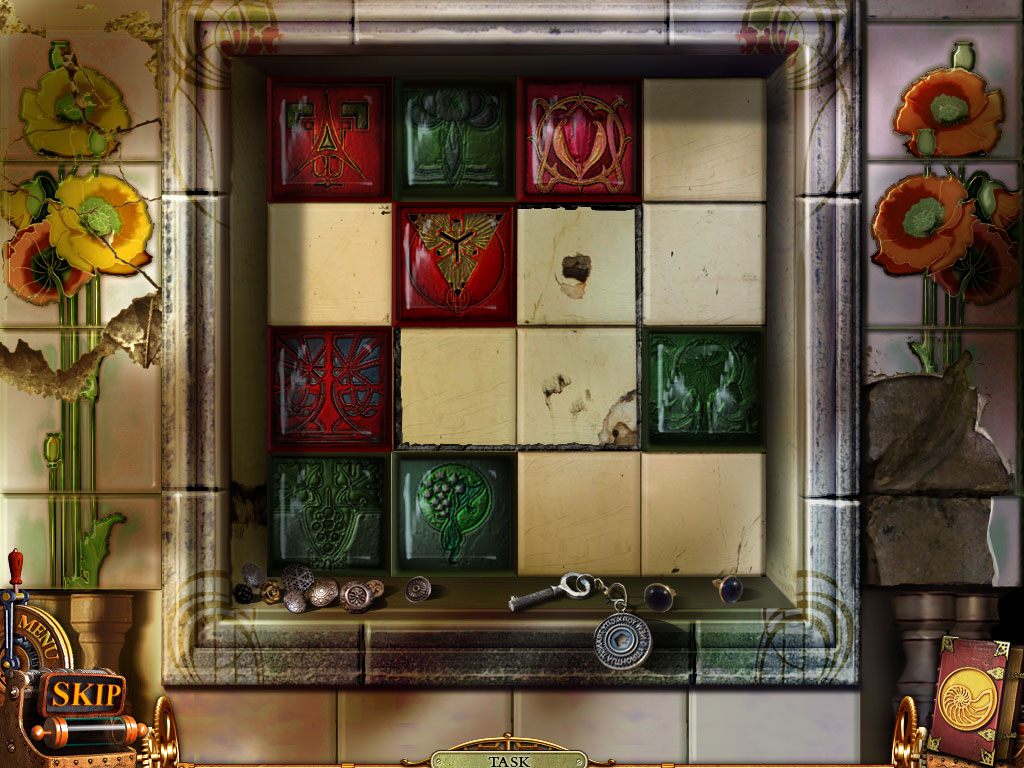
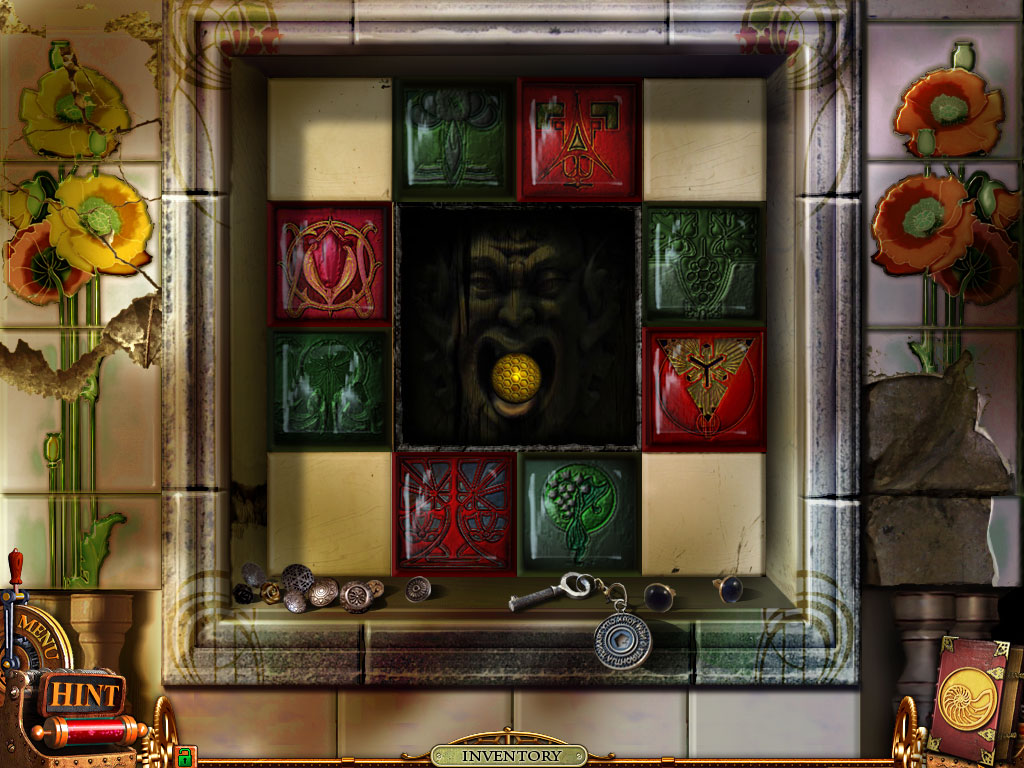
Tiles minigame finished
By the chair is a lantern base, zoom into it to place your lantern on it and grab the carbide lamp.
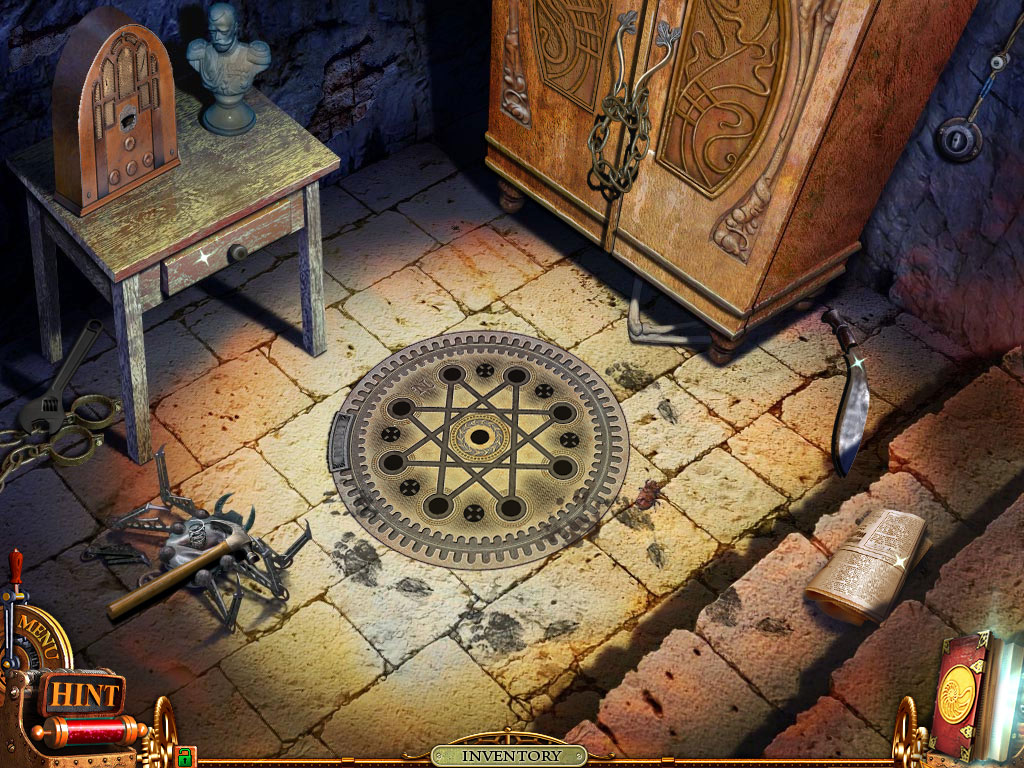
Cellar adventure start in chapter 2 Nemo Secret Vulcania

Hatch Finished so it opens
When everything is powered up, head down the hall and zoom in on the rails. Grab the lever and use your wrench to remove the bolts so you cans steal to the rail piece. At the top of the room you need to place your wire. Place your rail piece in front of the train and fix up the vehicle with the wagon wheel and the rod. Zoom in on the front of the train and place the lever and battery on it. Spin the lever and ride the track.
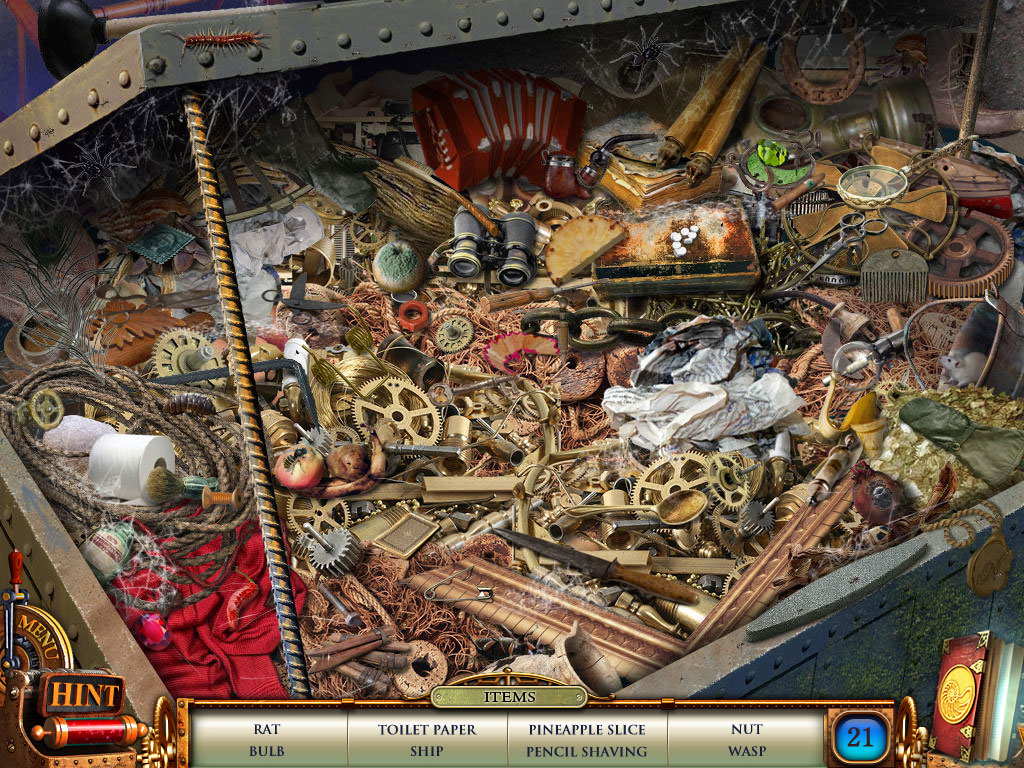
Go back down the ladder where you came from and zoom in for another HOS. Open up the crate front and center to reveal a bottle. This HOS has 20 objects for you to snatch. On the left side of the room is a martini glass, grab the dropper and squeeze it into the jar in the center of the room for an amethyst. Woo hoo, chapter 2 is done!
Chapter 3: Diamond
Use your horn on the bats in the upper left corner of the room. As soon as the flying robot appears, attach the horn to him. At the top center of the room is a black sheet, grab it. At the mouth of the cave is an arm, zoom in on it. Place the robot hand and align the red and blues.
Press the left button three times. Up button once. Right button three times. Up button once. Left once. Up once. Left, up, left and up to finish the puzzle. Grab the key and head back up the ladder.
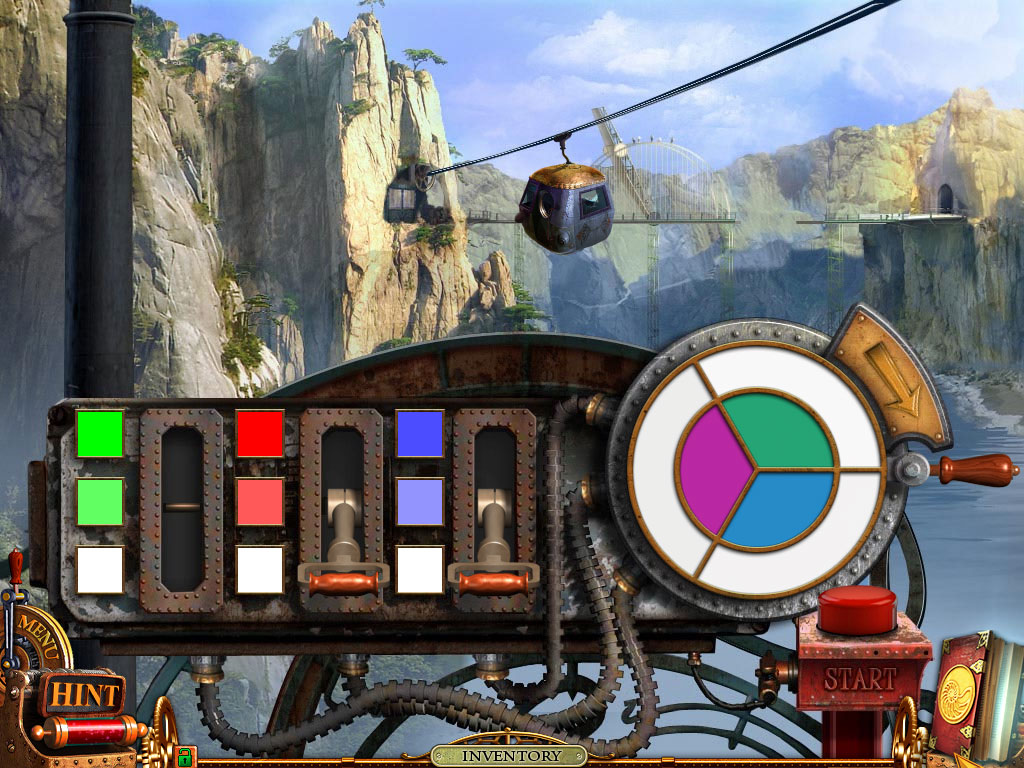
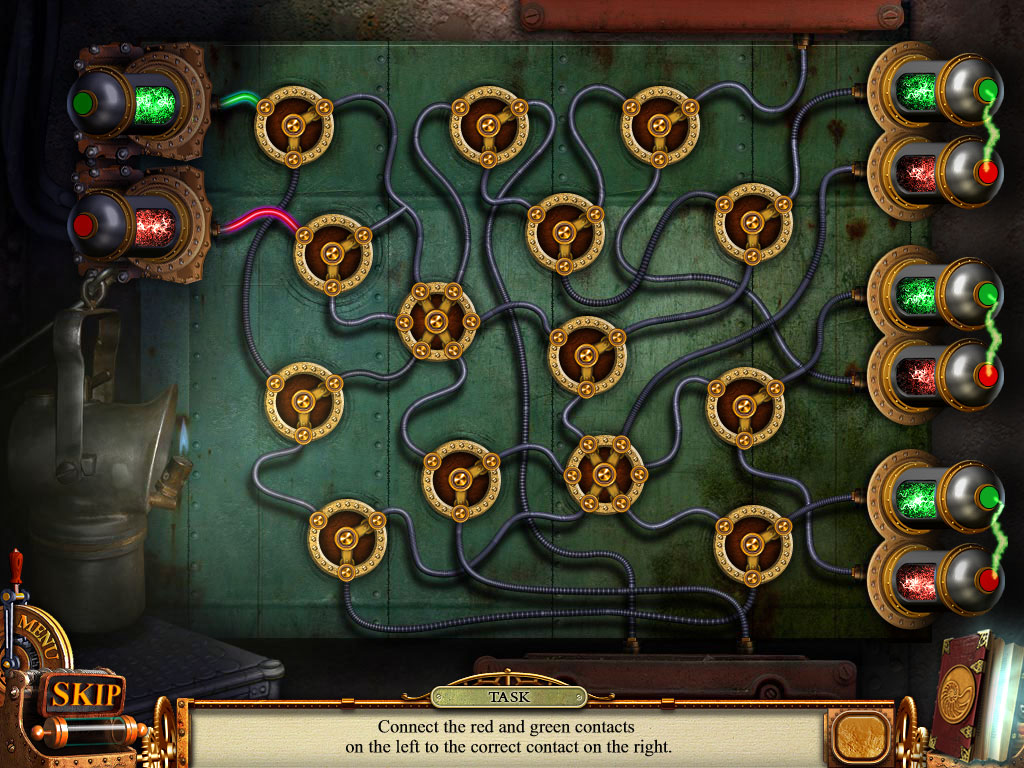
The first sequence will be:
- Green lever to bottom
- Red lever to middle
- Blue lever to middle
- Pull the handle
- Green lever middle
- Red lever bottom
- Blue lever top
- Pull the handle
- Green lever top
- Red lever bottom
- Blue lever middle
- Push the start button

Place the gangway to reach the sky train. Grab the brush on the left and clean up the controls. Pull the lever with arrow indicator. When you arrive click on the flying robot. Push the button on the wall to enter the elevator and pull the lever to go down to level one. Click on the ominous looking guy!
Chapter 4: Ruby
Put the respirator in front of you so you can enter the back room. Pull the lever on the wall in front of you to get some air going and pick up the rope sitting at the feet of the robot to the left.
Return to the pool area and attach the rope to the magnet by the stairs and pull it down. Drop the magnet over the pool and pick up the flanec.
Get in the elevator and head up to level three once again. Zoom in on the telescope and place the code into the slot. Adjust the dials to bring each image into focus, grab the code again and head down the elevator and back to the pool room. Zoom in on the door on the far right at the top of the stairs and place Part 1 and Part 2 on the puzzle. Arrange the pieces so the puzzle fits perfectly.
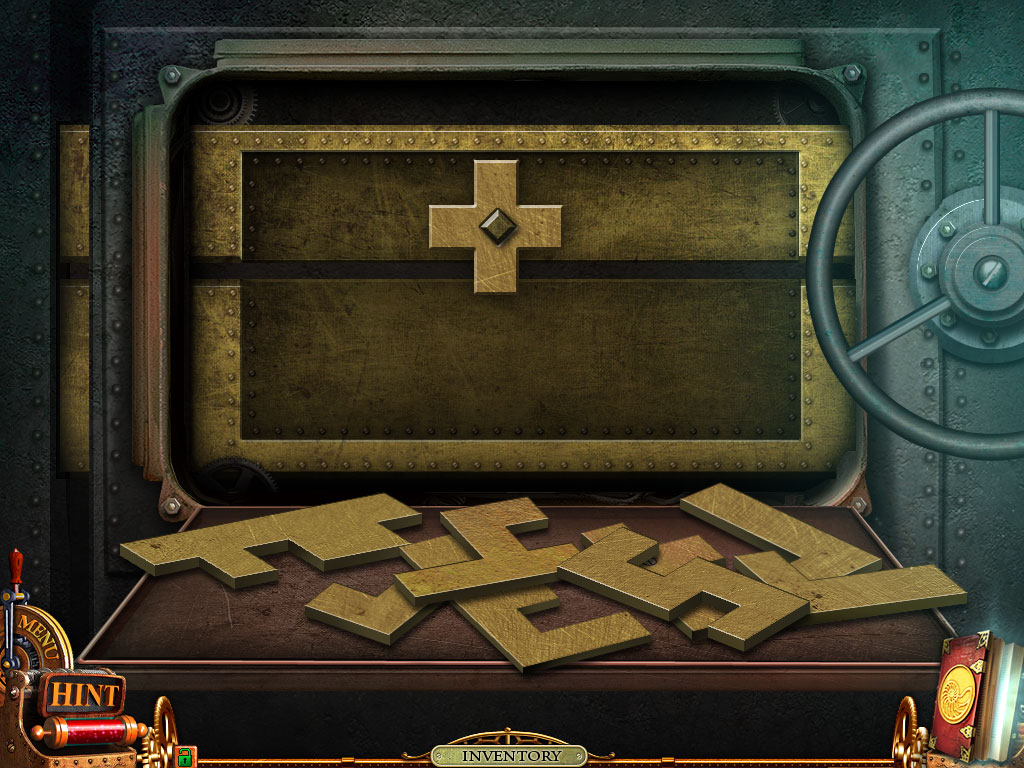
Empty puzzle from Nemo Secret Vulcania
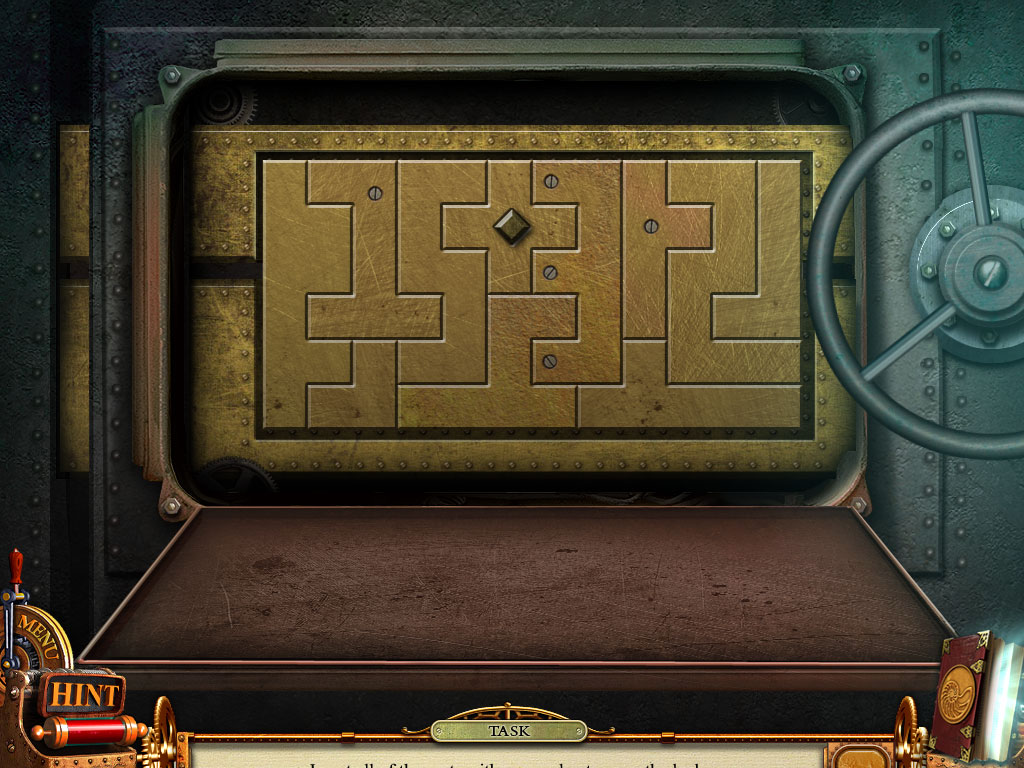
Finished puzzle from Nemo Secret Vulcania
The first sequence:Left,rotate and right.Rotate, left, rotate and right two times. Rotate, left two times, rotate three times, right, rotate three times, left, rotate and right three times.
The second sequence: Rotate, left three times, rotate three times, right, rotate and left. Rotate, right two times, rotate three times, left two times, rotate three times, right and then left.
The third sequence: Rotate twice, left, rotate and right four times. Rotate, left four times, rotate three times, right, rotate, left and rotate. Right two times, rotate, left two times, rotate three times and right.
Chapter 5: Amber
Head back to the elevator and get to level two so you can return to the trains. Zoom in between the two cars once more and place the coupler. Zoom into the back of the train again and put the bucket of coal in the oven and get the train going by lighting the coal with your lighter. Spin the handle bar and move forward toward the newly unblocked path.
Return to level one, leave the elevator and head back one more scene. Zoom in on the telephone and place the cylinder inside it. Head back to the time device room. On the glass case, to the right of the room, use your circle cutter so you can grab the starter crank.
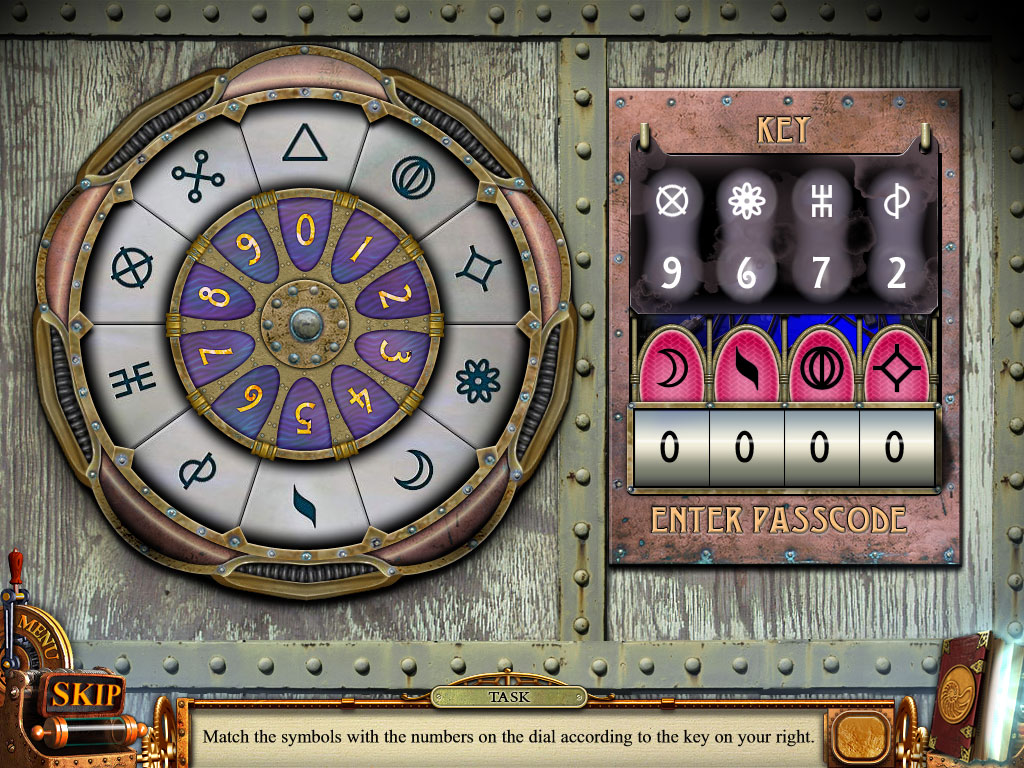
Match the symbols and numbers and finally enter the pass code
Head upstairs and click on our top hat fiend. Use the mirror to reflect his beam and zoom in on the bracelet once it settles. Zoom in on the flying robot and grab the paper knife. Zoom in on the bracelet once more and pry out the amber with your knife. Now zoom in on your journal.
Go to tasks, place the amber, amethyst, diamond, emerald and ruby into the time wheel and click on Captain Nemo.

I hope you enjoyed our Nemo Secret Vulcania walkthrough! Check out walkthroughs to our other games after you beat this one! We can help you with all the tricks and cheats you need to keep gaming fun and casual! Try out this neat walkthrough of I know a Tale
Читайте также: