
Остров ясиори геншин как попасть
Обновлено: 02.07.2024
В Genshin Impact с обновлением в игру добавили много интересного. В том числе и три новые области в стране Инадзума.
Рассказываем в нашем гайде о том, что нужно сделать для разблокировки Инадзуму и как попасть в Инадзуму.

Как разблокировать Инадзуму в Геншин Импакт
Чтобы разблокировать Инадзуму выполните следующие действия:
- Достигните ранга приключения 30 или выше
- Чтобы разблокировать Инадзуму пройдите Главу II: Акт I квеста Архонта «Неподвижный Бог и Вечная Евфимия»
- По ходу задания игроки в Геншин Импакт откроют в три области Инадзумы: остров Наруками, остров Ясиори и Канназука
Остров Наруками
На острове Наруками можно найти важные достопримечательности Инадзумы:
- Дом Аяки в поместье Камисато
- Священная Сакура
- Собственно, сам город Инадзума, находится на острове Наруками
Из-за того, что город Инадзума находится на острове Наруками, можно смело сказать, что это самая важная область территории на которой проходит квест Путешественника.
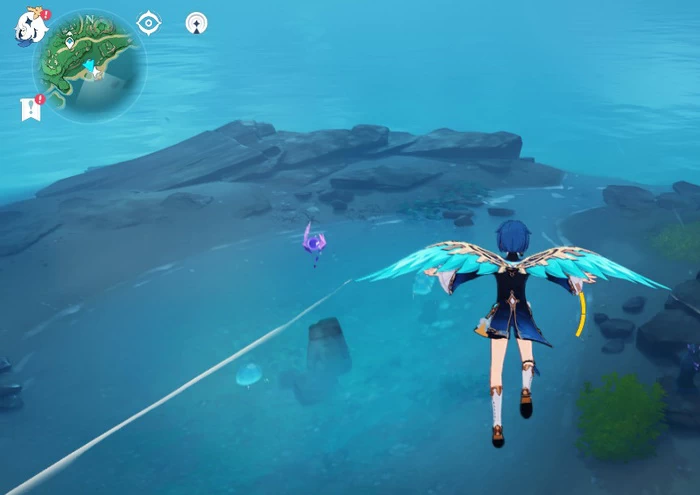
Остров Ясиори
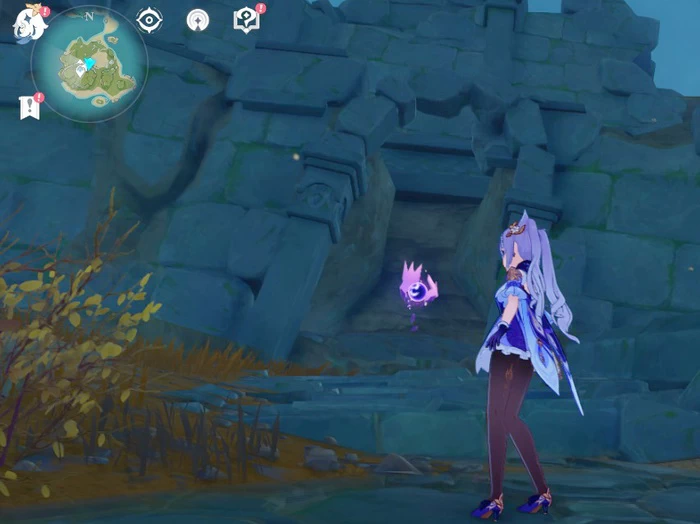
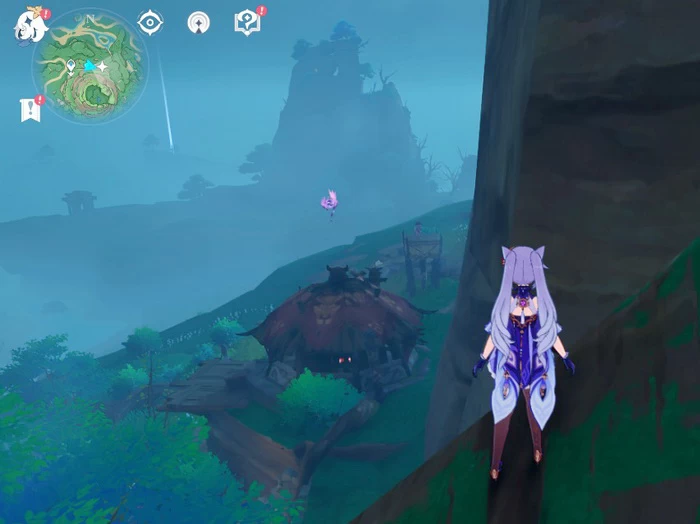
Остров Ясиори в предыдущих версиях Геншин Импакт показывался как темный регион. По большей части это связано с историей острова, в которой участвовал Электроархонт, которого вы можете знать под именем Райден Сегун.
Согласно легенде, Рейденский сегун когда-то сражался на Ясиори с большим змеем. Она выиграла битву, но, используя такую мощную атаку, она почти разделила его на две части. Текущее состояние острова — символ силы Райденского сегуна, кроме того на острове до сих пор лежит скелет змеи.

Канназука
У Канназуки во владении крупнейший плавильный завод страны – Mikage Furnace. Из-за войны работа завода приостановлена, но несмотря на это завод – важнейшая веха в истории Канназуки.
На острове прячется босс Ипостаси Пуро, предлагая свои за которого можно получить уникальные награды, как и в случае с другими боссами Геншин Импакта. Игрокам, нуждающимся в материалах для восхождения, нужно как можно скорее исследовать остров Канназука и победить Ипостаси Пуро.
Исследования в Инадзуме
Изучение Инадзумы сильно отличается от изучения Мондштадта или Лиюэ. Но что самое важное, так это то, чточасти Инадзумы подвержены воздействию окружающей среды (Балетундерс). Электроэнергия в этих условиях очень сильная, из-за чего здоровье персонажей постоянно уменьшается.
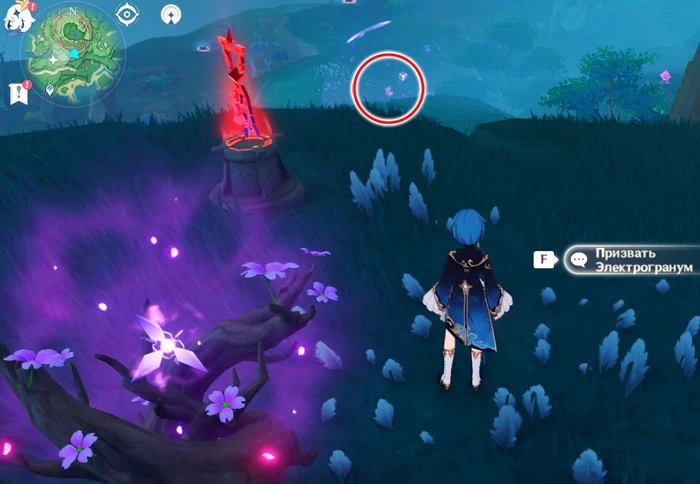
Для борьбы с эффектом Балетундерс игроки могут юзать Электрограну, найденную в Ветвях Громовой Сакуры. Электрограну также можно проагрейдить, увеличив уровень новой Священной Сакуры. Кроме того, игроки могут собирать Electro Sigils, чтобы повысить уровень этого дерева, что улучшает Electrograna на ряде уровней.
С Electrograna вы также сможете проходить новые препятствия Громового барьера или путешествовать по воздуху через Громовые сферы. Electrograna — важная часть исследованиий в Инадзуме, поэтому старайтесь прокачивать уровень Священной Сакуры по мере возможностей. Это окупится.

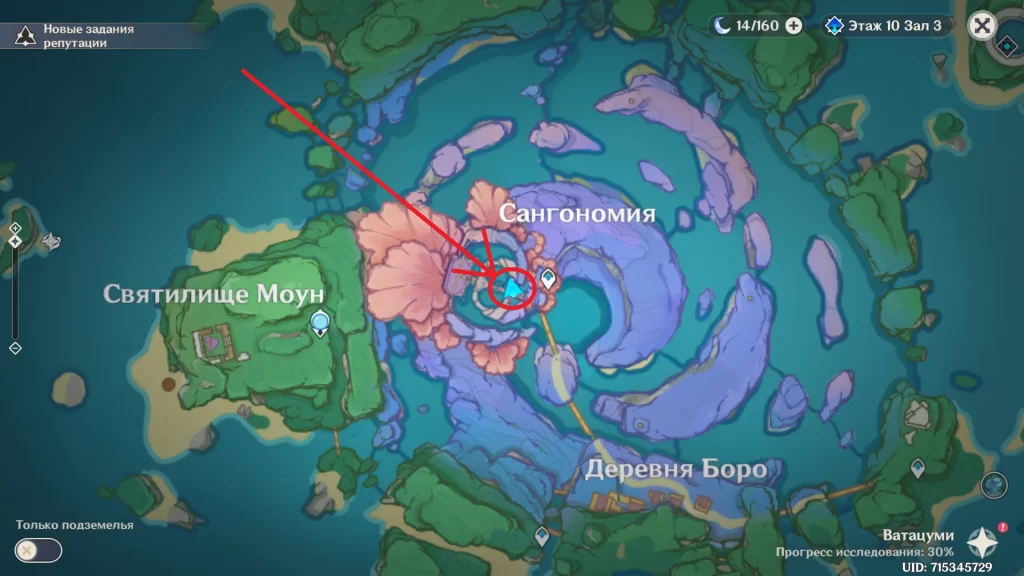
«Чистый дом» – новое мировое задание, которое появилось в игре после установки обновления Genshin Impact 2.2. Задание появится после выполнения финальной главы заданий архонтов Инадзумы.
Где получить задание «Чистый дом»?
Квест выдает Сидзуру в Сангономии на острове Ватацуми. Найти ее можно недалеко от точки телепортации.
Прохождение
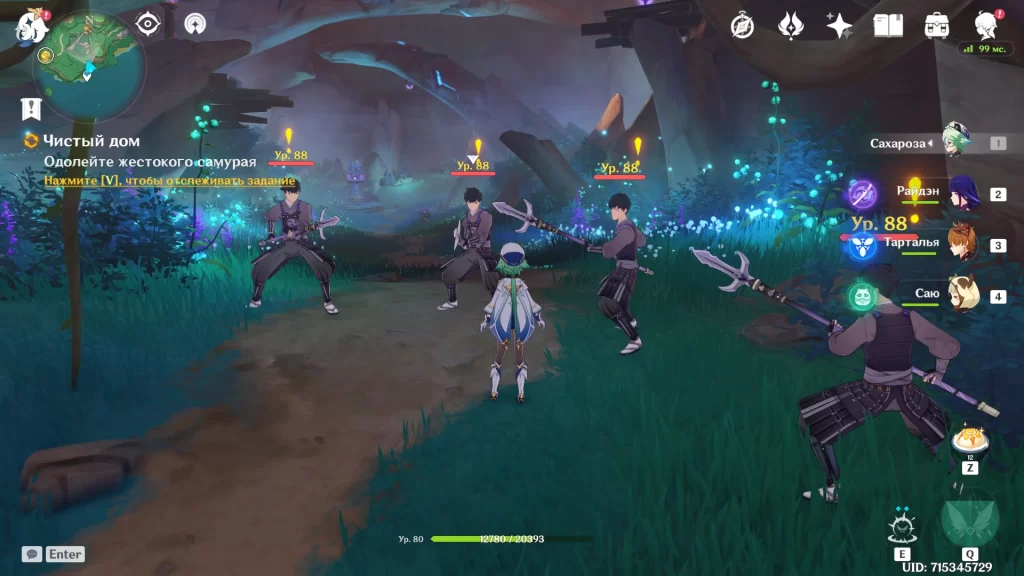
После разговора с Сидзуру отправляемся в шахту Дзякоцу на острове Ясиори. Здесь нужно провести переговоры с самураями сегуната.
Переговоры конечно же пройдут неудачно и придется убить всех противников. После боя подбираем записи главного самурая.
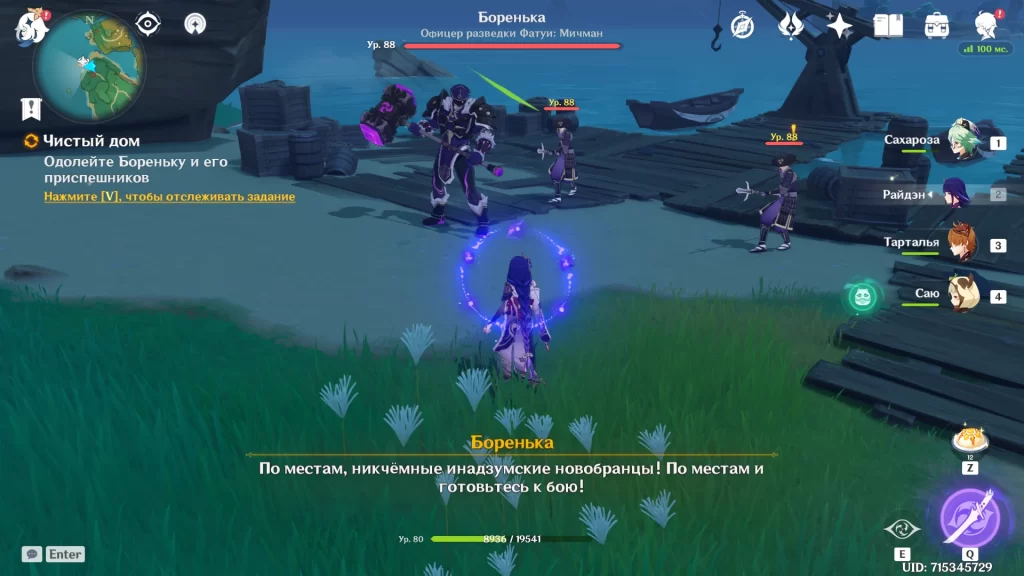
В какой-то момент Сэр Боренька заподозрит неладное и набросится на нас. Убиваем соперников, они нападают в несколько волн.
После боя говорим с Сидзуру.
Награда за прохождение задания «Чистый дом»
Выполнив квест можно получить 200 очков приключений, 2 фиолетовых карты опыта, 20000 моры и 30 камней истока.
Yashiori Island
Area

Location Type
Location
Chinese Name
Japanese Name
Korean Name
The skeleton of a great snake rests on this island. The presence of evil is palpable here.
Yashiori Island ( Japanese: ヤシオリ島 Yashiori-jima ) is an island in Inazuma. At some point within the last two thousand years, the island was attacked by the Watatsumi Omikami Orobashi no Mikoto, an ancient god who created Watatsumi Island.
As a result of the heavy concentration of Tatarigami energy, the island suffers from torrential rainfall and frequent thunderstorms in the open, which in turn applies constant Wet status. Getting hit by a thunderstorm while raining can cause Electro-Charged. Until the quest Orobashi's Legacy is fully completed, this abnormal weather will remain on the island.
Contents
Subareas


Notable Features
Domains


Bosses
Enemies
After Baal and her twin sister Beelzebul united Inazuma under their rule, none of the remaining gods sought to claim any territory that was not theirs lest they be eradicated by the Archon. Orobashi no Mikoto, known as the Watatsumi Omikami, was one such god. However, for unknown reasons, it suddenly came into conflict with the Shogunate. Orobashi and Beelzebul fought at Yashiori Island, where she slew it using the Musou no Hitotachi and split the island into two, creating the Musoujin Gorge. Orobashi's lingering hatred turned into the Tatarigami, which she suppressed using her wards. The people of Watatsumi Island begrudgingly accepted Baal's rule afterwards, although they continue to worship Orobashi even in the present.
Without the wards to keep them at bay, the Tatarigami began wreaking havoc on the island. The people of Higi Village began succumbing to mysterious illnesses and madness, leaving the village abandoned by the time the Traveler explores the area. Shogunate troops stationed in the area were also badly affected, causing General Kujou Masahito to send a report to his father, Tenryou Commissioner Kujou Takayuki, about the Tatarigami disturbance. Takayuki was furious over what he perceived to be Masahito's incompetence and dispatched an investigation team to report the "truth." Based on the findings of this investigation team, Tamayuki was going to consider demoting Masahito and assigning Kujou Sara to the area instead.
Over the course of the Lost Texts found throughout Yashiori Island, the investigation team discovered that Masahito was neither lying nor exaggerating about the effects of the Tatarigami. They began succumbing to the Tatarigami influence and the entire group is now presumed dead or missing.
The Story of Higi Village
Higi Village on Yashiori Island was one of the areas worst affected by the ongoing conflicts between the Sangonomiya Resistance and the Shogunate Army. Not only did the residents have to suffer through constant losses, due to the ongoing war, but they were regularly being visited by the Shogunate's Officers, to not only be kept in order, to make sure no one was choosing to side with the rebels, or defect, but also to have their supplies of Crystal Marrow, their biggest export and source of income, be commandeered for the war effort.
Washizu, the Chief of Higi Village, remained throughout to try and help his people to the best of his ability, while also relying on the capabilities of both the village pharmacist Naoko and the pharmacist's student Yasumoto. Early on in the war, Washizu kept a diary of sorts in the Incomplete Notes, where he stated that both sides of the conflict did not seem to care for the plight of Higi Village, only showing up to hand out propaganda for their respective side, while the village itself became inundated with refugees from Jakotsu Mine and started to succumb to a shortage of food and wealth. Due to the dire circumstances with which the village found itself in, Washizu decided to adopt a socialist approach, by gathering up the wealth of his citizens and redistributing it equally between them. He also set aside a portion of the wealth for the local Pirates, who seemed to have a symbiotic relationship with the village. Finally he nominated himself to guard the local Shrine, as he believed it to be his duty as the village head.
After the Orobashi Cultists, who infiltrated the Resistance, destroyed the shrines protecting the inhabitants of Higi Village, the residents slowly started to succumb to the effects of the newly released Tatarigami. Many of the residents either fled, with some joining the local Pirates, or fell ill and eventually died, while others started to lose their minds and descend into madness and insanity.
Washizu started keeping a logbook in the Incomplete Register, which was originally used to keep track of the residents who unfortunately perished, either due to the war, or due to the effects of the Tatarigami. While he could not do much himself in the face of such an invisible enemy, he was reliant on the abilities of Naoko and Yasumoto to find a cure for the sickness, although he never did trust Yasumoto. Many residents fell to the effects of the illness, without Naoko or Yasumoto making any headway with a cure, before, eventually, Naoko himself fell ill and started to lose his mind. Washizu had no other option but to lock him up, where he eventually passed, leaving Yasumoto to be the sole pharmacist. In his Pharmacist's Notebook, Yasumoto reveals that he could not do anything to combat the Tatarigami and thus resigned himself to making Lavender Melon and Sugar Soup, under the deception of it being a sort of medicine for those who were sick. Washizu eventually caught on to this and labelled Yasumoto as a fraud, while believing that his initial distrust of him was indeed warranted.
It was during this time that many of those who were sick decided to flee and seek aid from the local Pirates, under the command of "Uncle" Nazuchi Beach, one of those who fled was Chouji's father, who seemingly abandoned his wife and son under the influence of the sickness. Despite making a decent recovery to the eyes of the Pirates, he declined their help in returning for Chouji and his mother and instead disappeared, leaving the Pirates somewhat bewildered by his actions. This also led the remaining villagers to tell Chouji and his mother that their father and husband had died at the hands of the sickness.
Back in the Village, Washizu was starting his slow descent into madness. Most of his villagers had either fled or died and he believed he was starting to hear the words of Orobashi himself call out to him. During this time Washizu began sacrificing the remaining villagers, whether they be man, woman, or child, in the name of Orobashi, while turning the Incomplete Register into a list of people he had sacrificed. One of the villagers that was to be sacrificed was Chouji's mother, however, instead of offering her to the snake god, he heard the words of Orobashi that told him she was special and that "He" (Orobashi) was pleased with her, while telling Washizu to go and find her. From this point on, Washizu devoted his time to praying at the Village Shrine, which he believed was his link to Orobashi.
Not believing that her husband had actually died, Chouji's mother herself had gone to seek aid from Yasumoto, who was astonished to find that she was not tainted by the Tataragami like the others, but that it flowed freely inside her, although she was suffering from random bouts of fever and blood loss. Yasumoto recommended that she seek help from Onitaka and the Pirates, who could potentially take her to Sumeru to find a cure. Even though she was abandoning her son Chouji, much like her husband had done, she believed she had no other choice if she was to get better and find her husband, to eventually reunite their family. Yasumoto, writing in his Pharmacist's Notebook, explained that he would take care of Chouji when the situation was stable. Onitaka, for his part, entrusted the safety of Chouji to some of his men, before eventually setting sail, with Chouji's mother, for Sumeru.
Chouji, for his part, believed that Yasumoto did not like him, finding him slightly creepy, as he would always observe Chouji from afar and scurry away if approached.
Being completely abandoned by his family, seeing the village Chief be consumed by insanity and having no one to rely on but himself, as Yasumoto would avoid him and the others villagers had all perished or fled, Chouji began trying to gather Crystal Marrow, which he believed he could sell for a ludicrous price to an unsuspecting traveler or merchant. With the Mora he hoped to make from such a transaction, he would either pay Onitaka for a trip to Sumeru, or potentially catch a cargo ship from Narukami Island that was heading to Snezhnaya, to be able to be reunited with his parents.
Present
Editor's Note As the items and World Quests pertaining to the story of Higi Village can be discovered and completed in any order, please be aware that the following story might not be in canonical order.It was during this time that the Traveler and Paimon met Inaba Kyuuzou, a Samurai from the Shogunate army who was under siege by a group of Pirates, who are heavily implied to some of Onitaka's men. The Traveler and Paimon save the injured samurai from the raiding Pirates, much to his chagrin, as he is not following the Samurai code by accepting help, instead of resigning himself to death in battle. Over the following days, the Traveler and Kyuuzou formed a rapport, with the Traveler aiding Kyuuzou in foiling the Pirates' plans and lowering their numbers through combat. Despite this rapport and having made a recovery from his injuries, Kyuuzou disappears, leaving only his Final Words where he once resided, expressing his deepest regrets and apologies. It is uncertain whether he simply left, or committed seppuku, an honorable form of suicide for a samurai.
Shortly thereafter, the Traveler and Paimon discover Higi Village and make the acquaintance of Yasumoto, who is still living in the village, trying to develop a cure for the sickness, despite the fact that there are very few remaining residents left. Although he hasn't made much success, he has potentially found a clue that could lead to a breakthrough. Seeing as the local Naku Weed is steeped in the Tatarigami's energy, Yasumoto believes that he could potentially use the plant to create a vaccine. However, noting the very harsh and dangerous conditions, he, as a meagre pharmacist, would have to endure in order to collect the Naku Weed, he enlists the Traveler's help in his endeavour. Over the course of the following days, the Traveler proceeds to collect bunches of Naku Weed for Yasumoto, while he remains inside his house working on the potential vaccine and simultaneously using himself as a guinea-pig, leaving payment on his doorstep. In his Pharmacist's Notebook, Yasumoto mentions how the aid of the Traveler has fast-tracked his work on developing a cure and after several days of delivering the batches of Naku Weed, he disappears, leaving the parts of his notebook scattered around the village. The Traveler discovers that Yasumoto headed to the southern shoals of Yashiori Island, to test the final batch of his vaccine on himself, but his ultimate fate is unknown.
While doing the leg-work for Yasumoto, the Traveler and Paimon take note of a young boy, beside the now empty Jakotsu Mine. He introduces himself as Chouji and tries to sell the Traveler his small batch of Crystal Marrow, at a ludicrously inflated price. Having had to grow-up before his time, due to needing to fend for himself, Chouji acts far more mature for his age than normal and uses underhanded and sneaky tactics to try and lure the Traveler and Paimon into buying his wares. After some rebuttal, Chouji backs down slightly, offering to sell the Crystal Marrow for a low share of the profits, if the Traveler agrees to help him actually mine it. Eventually, they all come to an agreement once Chouji mentions his stash of treasure, that the Traveler can take if they help him out.
Upon returning with the Crystal Marrow, the Traveler and Paimon are not amused by the treasure left for them and confront Chouji about his usage of yet more sneaky and underhanded tactics, which are not befitting of someone his age. He starts to open-up about himself, but abstains, saying that he will reveal why he is doing this, if the Traveler helps him out again. Upon returning with yet more Crystal Marrow, Chouji finally opens up about himself, explaining about his parents, Washizu and Yasumoto. He also explains that he plans to either ask Onitaka's men about traveling to Sumeru, not knowing that his mother is already on her way there with Onitaka himself, or that the Traveler has wiped out many of his men on Nazuchi Beach, or that he will go to Narukami Island and board a cargo ship bound for Snezhnaya.
As a final gift, he offers to teach the Traveler how to cook Imported Poultry, although he is lacking the ingredients, due to having lived off of Lavender Melons during the ongoing crises. After retrieving the ingredients, the group sit down to enjoy a meal and Chouji gives thanks for helping him out. Although he is embarrassed to ask, due to his fear of Washizu, he politely asks if the Traveler can do one last task for him, which is find out any information about his mother from the local Shrines, before he eventually sets off on his journey to find his parents.
Upon their departure from Higi Village, the Traveler and Paimon come across Washizu, sitting besides the Village's Shrine. During their first encounter, Washizu appears to be in a deep meditation of some sort, ultimately getting annoyed at the Traveler and Paimon's attempts at conversation. He tells them to pray and worship at the Shrine as he does, so that they can hear "His" words. Despite the fact they hear nothing while praying, Washizu assures them that "He" heard them and will offer them gifts the following day. Upon returning, there are indeed rewards for the Traveler and Paimon and so, under the guidance of Washizu, they continue praying. This continues for several days, with the Traveler and Paimon praying at the Shrine and receiving bountiful gifts the following morning. During this time, Washizu is visually and verbally more erratic, appearing to descend into sheer lunacy before their very eyes. Eventually, the Traveler and Paimon lose hope and wonder if this whole thing is a scam, while Washizu trembles and mutters to himself beside them. As they pray for the last time, Washizu tries to stab them in the back, only for the statue to warn them of their impending fate, leading the Traveler to defeat Washizu in combat.
After searching his house for any clues, the Traveler and Paimon ultimately discover the morbid history of Higi Village:
Most of the residents have either fled, died or been sacrificed to Orobashi, Yasumoto is missing, presumed dead, Chouji's father is missing, his mother is on her way to Sumeru with Onitaka, whose men have been defeated by the Traveler, Chouji himself is on his way to Snezhnaya and Washizu, who was using his sacrifice's belongings to con people into praying at the shrine in order to sacrifice them, met his untimely fate at the end of the Traveler's sword.

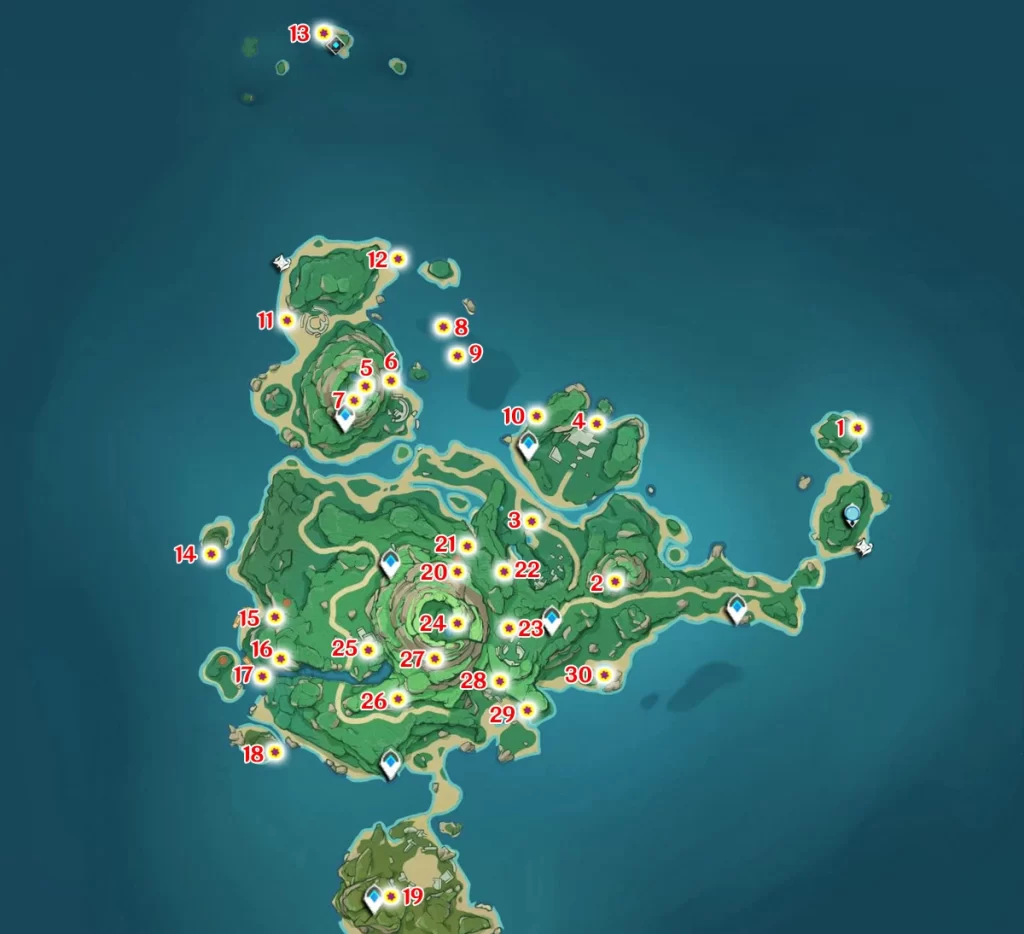
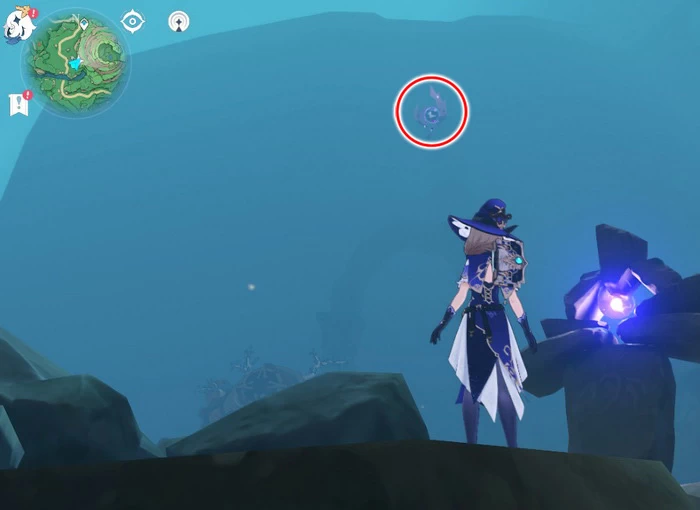
Электрокулы Цуруми: в обновлении 2.2 добавили новую область и вместе с ней 30 электрокулов.
Итак, всего в Инадзуме 181 электрокул. 180 нужно отдать статуе, а один, традиционно, останется сувениром в инвентаре.
Чтобы собирать окулы на Цуруми с комфортом, сначала пройдите задание «Исключительно исключительный писатель» и следующее за ним «Октава маусиро». Так вы спустите воду в подземелье под пиком Сирикоро, где находятся несколько электрокулов и обзаведетесь инструментом для решения загадок Цуруми.

Не забывайте во время путешествий зажигать «фонари» электро-персонажем, чтобы избавляться от тумана, иначе вы «заблудитесь» и вас отправят к ближайшему телепорту.
Электрокулы Цуруми: сбор
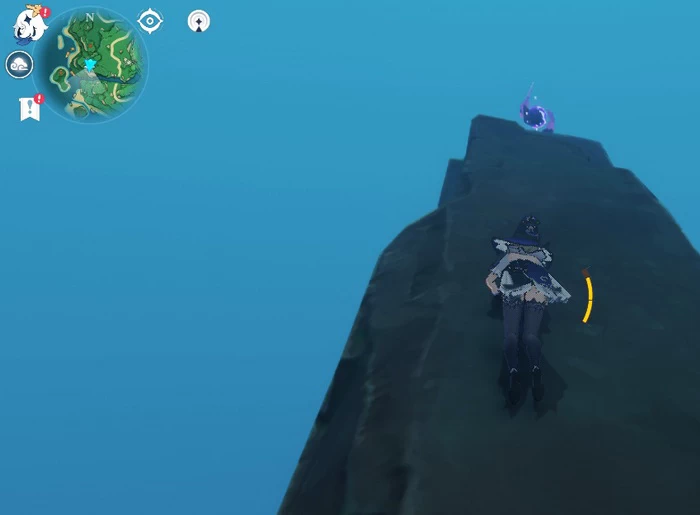
№ 1
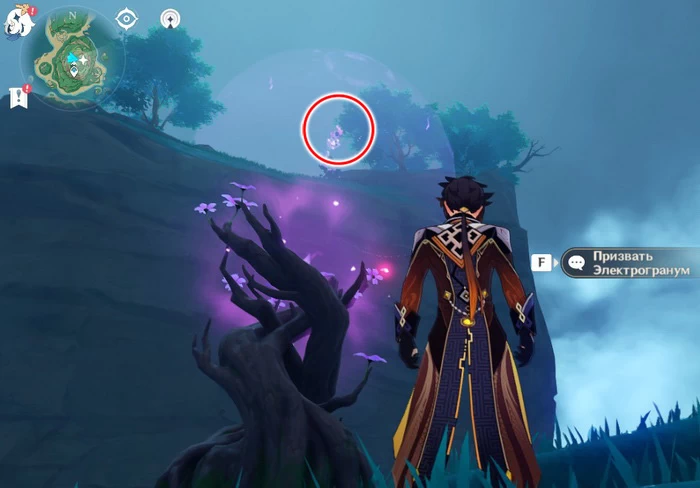
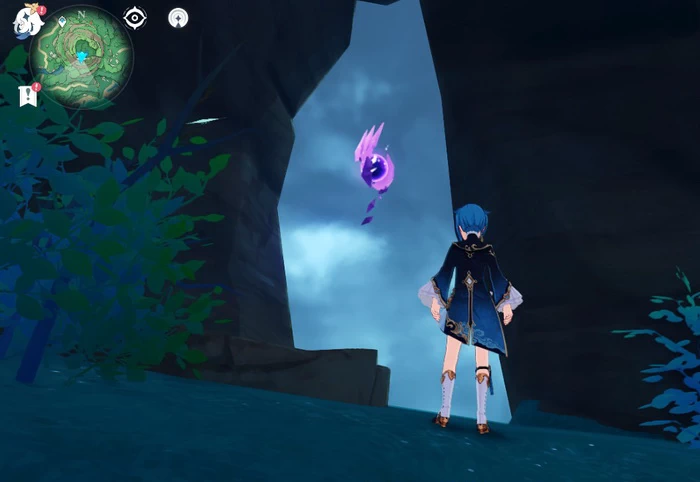
Взорвите все электробомбы на земле вокруг неактивных «ветвей громовой сакуры», пробежавшись по ним. Дождитесь окончания электростатуса на персонаже, если попали в один из взрывов. Теперь берите электрогранум и взлетайте к электрокулу.

№ 2
Взберитесь на горку и соберите окул в полете.
№ 3
От второго окула можно сразу слететь к третьему, он на небольшом утесе на пляже. Или же вскарабкайтесь к нему снизу.

№ 4
Этот окул висит в воздухе между двумя скалами. Вам нужно вскарабкаться на гору со стороны телепорта и войти в фазовые врата. Вы перелетите на другую горку, прихватив окул в полете.

№ 5
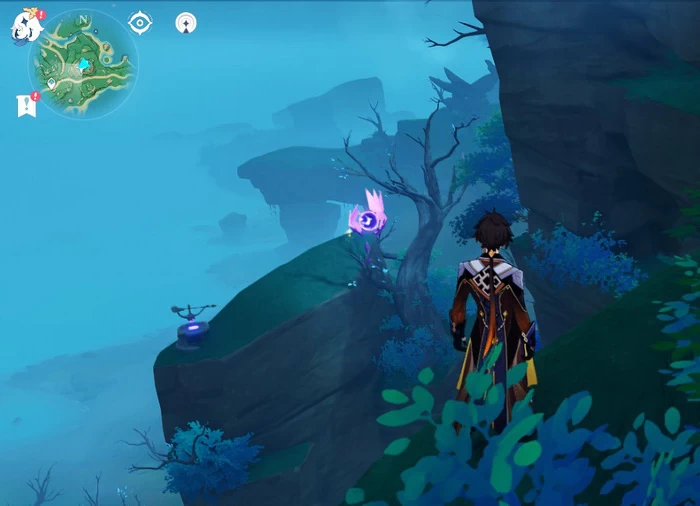
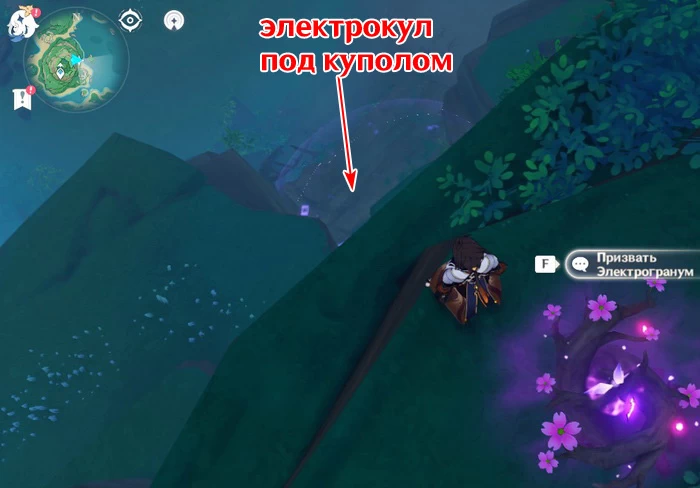
На горе под электрическим куполом. Возьмите электрогранум и летите к окулу.
№ 6
От пятого окула летите вниз, взяв электрогранум с ближайшей сакуры. Электрокул в куполе под горой.
№ 7
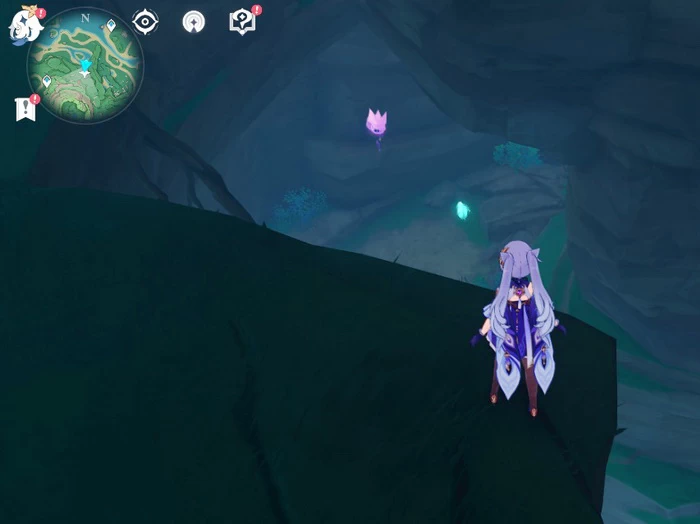
Этот электрокул, как и несколько последующих, находятся в обширных пещерах под пиком Сирикоро.
Сначала нужно пройти упомянутый в начале статьи квест «Исключительно исключительный писатель» и спустить воду в пещере, приведя трех фей к своим постаментам.
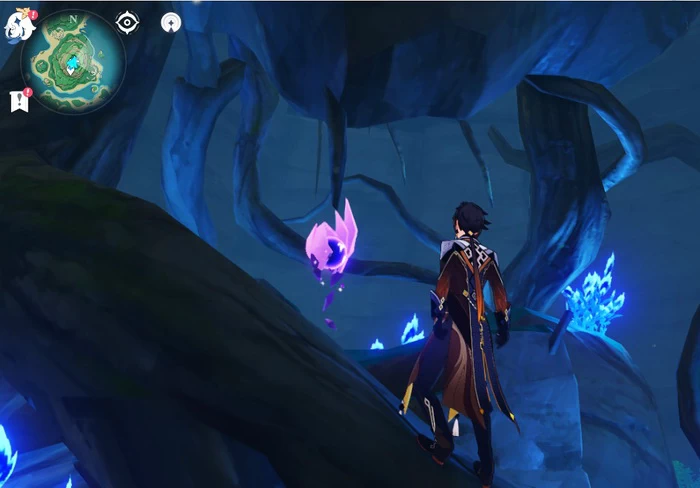
Электрокул № 7 находится прямо под корнями дерева-«Гнездовья». Можно аккуратно слететь сверху и зацепиться за ветки, а можно вскарабкаться с самого дна провала.
№ 8
Вам нужно сначала выполнить все тот же квест «Исключительно исключительный писатель», а затем задание «Октава маусиро»
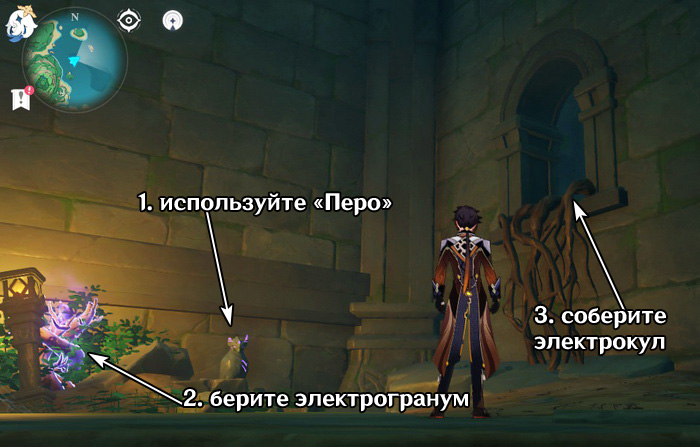
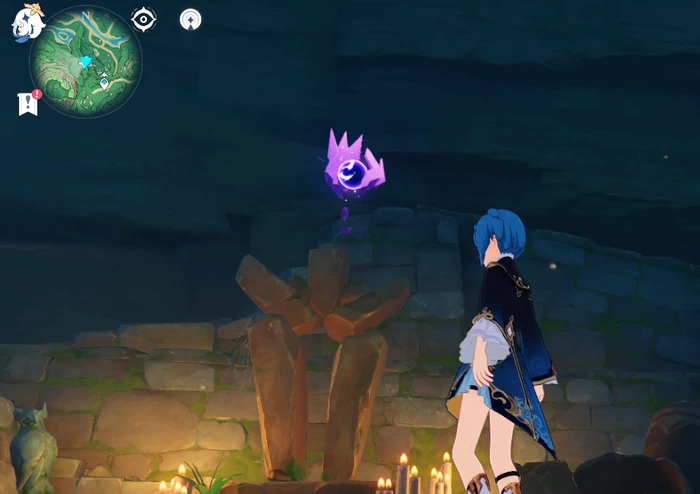
Если вы выполнили квест «Октава маусиро», используйте инструмент Перо на статую птицы прямо возле входа к электрокулу. Рядом появится призрачная сакура, с которой можно собрать электрогранум и тут же залезать за окулом.
Если же вы пока не добрались до этого задания, можно собрать электрокул немного иначе.
Лучше всего сделать это в два этапа и Розарией, именно в ночное время – так как она ночью бегает быстрее всех остальных персонажей, даже если она невысокого уровня.
Итак, сначала возьмите электрогранум у корней дерева-гнездовья внизу, неподалеку от входа в пещеры.
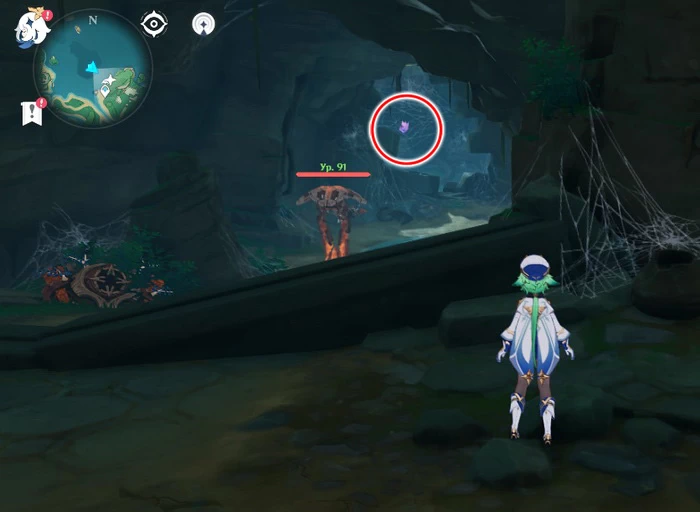
Теперь бегите вглубь, до первого громового барьера, он перед комнатой с круглой дверью.
Переведите дух, накопите выносливость. Можете выполнить испытание внутри – нужно на время убить несколько механических стражей. Главное, что нам здесь нужно – очередной электрогранум в углу комнатки. Берем его, выходим из комнаты и уже спокойно добегаем до электрокула № 8.
Можно сначала не спеша пройти этот путь, чтобы понять, как и куда двигаться.
№ 9
Доступен только после выполнения задания «Октава маусиро». Вам нужен инструмент «Перо», который выдают за задание.
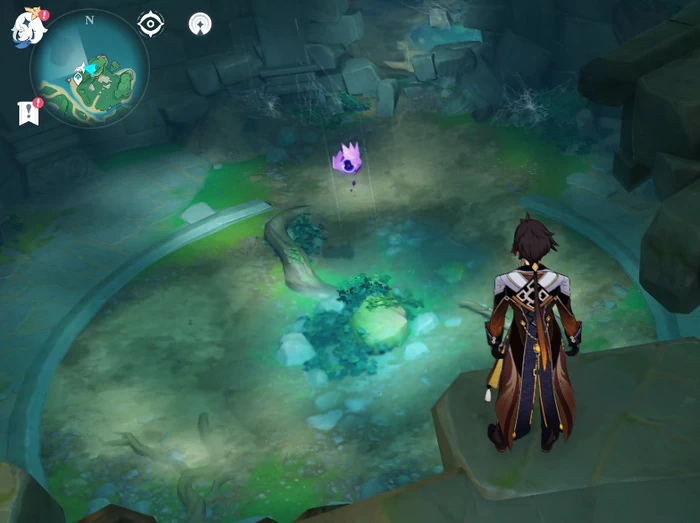
Сначала войдите в комнату с полуразрушенным куполом, в ту, где вы убирали воду и открывали вторую круглую дверь по квесту «Исключительно исключительный писатель».
Спуститесь вниз, найдите рисунок на стене и используйте рядом с ним инструмент «Перо» (надеть и нажать Z). Стена разрушится, за нею висит электрокул.

№ 10
Идите дальше, во вторую круглую дверь и вперед. На пути – несколько мобов и свободно висящий в круглой комнате электрокул.
Взять его можно, взобравшись по лозе в самой комнатке.
№ 11
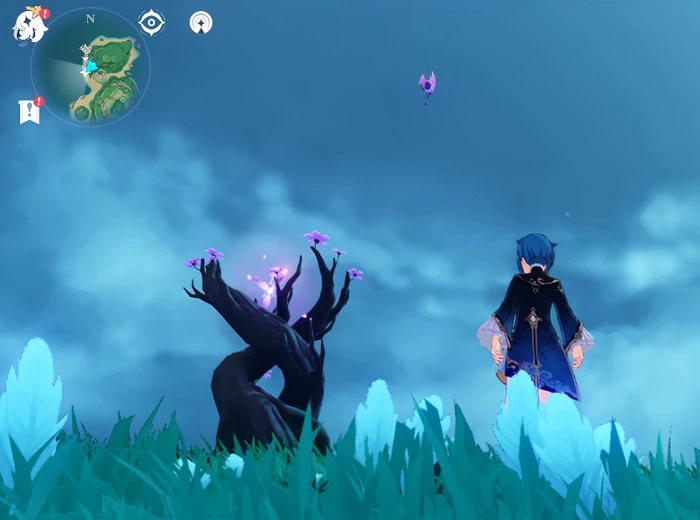
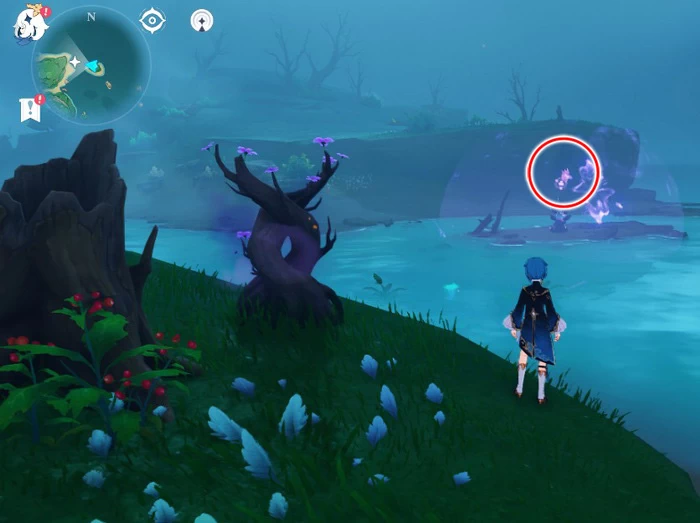
В небе над берегом. Берите электрогранум и взлетайте.
№ 12
На островке под громовым куполом. На соседнем клочке суши убиваем собачку (иначе ветви громовой сакуры будут неактивны), забираем сундук, обзаводимся электрогранумом и плывем за окулом.
№ 13
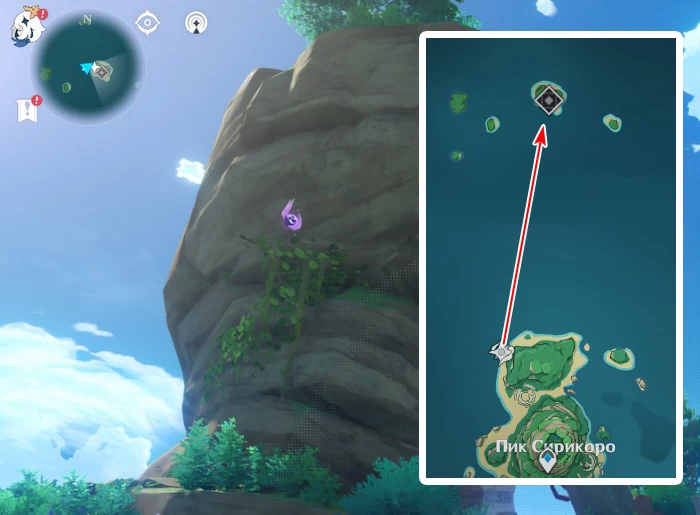
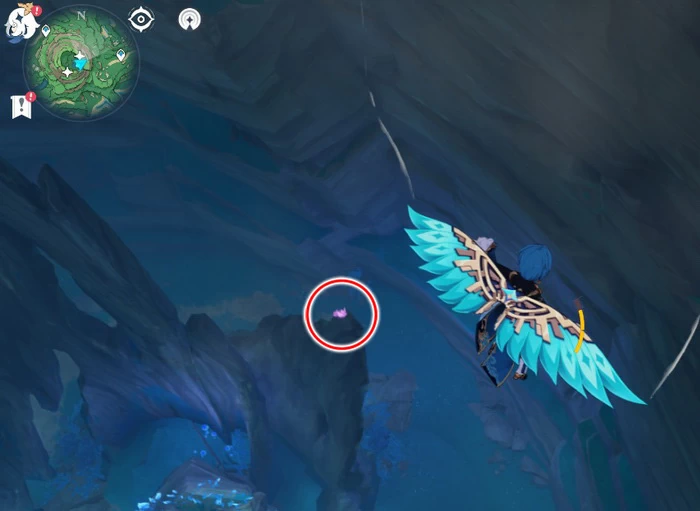
Возле подземелья, которое находится на небольшом архипелаге к северу от Цуруми. Электрокул висит под небольшой скалой. Залезайте наверх сбоку по колонне.
№ 14
Венчает монумент на небольшом островке.
№ 15
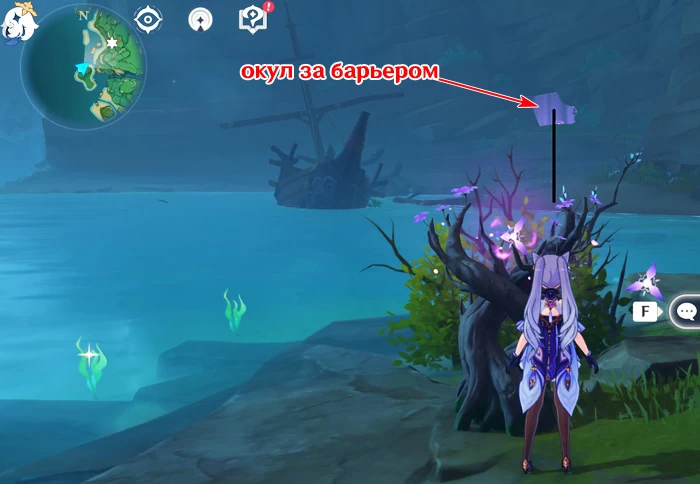
В пещере под берегом за громовым барьером. Напротив на островке есть электрогранум. Заберите окул и быстро выходите, иначе придется уходить телепортом, когда кончится действие электрогранума.
№ 16
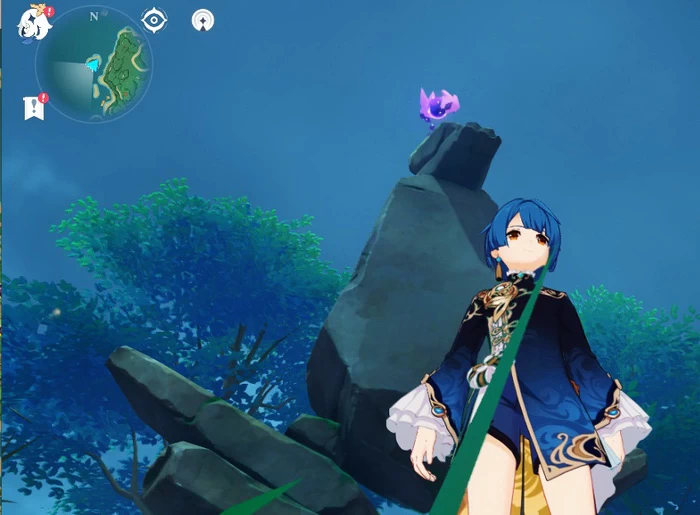
На макушке скалы.
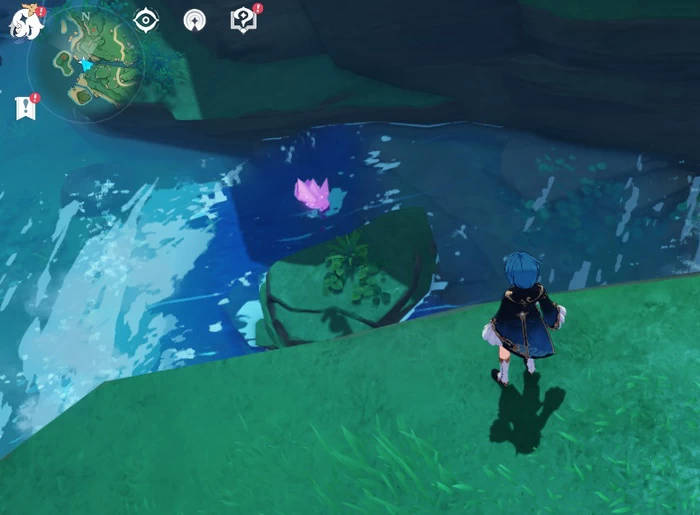
№ 17
На камне в самом низу водопада.
№ 18
№ 19
В руинах южной части Цуруми.
№ 20
Висит над хижиной хиличурлов. Проще всего слететь с горки.
№ 21
Под горой в пещерке. Забрать можно, слетев с горы справа или слева.
№ 22
Висит над каменным идолом под берегом.
№ 23
Электрокул просто лежит на земле, охраняемый парочкой мобов.
№ 24
Внутри горы Канна. Этот потухший вулкан – полый внутри. Можно забраться на него и спрыгнуть сверху, чтобы собрать окул. Или же войти сбоку (по дорожке, ведущей к горе) и вскарабкаться на этот корявый, огромный, разрушенный пень.
№ 25
Висит над площадкой со стражем руин у горы, можно забрать, слетев с арки, что на площадке. Не забывайте зажигать «громовые камни», чтобы рассеивать туман.
№ 26
Находится под электрическим куполом. Лучше всего слететь с горы Канна к сакуре, взять электрогранум и добежать до окула.
Если вы зайдете с другой стороны то, скорее всего, заблудитесь в тумане несколько раз, прежде чем доберетесь к электрокулу.
№ 27
Очень высоко на горе Канна. Можно не спеша вскарабкаться, уступов для отдыха много. А можно лететь вверх от сакуры к сакуре, которых немало на внутренней поверхности горы.
Никаких особых секретов или сложностей с этим окулом нет. Просто терпение и упорство.
№ 28
Под аркой алтаря Мосири, на площади, где должна была пройти «Церемония».
№ 29
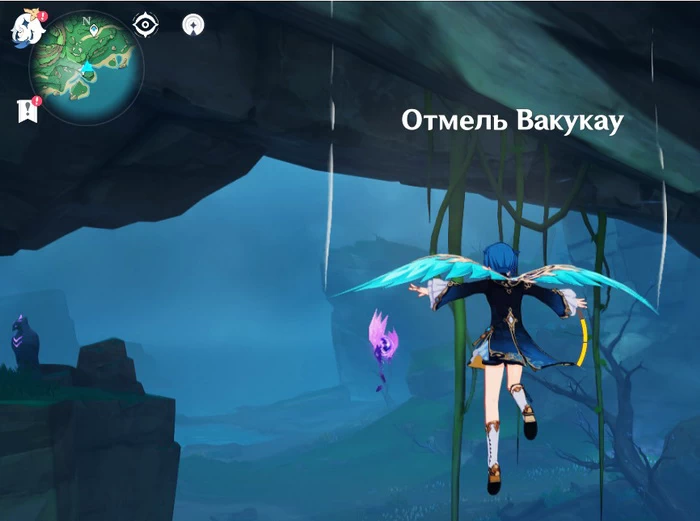
Висит под скалой, нависающей над отмелью Вакукау.
№ 30
Мирно болтается над лужицей со слаймами.
Электрокулы в других областях Инадзумы
Если вы по каким-то причинам пропустили предыдущие острова и не собрали электрокулы там, то эти гайды вам обязательно пригодятся:
Читайте также: