M4 scorcher arma 3 гайд
Обновлено: 04.07.2024
17 сен. 2014 в 13:24 Aiming with the M4 Scorcher
I've been trying to figure that out for a while? Does anyone know?
EDIT: The Rocket artillery, mortars etc use the same aiming system, I'd like to know how to aim all of these
If it's the same physics as real life, there are calculations and standard equations to work out how far a projectile will travel against the angle it's fired at. You'd need to know the weight and the force imparted to be useful though and i have no idea how you'd find that out. Im betting a turbo nerd has put the calculations for Arma 3 mortar / artillary fire online somewhere, maybe google that.
Basically though, ♥♥♥♥ maths, guess
17 сен. 2014 в 18:47If it's the same physics as real life, there are calculations and standard equations to work out how far a projectile will travel against the angle it's fired at. You'd need to know the weight and the force imparted to be useful though and i have no idea how you'd find that out. Im betting a turbo nerd has put the calculations for Arma 3 mortar / artillary fire online somewhere, maybe google that.
Basically though, ♥♥♥♥ maths, guess
^^ You can't really in this game you would need more detailed map and spotter and the ability to do calculations. Use the arti computer or some sort of spotter to walk it in. Отредактировано Skooma Addict; 17 сен. 2014 в 18:48 17 сен. 2014 в 21:50Arty is used for indirect fire. Its a waste of time for direct fire most of the time in ArmA.
In real life, you can use direct line of sight method, through your aiming sight, on mortar tubes.
And shift the tube on target after the impact of the first round. This method is called "direct lay".
VBS has a modue called "fires" and is nice. Arma is lacking.
That book with the arty info in it. is called a "firing table".
All the best,
The 2S9 Sochor is a self-propelled, heavy artillery vehicle used exclusively by CSAT forces in ArmA 3.
Contents
Overview
- Role:
- Indirect fire support
Design
Armed with a 155 mm howitzer cannon as its primary weapon, the 2S9 is a powerful gun-based fire support vehicle that is capable of firing a mixture of high-explosive, smoke, cluster, and even precision guided shells on targets at extreme distances.
Armament
The standard loadout of the 2S9 gives it 32 rounds of high-explosive (HE) shells for the main gun. In addition to the standard HE shells, 6 different sub-munition types are also available, forming a total of 24 more shells that can be loaded. These include:- 2 rounds of infrared-guided (heat seeking) shells
- 6 rounds of scatter shells that can cover an area with anti-personnel (AP) mines
- 2 rounds of cluster shells that can saturate an area with a hail of explosive fragments
- 6 rounds of deployable white smoke shells that can cover the impact zone instantly in a thick cloud of smoke
- 2 rounds of laser-guided shells
- 6 rounds of scatter shells that can cover an area with anti-tank (AT) mines
For self-defence, the 2S9 also has an RCWS turret fitted on top that is armed with a dual-mount 12.7 mm heavy machine gun and 40 mm automatic grenade launcher.
The externally mounted RCWS comes pre-loaded with a single 200-round belt of 12.7 mm ammunition and has a single belt to reload from. The GMG on the other hand, feeds from a 96-round 40 mm high-explosive (HE) grenade belt and also has only a single belt to reload with.
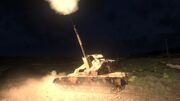
![]()
2S9 carrying out a fire mission at nighttime.
Features
The 2S9 shares the same chassis as its MBT parent, which grants it the heavy armour of an MBT while sharing the excellent manoeuvrability and speed of the T-100.Drawbacks
Although it shares the same advantages of the T-100 in terms of mobility, it also retains the same weaknesses as well - such as an exposed rear engine while lacking the heavy armour of its NATO counterpart.Protection-wise, many parts of the hull's plates are less durable and render the 2S9 even more vulnerable to damage from anti-vehicle launchers. It also cannot adequately defend itself against enemy threats that get too close without having to resort to attacking in direct fire mode, so having friendly units provide escort is essential.
Crew Capacity
The 2S9 has a seating capacity of three personnel for a crew consisting of the driver, gunner and commander.Camouflage
Hex (Camo Nets) Green Hex (Camo Nets)- Hex: Arid Hexacam camouflage pattern. Useful for forested, grass plains, and desert environments. Changes any applied camo nets to use a two-tone desert camouflage pattern.
- Green Hex: Tropical Hexacam pattern camouflage. This is used in heavily forested and tropic environments. Attached camo netting will use a two-tone woodland camouflage pattern
Protection
The 2S9 has a base armour value of 425. It uses a mixture of Composite Armour plating and Explosive Reactive Armour panels.
It has four separate ERA blocks shielding the glacis plate and both sides of the hull. The 2S9 cannot be fitted with slat cages.
The following highlighted positions serve as weak points on the 2S9:
![]()
LEGEND
Green = Hull
Orange = Engine
Violet = Fuel tanks
Light blue = Treads
Maroon = Turret
Gold = Howitzer barrelNote that in order to inflict actual damage, a munition must first penetrate through the surrounding armour plates and directly hit the component's weak point. Any strikes on non-highlighted parts will cause little (if any) noticeable damage.
Hull
The hull can resist up to 850 points of damage. Will cause a catastrophic kill if fully depleted.
Munition type Damage reduction (%) Velocity reduction (%) Armour Piercing None 20 High-Explosive 80 50 High-Explosive Anti-Tank 80* 20 Tandem High-Explosive Anti-Tank 80* 10 (*) Reductions only apply to the explosive component of the munition i.e. Tandem HEAT explosive charge
If the hull has been compromised, no reductions will be applied to the velocity/raw damage of incoming projectiles.
Hull ERA
ERA blocks are installed on the front and sides of the hull (rear excluded; along the frontal half only).
Hull ERA blocks will shield against 100 points worth of damage. They can only protect against a single projectile per block, and will cease to be functional once detonated.
Engine
Located in the tank's rear. It can take up to 467.5 points worth of damage. It takes only 20% damage from high-explosive (HE) type munitions.
30% of incoming damage onto the engine is always inflicted onto the 2S9's "health" pool. It will not however, cause a catastrophic kill if destroyed unless the 2S9 is critically damaged.
If damaged: Reduces power output, acceleration is decreased and it may become impossible to climb uphill.
If destroyed: Inflicts a mobility kill on the vehicle; 2S9 is instantly immobilised.Fuel tanks
The 2S9's fuel tanks can only resist 212.5 points of damage before they rupture. They receive only 60% damage from HE-type munitions.
30% of incoming damage onto the fuel tank is always shared with the 2S9's main "health" pool. Destroying the fuel tanks cannot result in a catastrophic kill unless the 2S9 is at critical health status.
If damaged: Gradually leak fuel over time, but it will stop at a threshold of 80% of the 2S9's remaining fuel capacity.
If destroyed: Causes it to rapidly lose its entire fuel capacity in just a few seconds.Treads
Both treads can resist 650 points worth of damage. No amount of damage inflicted on them is shared with the 2S9's main "health" pool.
Destroying either one of the treads will hamper the 2S9's handling but will not prevent it from moving. Destroying both will severely degrade the 2S9's handling and can prevent it from moving while on rough terrain.
Turret
The turret can only survive a meagre 340 points of damage. No amount of damage incurred is transferred onto the 2S9's "health" pool.
Munition type Damage reduction (%) Velocity reduction (%) Armour Piercing None 20 High-Explosive 80 50 High-Explosive Anti-Tank 80* 20 Tandem High-Explosive Anti-Tank 80* 10 (*) Reductions only apply to the explosive component of the munition i.e. Tandem HEAT explosive charge
If the turret's armour has been compromised, no reductions will be applied to the velocity/raw damage of incoming projectiles.
Howitzer barrel
The turret's howitzer can survive even less damage, being able to incur just 255 points of damage before failing. No damage inflicted on this component is transferred onto the 2S9's main "health" pool, however.
Destroying this component will lock the barrel and prevent the gunner position from adjusting its elevation/depression. It should also be noted that unlike the turret, the barrel is only capable of reducing 60% of incoming damage from high-explosive (HE) munitions.
RCWS
The commander's RCWS turret can resist up to 250 points worth of damage. No amount of damage incurred is transferred onto the 2S9's "health" pool.
Munition type Damage reduction (%) Velocity reduction (%) Armour Piercing None 20 High-Explosive 60 50 High-Explosive Anti-Tank 60* 20 Tandem High-Explosive Anti-Tank 60* 10 (*) Reductions only apply to the explosive component of the munition i.e. Tandem HEAT explosive charge
If the RCWS turret's armour plating has been compromised, no reductions will be applied to the velocity/raw damage of incoming projectiles.
Components
- Camo Net (Hull): Drapes the entire hull with camouflage netting (the turret is not covered). Partially conceals covered sections from thermal sensors.
- Camo Net (Turret): Identical to Hull camo netting but for the turret only instead. Note that some components like the RWS or the commander's optics are not concealed.
Armament
The gunner position handles the primary Howitzer 155 mm, while the commander controls the dual-mount RCWS HMG 12.7 mm/RCWS GMG 40 mm remote weapons turret:
Howitzer 155 mm
NOTE: Refer to the Capabilities and Manual Firing sections for a more detailed explanation of the Howitzer 155 mm's usage.
Shell name Base damage value Damage type Initial velocity (m/s) HE 340 High-Explosive 810 Guided (Primary) 300 High-Explosive 810 Guided (Secondary) 1,200 High-Explosive N/A Cluster (Primary) 300 High-Explosive 810 Cluster (Secondary) 35 High-Explosive N/A LG (Primary) 300 High-Explosive 810 LG (Secondary) 1,200 High-Explosive N/A It has a muzzle velocity of 810 m/s. Without a firing solution selected, the Howitzer 155 mm can fire one shell every 7 seconds (
8 rounds per minute). It also takes 7 seconds to switch between munition types.
Blast radii, guidance type (if applicable) and penetration depth vary depending on the type of shell loaded. Smoke and AT/AP scatter shells do not have explosive payloads as they are fitted with dummy warheads designed to disperse submunitions instead (and are therefore not listed here):
- High-Explosive (HE): 30 metre blast radius, has a penetration depth of 121.5 millimetres (direct impact only).
- Guided: 4 metre blast radius, infrared-guided; will attempt to home in onto "hot" vehicles within a radius of 800 metres. The submunition separates from the main shell once it is 500 metres above the impact zone. The IR seeker has a 10% chance to lose lock against smoke countermeasures.
- Cluster: Will separate into multiple smaller explosive fragments once the dummy shell is 200 metres above the impact zone. The primary shell will disperse these fragments in a 35 metre radius. The fragments each have an 8 metre blast radius and have a 7% chance of failing to detonate, leaving behind Unexploded Ordnance (UXO) pieces.
- Laser Guided (LG): 4 metre blast radius, laser-guided; can only lock onto laser spots within a radius of 800 metres. The submunition will "launch" from the dummy shell once it is 500 metres above the impact zone and begin seeking a laser spot.
- The gunner is also able to toggle a live camera feed from the shell once it is separated. If no laser spot can be found, the shell will simply strike the point below where it separated from the primary shell.
RCWS HMG 12.7 mm
Base damage value Aerodynamic friction Initial velocity (m/s) Penetration depth (mm) 30 -0.00086 910 35.49 Intended for infantry, unarmoured/lightly-armoured vehicles and low-flying helicopters. It has an effective firing range of 800 metres up to a maximum of 1,500 metres.
The RCWS HMG can attain a fire rate of up to 600 RPM and requires 20 seconds to reload a fresh box. Accuracy-wise, it has a fixed dispersion of 0.0012 rad regardless of distance. The commander's optics support three fields of view, and can toggle either day, night or black-hot/white-hot thermal vision modes.
The Fire Control System is only able to automatically zero on stationary targets and requires 1 second to finish adjusting. Manual zeroing is also possible, though only in increments of 100 m up to a maximum of 2000 m.
RCWS GMG 40 mm
NOTE: Although its HEDP grenades function like as if they were purely HE-based, they are actually treated as a HEAT-type munition instead.
Damage type Base damage value Aerodynamic friction Initial velocity (m/s) High-Explosive Anti-Tank 100 -0.001 241 Its HE grenades are intended for use against groups of infantry, unarmoured/lightly-armoured vehicles and medium-armoured vehicles with exposed turrets.
It has an effective firing range of 1,200 metres and has a fire rate of
349 RPM. It requires 20 seconds to reload a second belt and for dispersion, the GMG is always set to a fixed value of 0.005 rad. Optics are identical to those used for the RCWS HMG.
The FCS can only zero onto stationary targets and requires 1 second to finish adjusting. Like the RCWS HMG, manual zeroing is also possible up to a maximum of 2000 m.
Capabilities
It fires all 32 HE rounds in four minutes and 12 seconds, averaging at just under 8 seconds per shot. This makes its fire rate considerably slower than the Mk6 Mortar, although its damage and blast radius per shell is significantly greater.
The Sochor has five range modes available for firing:
Overlaps occur in the following ranges:
- 2,059-2,415 metres (Close and Medium)
- 5,271-6,021 metres (Medium and Far)
- 14,644-15,414 metres (Far and Further)
- 22,881-42,818 metres (Further and Extreme)
Unfortunately, this means that when simply using the built-in artillery computer, the 2S9 can only perform MRSI strikes in narrow nearby bands, or in the large band beyond
23 km. It is also unable to have more than two volleys landing on the same target at the same time.
Note however that the built-in computer tends towards using low-angle trajectories. The Sochor is capable of firing at up to an 80 degree angle from flat ground. This means that it is technically capable of getting multiple volleys to land on the same target simultaneously, but it would require manual calculation of the appropriate trajectories, or the use of spreadsheets or third-party applications.
Manual Firing
By default, the turret can be manually raised and lowered with the page up and page down keys. For precision aiming, the rate of adjustment can be slowed by holding down the shift key (by default) while aiming up or down.
It is also possible to adjust range mode without the artillery computer, though this is more difficult. By default, using the F key will cycle through the different range modes, from Close range through to Extreme range and back to Close. It is also possible to bind a key to go from longer ranges to shorter ranges, though there is no default binding for it (Weapons > Previous weapon).
Although there is no indicator without the artillery computer to determine which firing mode is currently active, it is possible to work it out by using the rangefinder to point at an object within Close range (826-2,415 metres) and cycling through the firing modes until the red X on the crosshair goes away, indicating you've returned to Close range.
NOTE: This article is about the M4/M4A1 carbine in Armed Assault, ArmA 2 and ArmA Tactics. For the M4 Scorcher self-propelled gun artillery vehicle in ArmA 3, see M4 Scorcher.
The M4A1 is a 5.56 mm carbine featured in ArmA: Armed Assault, ArmA 2 and ArmA Tactics.
Contents
ArmA: Armed Assault
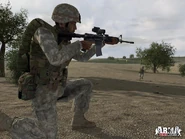
Library Description![The M4A1 5.56 mm carbine.]()
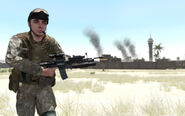
The M4A1 is used by both U.S. Army forces and Black Element PMCs in ArmA: Armed Assault.
Overview
The M4A1 is a gas operated, selective-fire carbine that is chambered to fire the 5.56×45 mm NATO round.
It loads from 30-round STANAG magazines and can attain a fire rate of up to 667 rounds per minute, and has a muzzle velocity of 850 m/s. The M4A1 features a suppressed sub-variant, and can also be fitted with either a red dot sight or ACOG riflescope.
A modular platform, the M4A1 serves as the standard-issue weapon of U.S. Army soldiers deployed to Sahrani. It is comparable to the longer M16A4 assault rifle, though its shorter-length barrel reduces its inertia penalty on the user and makes it easier to wield in close quarters.
Accuracy-wise, the M4A1 has almost twice the dispersion of the M16A4 at distances of beyond 300 metres. In all other aspects the M4A1 isn't that much different to the M16A4 nor its older predecessor, the M16A2.
Variants
M4A1 GL
![The M4A1 GL 5.56 mm carbine.]()
The M4A1 GL is simply a modified variant of the baseline M4A1 carbine that has an underbarrel grenade launcher attached to it. The M4A1 GL is always equipped with an ACOG riflescope.
The M203 GL can fire a mixture of either 40 mm high-explosive (HE) or flare grenade rounds. It is accurate at ranges of up to 300 metres. The weapon itself is otherwise unchanged (performance-wise) to regular M4A1s.
M4
Library Description![The M4 5.56 mm carbine.]()
The M4 is another variant of the baseline M4A1 carbine.
Unlike stock M4A1s, the M4 is only capable of toggling between a semi-automatic or three-round burst fire mode and cannot switch to firing on full-auto. It remains otherwise unchanged to the regular M4A1.
M4 GL
![The M4 GL 5.56 mm carbine.]()
The M4 GL is a modified variant of the baseline M4A1 carbine with an underbarrel 40 mm grenade launcher. It is fitted with an ACOG riflescope by default and cannot mount sound suppressors.
Performance-wise, the M4 GL remains identical to its full auto counterpart but is only capable of toggling between a semi-automatic or three-round burst fire mode.
Camouflage
Ironsights CCO (Suppressor)- Black: Standard matte black/grey finish.
Ammunition
Round name Base damage value Initial velocity (m/s) 5.56×45 mm NATO 8 850 5.56×45 mm NATO SD 7 320 For grenade rounds usable with the GL, refer to its dedicated article here.
All variants of the M4 carbine support being loaded with three types of magazines. They all require one free inventory slot to carry:
30Rnd. Stanag
Standard 30-round magazine. Does not contain any visible tracers.
30Rnd. Stanag SD
Specialised magazine loaded with subsonic 5.56 mm ammunition. Identical to regular 30-round STANAGs save for a much lower velocity of 320 m/s.
20Rnd. Stanag
20-round box magazine used by the Mk12 marksman rifle. Aside from its capacity it is otherwise completely identical to regular 30-round STANAGs.
Trivia
-
is currently the only main ArmA title in the series to feature burst fire-only models of the M4 carbine.
- Based on unused strings within the game files, all variants of the M4A1 were supposedly intended to have their own specific magazines rather than drawing from a generic pool shared by all 5.56 mm weapons.
- The two magazines, named "M4 20rds mag." (string name: STR_MN_M4_20) and "M4 Mag." (string name: STR_MN_M4) would've been 20-/30-rounder magazines (respectively).
Gallery
![Arma1-Screenshot-11]()
![Arma1-Screenshot-05]()
![Arma1-Screenshot-12]()
![Arma1-stryker-01]()
![Arma1-hmmwv-00]()
![Arma1-m4a1-01]()
![Arma1QG-Screenshot-01]()
![Arma1-m4a1-03]()
![Arma1-m4a1-02]()
![Arma1-m4a1-00]()
ArmA 2
Thanks to the SOPMOD program the M4A1 can be modified with a variety of special accessories including optics such as the M68 Aimpoint and ACOG, an easily detachable suppressor, the M203 under barrel grenade launcher, and many others.
Armoury Description![The M4A1 5.56 mm carbine.]()
The M4A1 is used by the U.S. Marines and in limited numbers with ION PMC bodyguards in ArmA 2.
Overview
Returning from Armed Assault, the M4A1 still serves as an alternate counterpart to the M16A4 assault rifle used by the U.S. Marines.
It still loads regular 30-round STANAG magazines used by other 5.56 mm weapons like its rifle counterpart, and has the same fire rate of its predecessor.
Its muzzle velocity has been increased to 930 m/s however, and now has several variants fitted with different optical sights ranging from the CCO red dot sight as well as holographic sights. In addition, there are laser pointers and flashlights attached to certain models, along with variants fitted with sound suppressors.
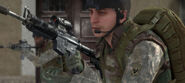
![]()
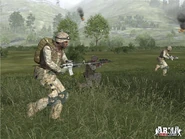
A USMC Corpsman (left) and Force Recon operator (right) armed with M4A1s.
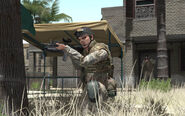
Primarily wielded by USMC vehicle crewmen, Navy Corpsmen and Force Recon operatives deployed to Chernarus, the M4A1 features a wide variety of accessories for the operator to choose from. Both ironsights and non-magnified optics give the M4A1 an effective range of up to 300 metres.
Like in Armed Assault, its carbine configuration results in the M4A1 being less accurate than its rifle counterpart at distances of beyond 300 metres. As a result, it shouldn't be used to engage targets that exceed 400 metres (even with the ACOG-equipped variants).
In addition, suppressed variants of the M4A1 such as the M4A1 CCO SD, are restricted to using subsonic 5.56 mm ammunition and cannot utilise non-subsonic 5.56 mm magazines.
Variants
M4A1 M203
![The M4A1 M203 5.56 mm carbine.]()
The M4A1 M203 is a modified variant of the baseline M4A1 carbine that has an underbarrel grenade launcher attached to it. As with its parent counterpart, it is chambered to fire the same 5.56 mm NATO round.
The underbarrel M203 launches a variety of 40 mm grenades, ranging from high-explosive (HE) rounds to non-lethal smoke grenades and less-than-lethal (LTL) flare shells.
The M203 has a conventional leaf sight that is accurate at ranges of up to 300 metres. In every other aspect, it is identical to the M4A1.
M4A3
This is a premium asset that requires ownership of the Operation Arrowhead expansion pack.
Armoury Description![The M4A3 5.56 mm carbine.]()
The M4A3 is a separate variant of the standard M4A1 carbine used by both Czech special operations and ION contractors. It was added with the release of the Operation Arrowhead expansion pack.
While stated to be a different weapon, the M4A3 is actually functionally identical to the baseline M4A1 in virtually every way, save for using a desert finish, the flashlight accessory, and is always equipped with a CCO red dot sight.
However, it does have one unique attribute in that it is able to utilise magazines with subsonic 5.56 mm ammunition (whereas the M4A1 is incapable of doing so).
It also has a foregrip attached just like USMC Force Recon M4A1s, though it is merely cosmetic and does not affect its handling in any way. It does not have any variants that can be fitted with muzzle suppressors.
M4A3 M203
This is a premium asset that requires ownership of the Operation Arrowhead expansion pack.
Armoury Description![The M4A3 M203 5.56 mm carbine.]()
The M4A3 M203 is the grenadier variant of the M4A3 carbine but is utilised exclusively by Czech special operations. It was added with the release of the Operation Arrowhead expansion pack.
Just like the M4A1 M203, it is functionally identical in every aspect aside from using a desert camouflage finish and a laser pointer. The M4A3 M203 is always equipped with an ACOG riflescope.
Along with the baseline M4A3, it does not have any variants that can be fitted with a muzzle suppressor.
Вооружение самолетов. Применение. От hero from the Internet Доброго времени суток, летчик! В этом руководстве я попытаюсь коротко и доступно объяснить как вести огонь из орудий самолетов в Arma III![]()
1 В избранное В избранном Этот предмет добавлен в избранное.![]()
hero from the Internet![]()
Не в сети 28 мар. 2020 в 16:37 30 мар. 2020 в 8:44
Оглавление руководства1,214 уникальных посетителей 62 добавили в избранное ![]()
Вооружение![]()
Как применить вооружение на практике?![]()
![]()
Комментарии Вооружение![]()
Начну свой гайд с того, что расскажу вам о вооружении ванильных самолетов в Arma 3
Как пример взят самолет A-164 Wipeout
На самолетах вы можете заметить великое множество различного оружия - начиная от 30мм-ой пушки заканчивая 1100 фунтовой кассетной бомбой. Вам может показаться сложным запомнить название каждой ракеты и понять что она делает. Мне тоже это казалось сложным, но не стоит волноваться, вы к этому привыкните. На каждом самолете стоит идентичное вооружение, просто с разными наименованиями.
Рассмотрим основные виды ракет:
Начнем с того, что ракеты отличаются по своему назначению и у каждого класса ракет есть свое название
Ракета типа AA (Air-Air)
Фальшион-23 AA SM (Air-Air-Small-Radius)
Также стоит отметить, что есть ракеты типа AA MR (Medium-Radius)
Фальшион-23 - ракета маленького радиуса действия с тепловой системой наведенияРакета типа AG (Air-Ground)
Macer II AG ракета типа Земля-Воздух с тепловой системой наведения
Также есть ракеты ARM (Anti-Radiation Missile) с системой радиолокационной наводки
ARM ракеты подходят для уничтожения ПВО типа ZSU*Безымянные ракеты*
Как применить вооружение на практике?
Неуправляемые ракеты-болванки. Куда смотришь туда и стреляет - все просто :)
Авиационные бомбы
Есть два вида бомб: кассетные и фугасные (На картинке фугасные)
Кассетные бомбы используются для уничтожения пехоты или малобронированной техники. Фугасные в свою очередь эффективны против зданий или тяжелой техникиСамое трудное - это применять оружие на врага
Сейчас я попытаюсь доходчиво объяснить как это делать, приступим!
Стоит начать с того, чтобы уничтожить цель (например воздушную) ее нужно сначала захватить на радаре нажимая кнопку R (Конечно если ее видно на радаре)Обратите внимание, что Квадратики это наземные цели, а треугольники - воздушные
Пример наземной цели:
Пример воздушной цели:Радар включается на русскую Х или Ъ. На правый CTRL + Х или Ъ менять радиус действия радара.
После ждем, пока выбранная вами ракета наведется на цель (Вы это поймете по характерному писку) Затем делайте пуск по цели, готово! (Правда не исключено, что ракета не попадет с первого раза)
Aвиационные бомбы
Тут все несколько сложнее. Чтобы уничтожить наземную цель независимо от того техника это или пехота, нужно нажать сочетание клавиш CTRL+ПКМ и у вас откроется камера, через которую будет осуществляться наводка на вашу жертву.
Интерфейс камеры:
Далее для удобства нажимаем сочетание клавиш CTRL+Т(Англ) Включится режим AREA для фиксации камеры в одной точке. Можно включить тепловизор на N
Теперь самое важное, как сбросить бомбу так, чтобы она попала в цель? На самом деле все достаточно просто. Нужно выбрать лазерный целеуказатель на 4, а затем
включить наЛКМ, после меняем обратно вашу бомбу (так же на 4). Посмотрите на скриншот ниже
На нем вы можете заметить большой прямоугольник, в котором есть перекрестие. Также вы можете заметить маленький плюсик(перекрестие) чуть ниже большого перекрестия это то место, куда упадет ваша бомба. Так вот, прицел вашей бомбы должен быть внутри большого прямоугольника, тогда вы сбрасываете своего малыша и у вас получится что-то такое:
Надеюсь я смог кому-нибудь помочь своей статьей, если это так, то пожалуйста, оцени ее и оставь комментарий! :))
Читайте также: