
Как открыть песочницу в boneworks
Обновлено: 04.07.2024
ПРЕДУПРЕЖДЕНИЕ: в эту игру нельзя играть, если вы склонны к укачиванию!
В этом руководстве я научу вас играть в Boneworks нулевого уровня стресса.
Итак, теперь, когда вы знаете, что такое Boneworks, нужно знать кое-что важное. Boneworks очень сильно влияет на производительность, я могу нормально запустить его на Nvidia gtx980, но все, что ниже, вероятно, не будет работать, если вообще (см. Полные требования на странице магазина).
Начнем с основ. (вы можете изучить элементы управления на первом уровне режима истории)
Вы можете использовать функцию под названием Force Grab, которая означает, что если вы удерживаете захват и спусковой крючок, повернув руку к объекту, он полетит к вам. это очень полезно в некоторых ситуациях и может заставить вас почувствовать себя Люком Скайуокером. Вы также можете использовать замедленное движение в своих интересах. Удерживая кнопку на левом контроллере, вы можете активировать медленную ведьму, которая может упростить уклонение от вражеских атак (или просто притвориться, что вы играете в Superhot).
Вы также можете взаимодействовать со всем вокруг, будь то картонная коробка или монитор компьютера, вы можете взять его и использовать. Это очень помогает в бою. Закончились патроны? потерял нож? нет проблем, просто используйте ту деревянную доску или эту метлу в углу. Также будьте осторожны, чтобы не пропустить коробки с логотипом Boneworks на них, в них просто может быть несколько вкусностей.
Еще одна вещь: если вы пересекаетесь с большой металлической трубкой с синим светом в ней, бросьте в нее свое оружие или предметы коллекционирования. Почему? потому что, когда вы разблокируете уровни песочницы (объяснено позже), вам нужно собирать оружие, объекты для возрождения и т. д. Выбрасывая предметы, которых у вас еще нет, в мусорную корзину, вы автоматически запрашиваете эти предметы для песочницы.
Сложность: сложная (в цифрах)
Сложность: безмозглый легко
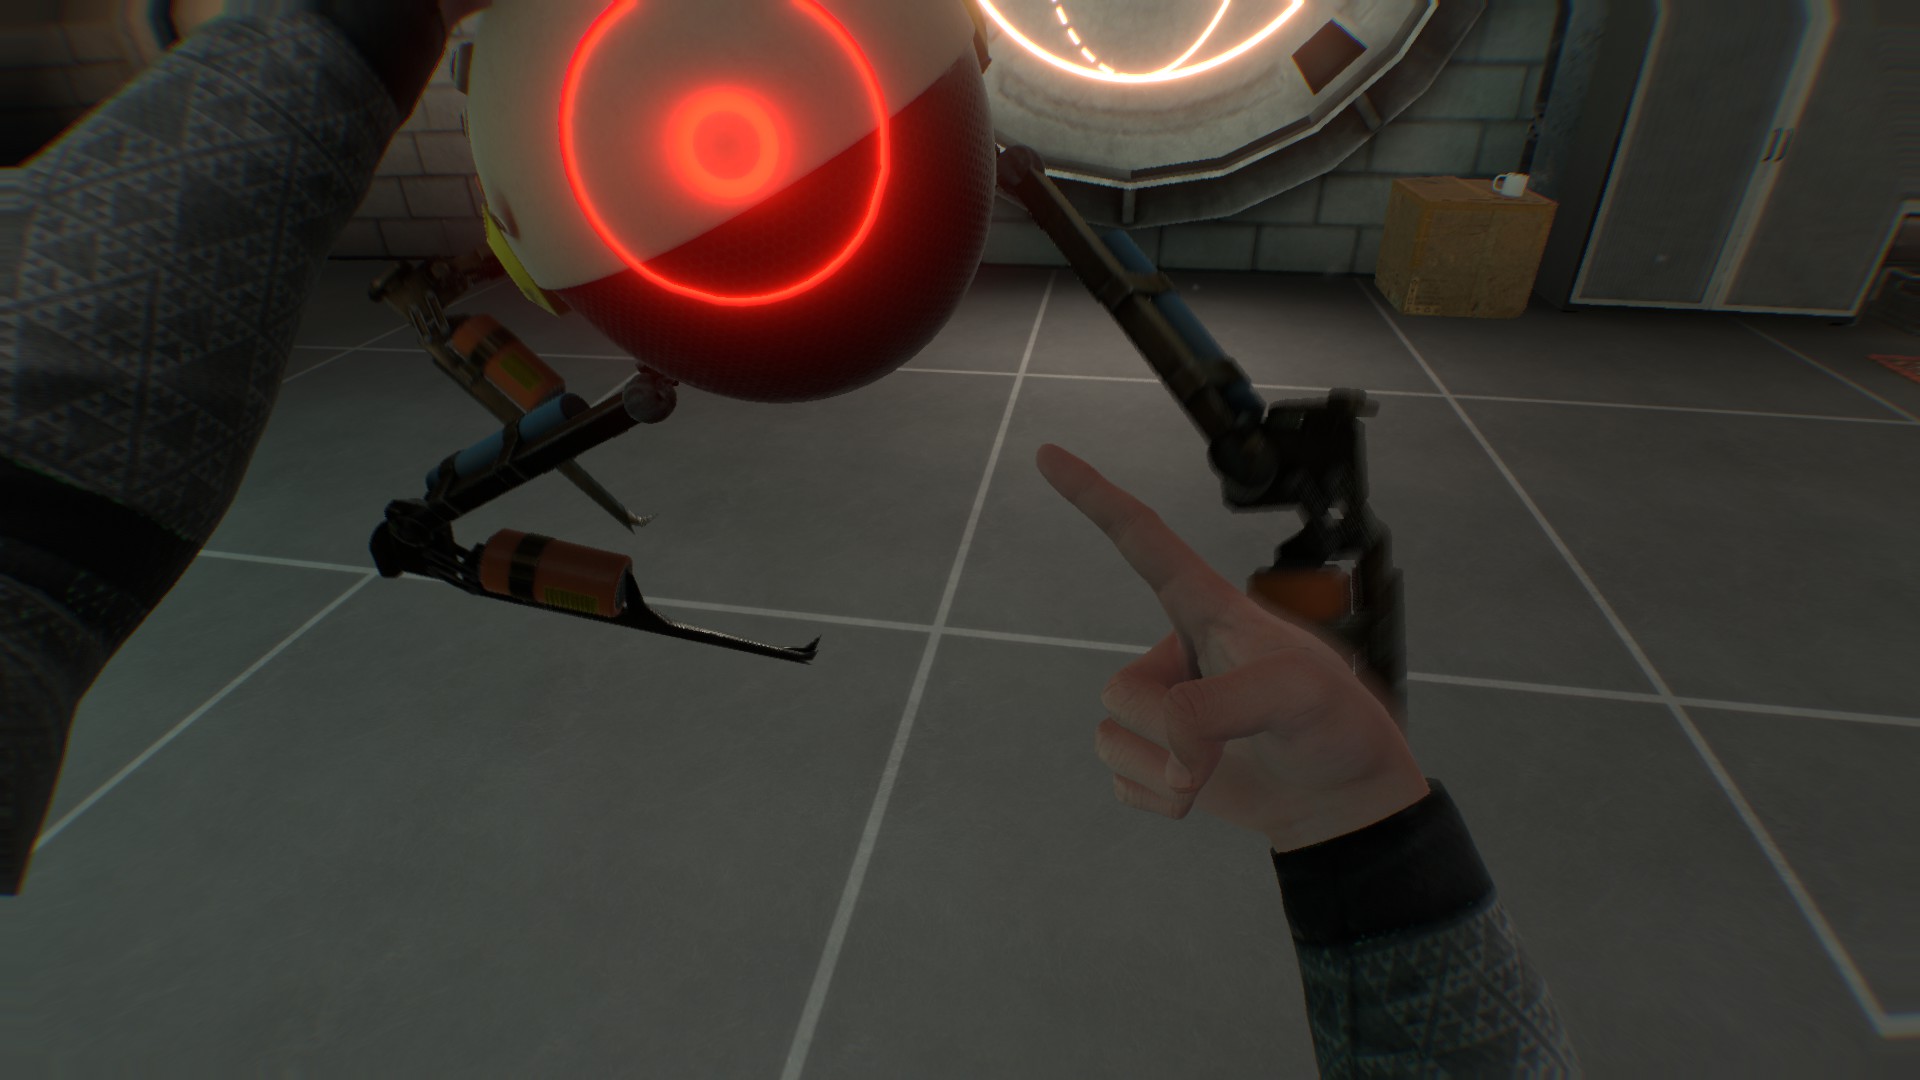
извините, нет фото Описание, потому что нет изображения: они размером с футбольный мяч, и они не будут атаковать.
Имя: Омни проектор
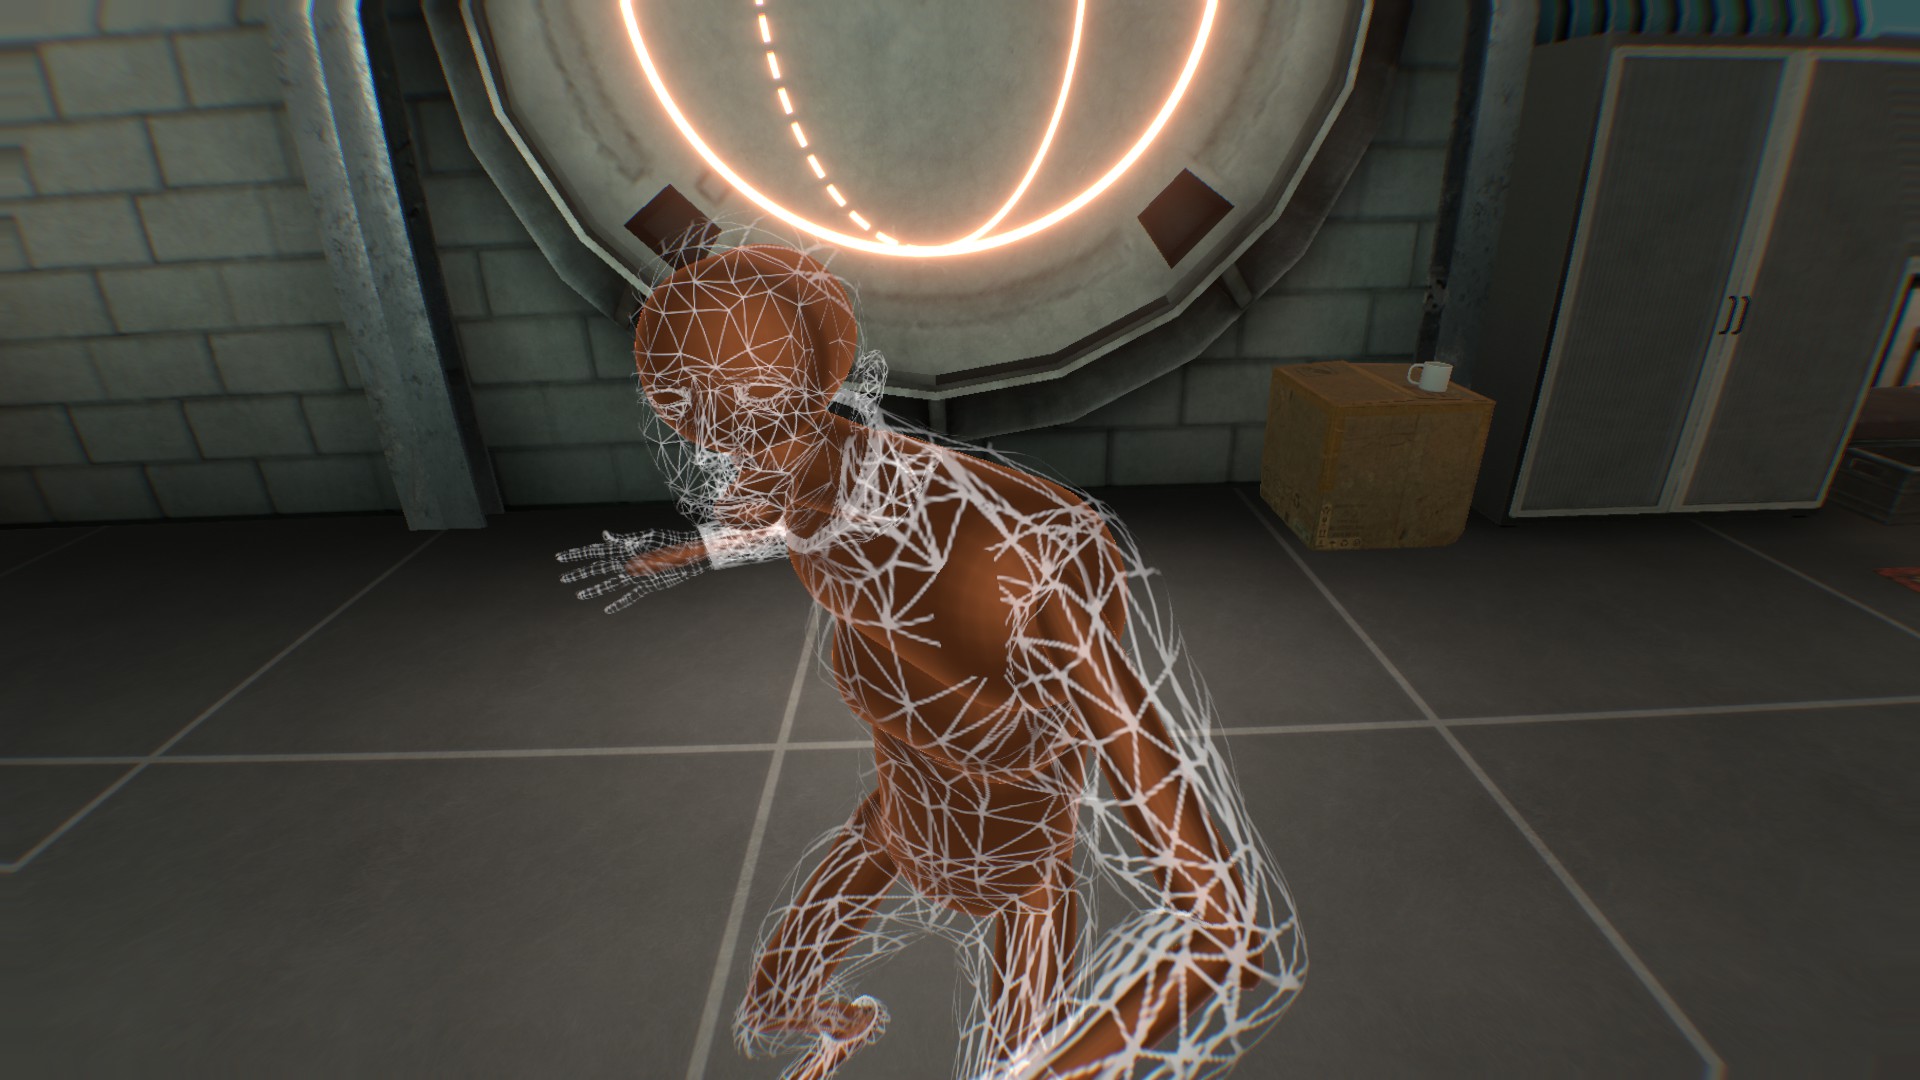
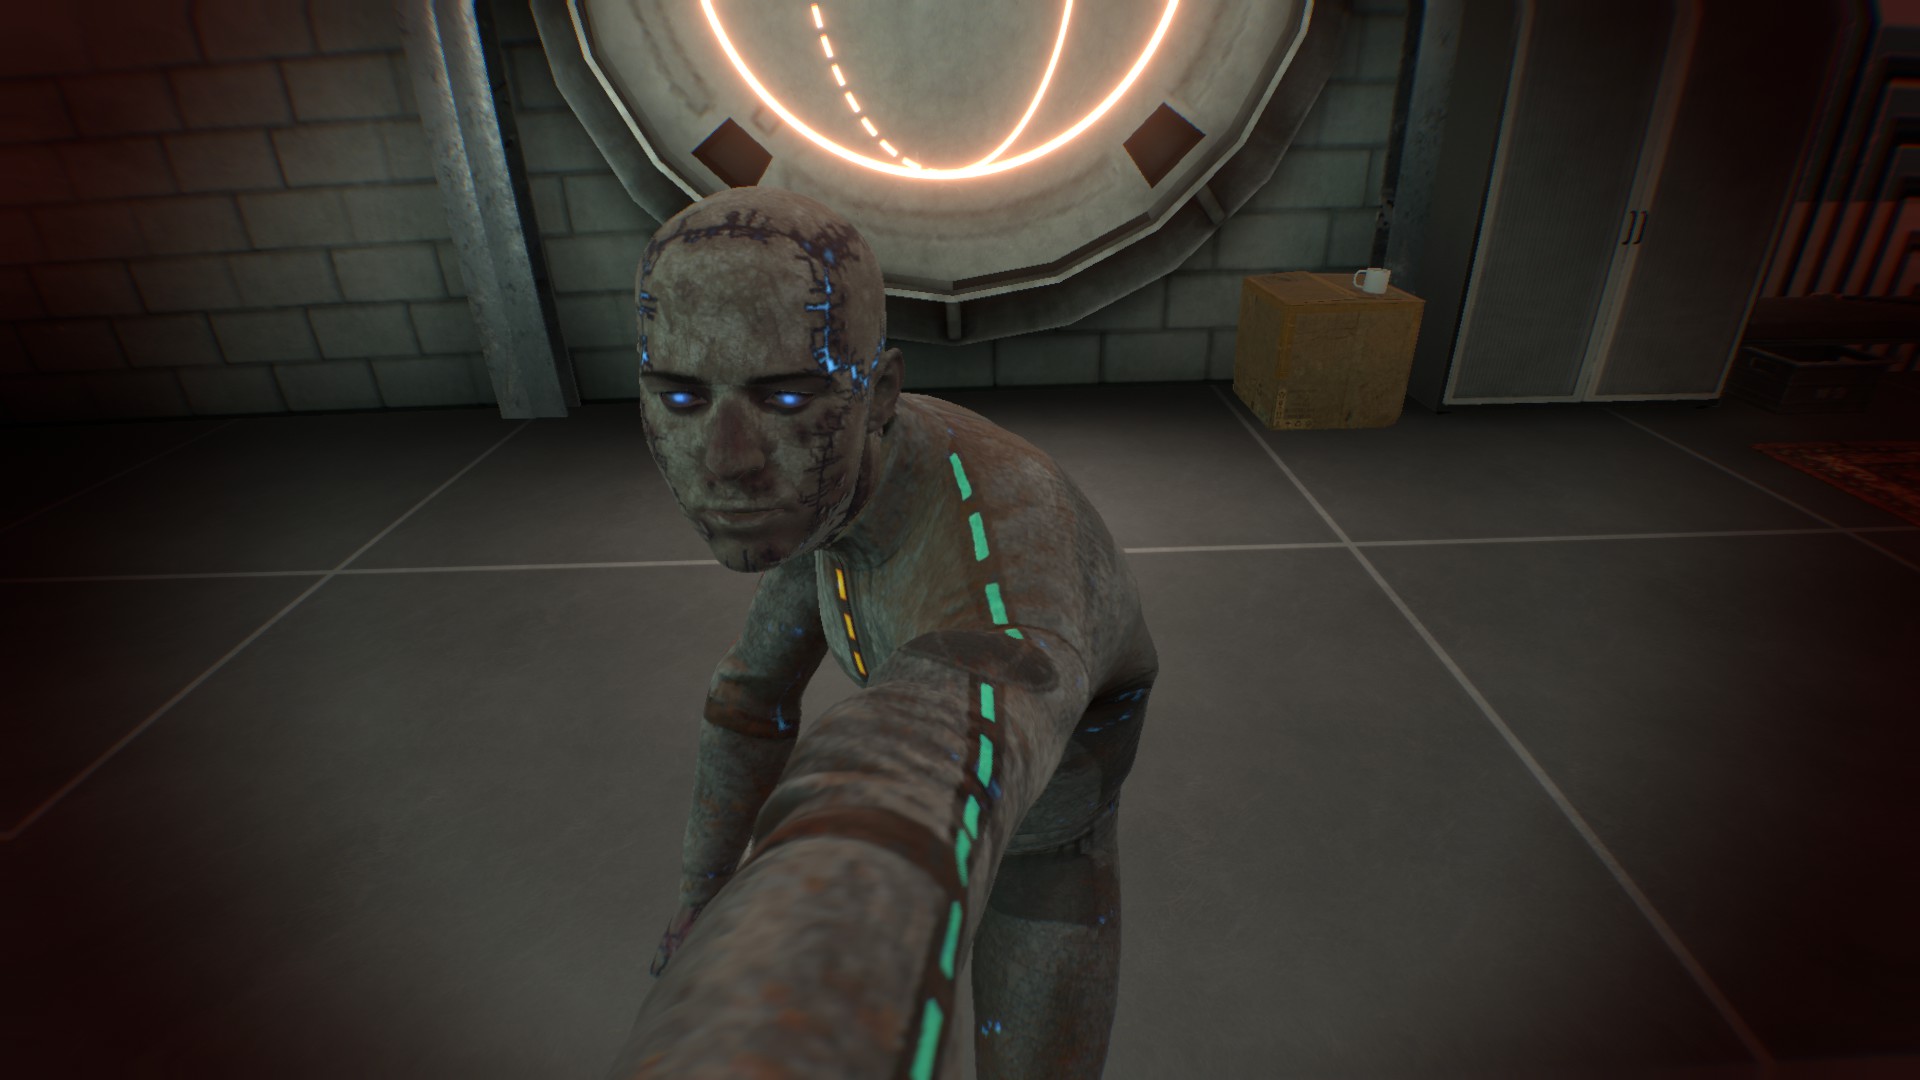
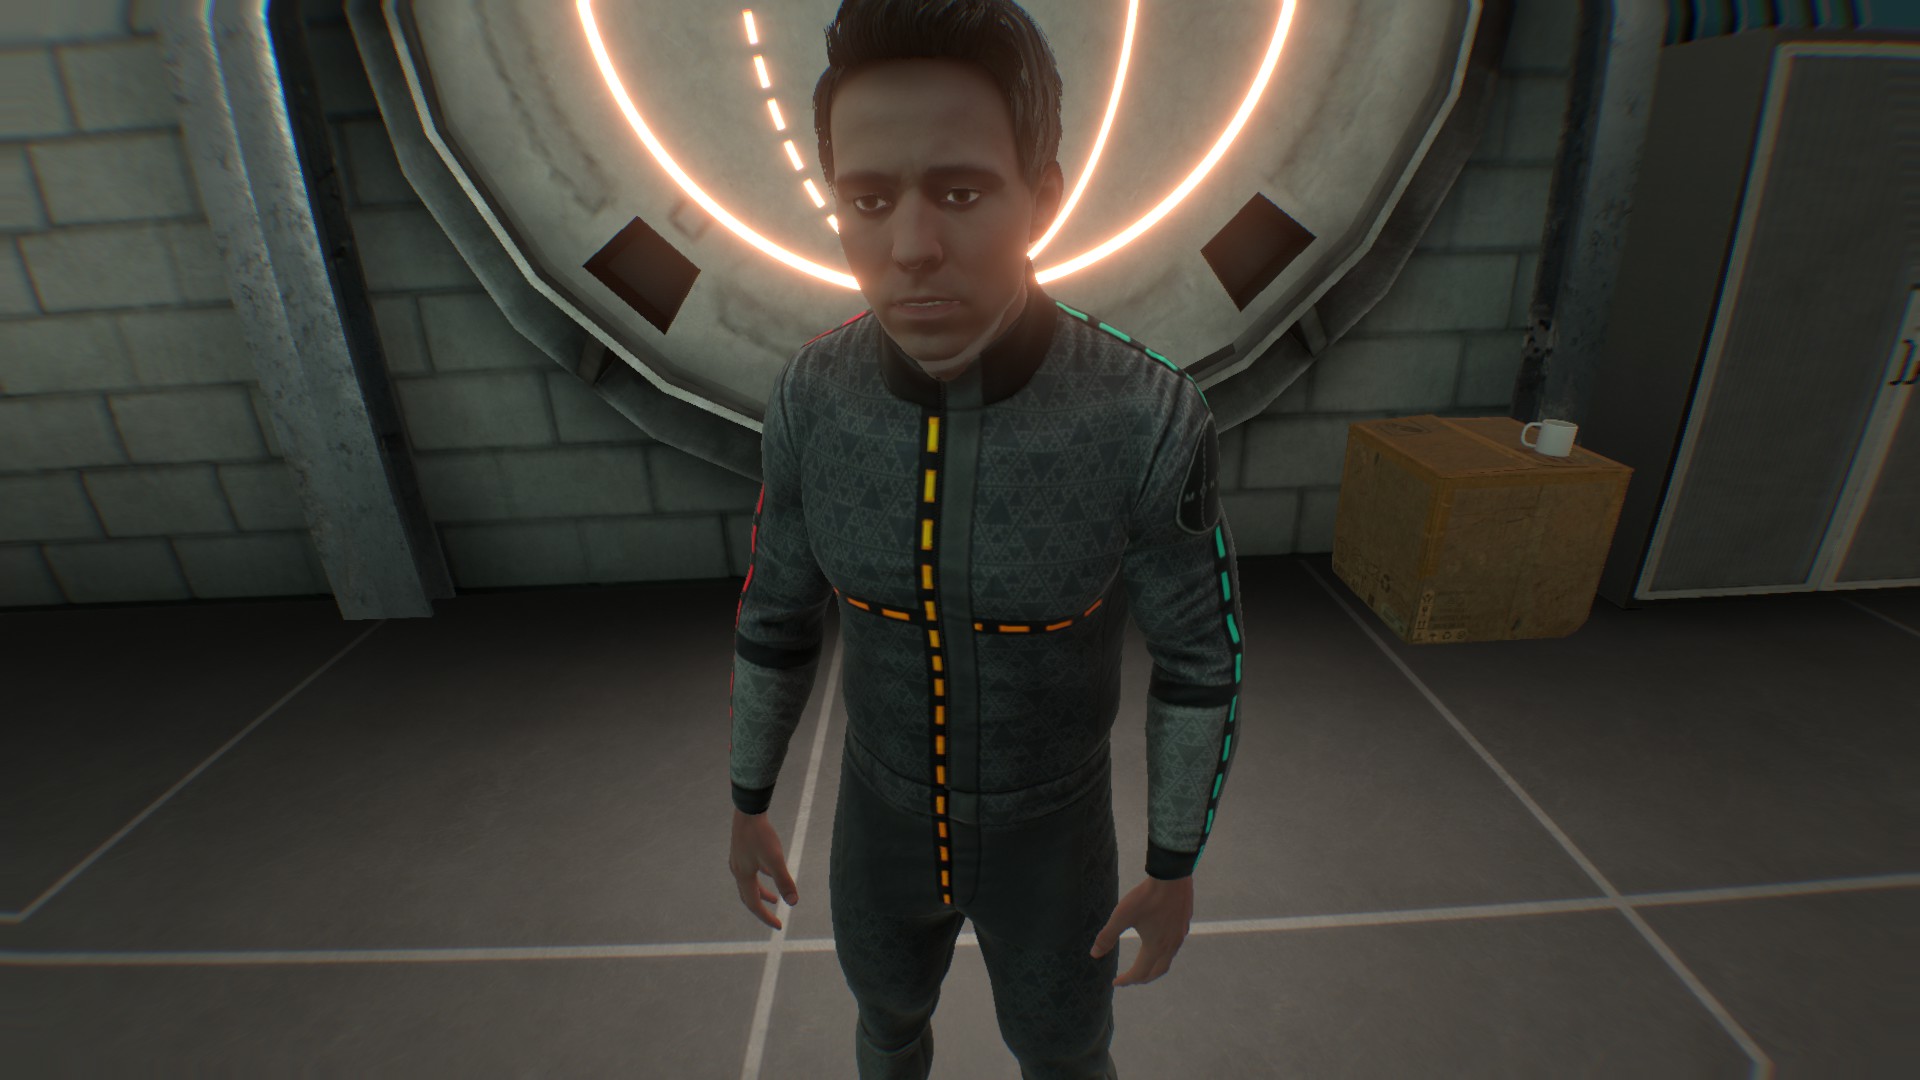
нет фото извините (снова) Описание, потому что нет фото: Это голограммы мужского размера в защитных костюмах. они также единственный враг в игре с оружием, так что будьте осторожны!
Я не знаю, почему фотографии не работают должным образом, но вы все равно можете просмотреть их, нажав на ссылку.
ЭТО НЕ ВСЕ ВРАГИ
Boneworks предлагает разнообразное оружие, от мечей до топоров и немного оружия! Вы можете собрать их в режиме истории, как объяснялось ранее.
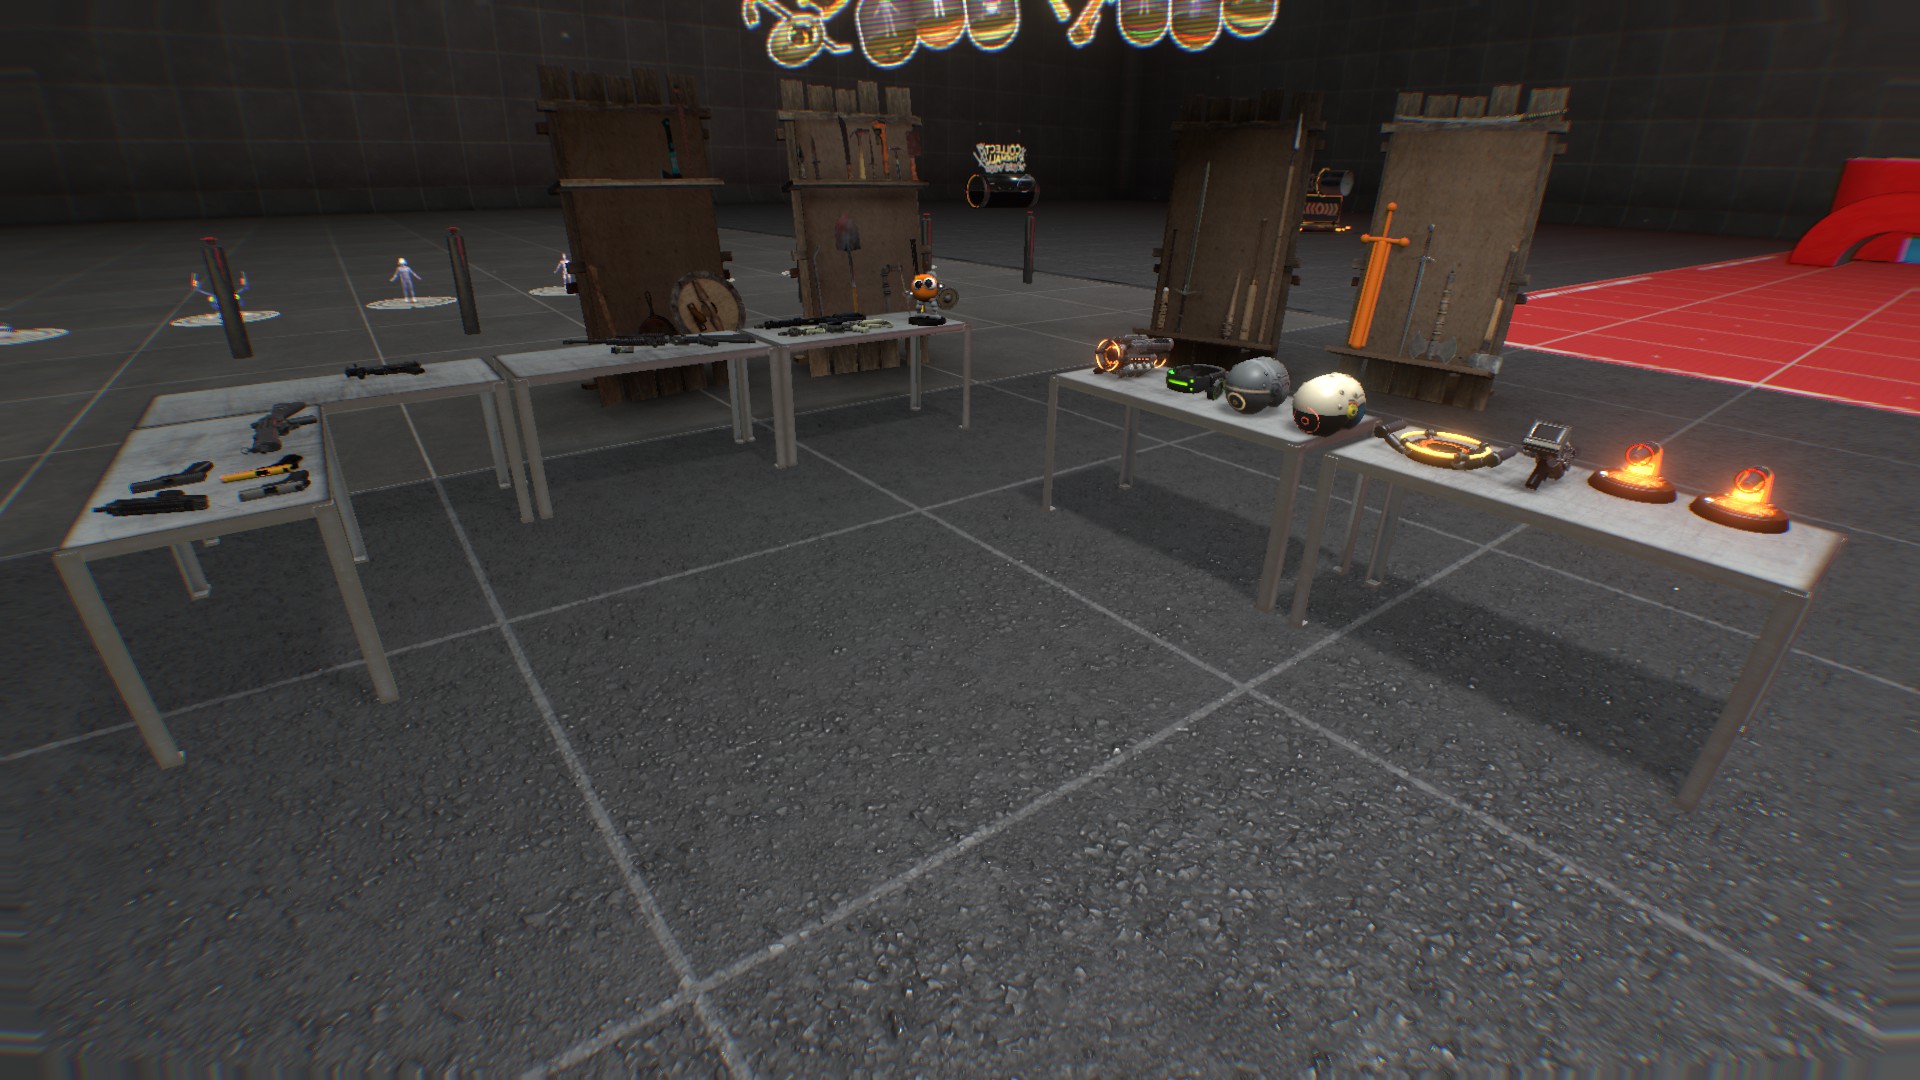
это изображение почти всего оружия в Boneworks. Как видите, здесь много мечей, топоров, тупого оружия, ружей и многого другого. Если у вас закончатся боеприпасы для вашего оружия, вы можете просто использовать их в качестве убийц черепов, а также любую другую вещь, которую вы найдете. Говоря об оружии, я могу дать вам небольшой их список. (перечислены не все пистолеты) (также нет фото, потому что я ленив) Есть три пистолета: Glock 17 и Sig p350 1911 года, также есть узи только с одним вариантом. есть также smg, такие как mp5 и mk18, оба с некоторыми вариантами. и, наконец, m16 с пятью вараинтами.
Что касается оружия, их очень много, так что, к сожалению, я не могу перечислить их все, поэтому вам просто нужно увидеть их лично.
Спасибо, что прочитали это, это мое первое руководство, и я надеюсь, что вы сочли его полезным, и я надеюсь, что вам понравится Boneworks.
скоро появятся другие гиды
wip: секреты доброй работы
wip: как круто уничтожать врагов
wip: как получить моды
. НЕ ЗАГРУЖАЙТЕ ПЕРЕЗАГРУЗИТЬ .

Это руководство покажет вам, как разблокировать режим песочницы в Boneworks.
Пошаговое руководство по разблокировке режима песочницы
Возможно вам будет интересно: Jurassic World Evolution - совместимость всех травоядных, палеоботанический лист

Sandbox is a post-game mode where the player can mess around with various physics objects and tools freely. It features buttons to spawn enemies along with a utility gun to spawn or remove objects. Weapons placed in Reclamation Bins are available to spawn in sandbox; enemy capsules can also be thrown in reclamation bins to unlock enemies. The sandbox map is a very large, mostly empty space with the notable areas being the center area and foam castle. The center area provides ammo and a few simple props, as well as a long line of buttons. One quarter of the map features stacks of climbable foam blocks which are incredibly light for their size. A giant clipboard including information about future updates can be found next to the Bullet Banker machine.
Unlocking
Sandbox is available only when its module is plugged in on the Main Menu. The module can be found by the Reclamation Bin in the Museum. After reclaiming it and completing the scene, it will appear in a Bonebox. it can then be plugged in to a socket near the left wall to unlock sandbox as a mode of play.
As of one of the most recent updates, the “Sandbox” module in the Archive Room has been replaced with a “Blankbox” module instead. This module will unlock a different Sandbox map, which is a large and empty sandbox map. The map was created with the reason of allowing people with lower specs to get a good experience out of Sandbox.
MuseumBasement
MuseumBasement, also the generic sandbox map from earlier versions of the game, is one of the five sandbox maps currently present in BONEWORKS. Upon spawning, the player will find themselves in a large box. This box includes a cannon machine for launching objects, tables with collected firearms and gadgets (for example, the Utility Gun), alongside headsets resembling those of the Ford VR Junkie. Near the spawn is also a health-setter machine, alongside the Bullet Banker, which can dispense both light and medium ammo. The Bullet Banker also includes a button on the back, labeled "Emergency Make it Rain Mode", that will be set to Inactive by default. By pressing the button, it allows the player to hold ammo buttons and they will continuously dispense ammo. There is also an area to the top-right of the map, which contains multiple gym blocks set up as a playground.
Also of note, there is a long line of buttons to the right side that can spawn NPCs without forcing the player to use the Utility Gun. Of note is that you can only spawn gathered NPCs, and buttons for NPCs you do not have gathered yet do not work. There is also a red type of ammo on the Bullet Banker, but it is nonfunctional. Many speculate that this will be a new type of ammo, likely a shotgun.
Also of note is that two tunnels have been added to the left side of the map. The bottom one is blocked off by a black wall, with large red text reading “QUARANTINE”. The tunnel seems to lead into another room, with what appears to be a seesaw sort of thing. The top tunnel seems to just be blocked by a black wall, with no text on it.

BONEWORKS Guides:
Sandbox Mode Guide
- Go to the menu and load the breakroom level.
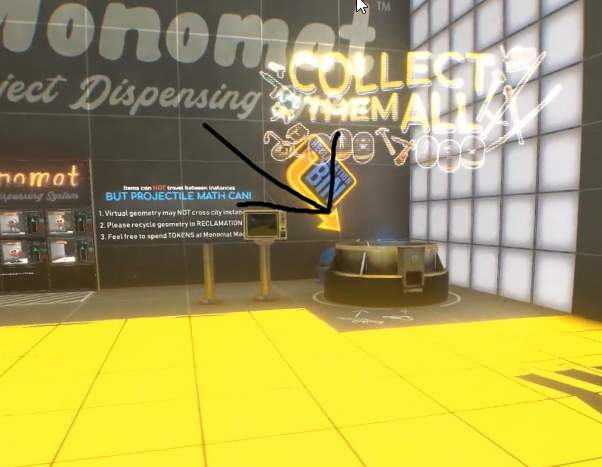
- Throw all of the items into the blue/archive circle.
- Continue playing the game until you reach the corridor right before the area where there are destroyable windows and the parkour room. On the left there should be a hidden door which you can just push yourself through.
- Inside the hidden room you will find a big crate with a skull logo on it. Destroy it and pick up the sandbox module.
- Carry the module to the end of the museum (the room right before the shooting range).
- Throw the sandbox module into the reclamation bin. It should look like this.
- Now finish the level and once you have reached the street level you can return to the main menu. There will now be a box next to the module thing.
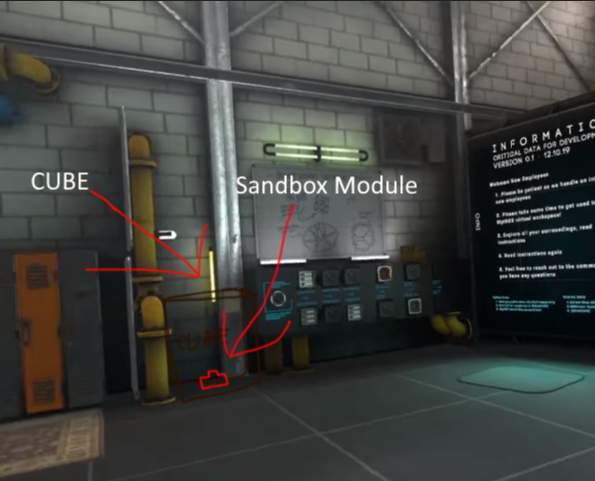
- Destroy the box and insert the module that you can find inside here.
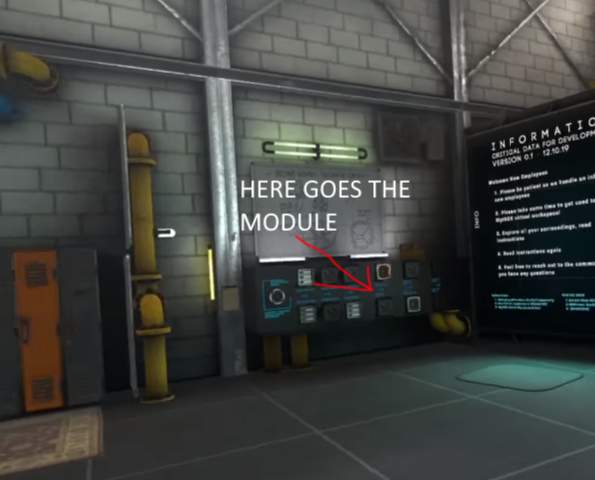
- And you should be able to select it in the menu by clicking on story until it changes to sandbox.
Throughout the game players have many opportunities to unlock many items in the Sandbox game mode. This page is a guide for how to unlock each.
The locations are accurate as of 1.4, and can be found using Greased Scotsman's Revamped Story Mode Guide: YouTube Playlist Link. Each location is only a single instance of where to find the item and may likely not be the only spot, but is probably the easier location to get it from.
Some objects/NPCs are found in the form of a capsule/gachapon with a hologram of the Object/NPC inside it. They must be claimed in a Reclamation Bin before it is unlocked. The level does NOT need to be completed for them to be saved, that's only required for Ammo! (Tested and Confirmed as of patch 1.6)
Items are categorized according to where they can be found in the Utility Gun menu.
- This is what the item's name is in the Utility Gun if it's majorly different from the item's normal name.
Museum Door Trick: To get anything from the shooting range or further into the Reclamation Bin, you must use a metal trash can next to the door to stop it from going all the way down. It's the door before the turnstile and green beam, not the one after.
Contents
Spawnables
Museum Basement Sandbox Module
Museum, directly to the right of the Reclamation Bin.
Redacted Sandbox Module
Museum, in a Bonebox to the left of the Reclamation Bin
Blankbox Sandbox Module
Museum, Found in a Bonebox in the Archival Room. The room only opens after archiving all 3 items in the Breakroom (throw all 3 items in the blue bin, not the red bin)
Hoverjunkers Sandbox Module
Tower, In the Hoverjunkers Room.
Handgun Range Sandbox Module
Redacted Sandbox, Go through the void door several times until the Bonebox appears at the top, launch through the Reclamation Bin that appears high up the back wall in the main area (with the dev manipulator)
Tuscany Sandbox Module
Complete the combat trial in the Handgun Range Sandbox
Blunt Weapons
Hand Hammer
Central Station, In the room that needs the Red Key, downstairs in the milk crate
Hammer
Museum, Leaning against the “Breaking the Barrels” display in the Puzzle Room.
Sledgehammer
Museum, Leaning against the “Breaking the Glass” display in the Puzzle Room.
Crowbar
Museum, There are three in the room with the Reclamation Bin.
Lead Pipe
Museum, Combat Area. (Needs door trick, see above)
Wrench
Museum, Combat Area. (Needs door trick, see above)
Shovel
Runoff, In the Melon area just past the first Reclamation Bin.
Mining Pickaxe
Streets, In a Bonebox on the top of the first building on the right.(Needs more description)
Baseball Bat
Museum, Combat Area. (Needs door trick, see above)
Barbed Bat
Sewers, In a Bonebox on a platform above the large square room with the pit in the middle. Jump to the metal chain and climb to get up to it. Beware the Crab up there.
Golf Club
Streets, Where all the Raffle Boxes are. Break the raffle boxes for a chance at the club.
Noodledog
Museum, Combat Area. (Needs door trick, see above)
Spiked Club
Tower, In a Bonebox on the ceiling of the Knife Room, above the door you enter from.
Viking Shield
Museum, Found against the left wall in the Archival Room. The room only opens after archiving all 3 items in the Breakroom (throw all 3 items in the blue bin, not the red bin)
Baton
RNG from any Monomat Giftbox. Sewers is the best bet with 2 chances.
Frying Pan
Museum, Combat Area. (Needs door trick, see above)
Soup Can
Museum, Gift Shop (Needs door trick, see above)
Pistols
Uses Light Ammo (Yellow)(Shared with SMGs)
Eder 22
Museum, Right next to the Reclamation Bin.
Gun Range Sandbox, Everywhere.
M1911
Museum, Combat Area. (Needs door trick, see above)
Uses Light Ammo (Yellow)(Shared with Pistols)
Micro Uzi
Museum, Combat Area. (Needs door trick, see above)
Museum, Combat Area. (Needs door trick, see above)
Black with Ironsights
Runoff, Monomat, 250 cost.
Cyan with Flashlight
Sewers, In the storage container in the middle of the room, with an arrow on the floor pointing to it and writing that says "Over Here". It's in the same room as the nightvision goggles in the dark corner.
Red Dot Sight
Central Station, In the storage container in the storage room on the right after you get off the trolley
Yellow Saberlake
Tower, In the storage container right after the Dance Room.
Rifles
Uses Medium Ammo (Orange)
Base M16
Central Station, In a locker in the Purple Key room.
Ironsights
Runoff, Kicked under the door before it closes and the start of the level.
Laser and Foregrip
Tower, In the storage container through the second Green Key door.
Runoff, In a storage crate down the dark alley on Runoff Island, by the massive "Down with Monogon" graffiti and Save Point.
Navy Blue with Ironsights
Warehouse, In a storage crate above the first room of the first warehouse building, up the stairs and across the wooden walkway.
Bright Blue with Laser and Foregrip
Tower, Climb the metal lattice behind the Monomat, drop down above the Ultra Mersion billboard (to the left of the Monomat), and follow the platform to the storage container. Alternate route, between the dance room and the security office, break the glass on the right and fall down onto the same platform with the storage container.
Tan with Holosight
Museum, Combat Area. (Needs door trick, see above)
Yellow Saberlake
Tower, In the left storage crate, when you get to the final level of the area.
Special
Balloon Gun
Streets, In a Bonebox above the doorway to the Playroom.
Stapler
Hover Junkers Sandbox, On a rock right as you leave the shipping crate. Find the Dragonballs, get the Yellow Key, get to the end of the level, use the Yellow Key to unlock the Reclamation Bin.
WARNING: It has to be the Stapler you pick up from the rock that has the removable clip, the one on your ankle doesn't count!
NullRat
Sewers, In a Bonebox in the Purple Key area
NullBody
Museum, Right next to the Reclamation Bin.
NullBody Corrupted
Sewers, In a Bonebox in the melon packaging room, next to the neon purple room.
Dungeon, In a Bonebox above the end of the level. Jump from where the Reclamation Bin is.
Ford VR Junkie
Tower, In a Bonebox beside the lift that ends the level. Climb up the lights like a ladder and its on the left.
Zombish
Zombish VR Junkie
Warehouse, In a Bonebox above the entrance room. Climb up the building above the Monomat.
Crablet
Warehouse, In a Bonebox at the end of the level. Look up at the wall at the back of the train and shoot it (way up!)
King Crablet
Time tower, In a Bonebox in the left cubby on the wall, climb up using gravity cups or nimbus.
Ford Head
Tower, In a Bonebox above the garden in the middle of the final area of the level. Parkour over to the garden and shoot it above you.
Turret
Streets, In a Bonebox on top of the floating structure next to the raffle boxes. Use the side objects to rotate the center structure until the Bonebox falls.
Omniprojectors
Runoff, In a Bonebox under other breakable boxes at the bottom of the garbage drop after the melon area. (See Shovel)
Omniwrecker
Museum, Bonebox next to Gravity Room. Complete BOSSCLAW minigame. (Needs door trick, see above)
OmniTurret
Runoff, In a Bonebox in the "Filter Master" room.
Props
Apollo
Museum, In the Monomat next to the Reclamation Bin. Also one in the Gift Shop at the end of the level (Needs door trick, see above)
Brick
Museum, In the room with the Punching Bag.
Duck Season)
Museum, Gift Shop, RNG in the prize box behind the counter (Needs door trick, see above)
Carboard Box
Central Station, In a Bonebox in the room with all the Crablet boxes near the end of the level.
Coffee Cup
Museum, Gift Shop (Needs door trick, see above)
Crown
Streets, On the giant Apollo's head in the Yellow Key/StressLevelZero/FanstasyLand Room
Monkey Doll
Streets, On the carrousel, cannot be holstered
Plant
Tower, Immediately after you leave the Knife room, it's in a garbage on the right.
Shopping Cart
Tower, Above the Reclamation Bin at the end of the level, in a desk drawer.
Watermelon
Sewers, In the Neon Melon room, on a shelf with some boxes on the right.
Destructible Wooden Crate
Streets, Go past the Reclamation Bin on the ground and find the building at the end. Its in a Bonebox on the 2nd floor.
Indestructible 1M Crate
Indestructible 2M Crate
Warehouse, In a Bonebox behind the final building of the area, near the ladder and Katar Bonebox.
Red Gym Block A
Museum, Directly to the right of the Reclamation Bin.
Dark Grey Gym Block B
Streets, On the floor at the end of the "Down with Monogon" Alley
Blue Gym Block C
Runoff, On a crate at the end of the garbage drop after the melon area. (See Shovel)
Yellow Gym Block D
Sewers, In a Bonebox right after you open the Purple Key door.
White Gym Block E
Tower, On the first floor of Tower, look for the "Gun, Projectile Physics" Hologram. Its in a milk crate by the doorway before the Save Point.
Orange Gym Trapezoid A
Streets, On the floor at the back by the actual Orange Gym Trapezoid.
Yellow Gym Trapezoid B
Runoff, Yellow Milk Crate by the dark alley on Runoff Island.
Blue Gym Trapezoid C
Central station, In a garbage can by the vending machines and gift shop of the main terminal.
Grey Gym Trapezoid D
Tower, In a Bonebox in one of the train modules.
Gym Disc A
Handgun Range, Behind a pallet in the chained area by the "Outbound" shipping containers in the first area before you turn off any forcefields.
Red Gym Disc B
Handgun Range, On the first generator in the room with the 2 giant electrical generators, after the pile of crates that contain the Gym Giant Soccer Ball. See also Gym D12.
Gym Cone A
Handgun Range, In a Bonebox at the top of some shelves by the "Outbound" shipping containers in the first area before you turn off any forcefields.
Gym Cone B
Handgun Range, In a milk crate on the roof of the first building in the Handgun time trial.
Yellow Gym Cube Small
Runoff, In one of the lockers in the Shower room at the start of the level.
White Gym Cube 1M
Redacted Chamber, In the Main room, in a milk crate on top of the ductwork on the ceiling. After going through the void gate and jumping down into the red room, locate the fan opening above the ductwork and jump down from there. (See Handgun Range Sandbox Module at the top for access to the Reclamation Bin)
Orange Gym Cube 2M
Redacted Chamber, In a milk crate at the back of the red room, on top of a yellow climbable pipe.(See Handgun Range Sandbox Module at the top for access to the Reclamation Bin)
Blue Gym Cube 3M
Redacted Chamber, At the top after the void gate, jump to the blue pipes on the right and climb across them and it's in a Bonebox on the right. (See Handgun Range Sandbox Module at the top for access to the Reclamation Bin)
White Gym Cylinder Small
Tower, On the counter of the Red Key room (Swords and Spiders store), next to the Green Key.
Gym Half Cylinder A
Tower, In a Bonebox in the garden at the center of the top level.
Gym Half Cylinder B
Handgun Range, In a milk crate on a shelf above the exit door in the room with the storage container that has the Katar in it.
Red and Blue Gym Cylinder Large A
Runoff, In a Bonebox at the end of Runoff Trench A. (Before Runoff Upstreet)
Gym Cylinder Large B
Handgun Range, In a milk crate on top of the platform holding up the Hexagonal Containers before the ending portal.
Blue Gym "Octagon" Hexagon
Runoff, In a Bonebox in the final room of the level. Go down the slope and go into the darkness opposite of the end portal of the level.
Gym Beam
Handgun Range, Continue climbing the pipes from Gym D20 until you reach the next room. Climb the pipes up to the ductwork above the ammo dispenser and it's in a milk crate at the end.
Red and Blue Gym Prism
Sewers, In a Bonebox across from where the Purple Key sits in the big room with the Yellow Key and Door. GreasedScotsman's Long Climb
Blue Gym Torus
Handgun Range, In a Dumpster in the first area before you disable any forcefields.
Gym Arch
Handgun Range, In a milk crate in one of the upper "Outbound" shipping containers in the first area before you turn off any forcefields. (Use the Axe to pull yourself up)
Gym Shallow Ramp
Handgun Range, After shooting the red target and having the bridge fall, it will be on the floor along the wall to the left.
Gym Tall Ramp
Runoff, After the "Filter Master" room (See OmniTurret), before jumping down, go through the door to the right of the Save Point, and it will be in one of the blue garbage bins on the shelves.
Blue Gym Ball
Streets, In the breakroom with the Monomat, it's behind the miniature house
Gym Giant Soccer Ball
Handgun Range, In a Bonebox at the bottom of a pile of crates immediately after getting Gym Shallow Ramp.
Gym D4
Handgun Range, In a milk crate immediately above the doors after turning off the first forcefield.
Gym D6
Handgun Range, In a milk crate above the button that turns off the first forcefield.
Gym D8
Gym D10
Handgun Range, In a milk crate on the upper level of the final area of the Handgun time trial.
Gym D12
Handgun Range, In a milk crate above the door in the room with the 2 giant electrical generators, after the pile of crates that contain the Gym Giant Soccer Ball. See also Red Gym Disc B.
Gym D20
Handgun Range, From the room with the Katar storage container, climb the pipes down and over the green lava until you get to the shelf with the milk crate in it.
Blades
Hatchet
Museum, Combat Area. (Needs door trick, see above)
Firefighter Axe
Warehouse, Leaning on the crates beside the final Save Point.
Double Axe
Dungeon, In the storage container in the Blue Key room.
Norse Axe
Dungeon, Found on the table where the Red Key is.
Kunai
Museum, Combat Area. (Needs door trick, see above)
Combat Knife
Central Station, In a locker in the Purple Key room.
Boot Knife
Museum, Combat Area. (Needs door trick, see above)
Half Sword
Museum, Combat Area. (Needs door trick, see above)
Claymore
Museum, Combat Area. (Needs door trick, see above)
Katana
Time Tower, In a Bonebox attached to the roof far above the Gravity Core. Shoot the box and try not to get skewered when it falls.
Katar
Warehouse, In a Bonebox under a bunch of boxes behind the final building of the area, near the ladder and Indestructible 2M Crate
Spear
Runoff, In a Bonebox near the first Reclamation Bin.
Gadgets
Utility Gun
Time Tower Monomat, 22100 Cost
Developer Manipulator
Time Tower Monomat, 19600 Cost
Gravity Welder
Hover Junkers Sandbox, On the fountain in the middle of the first flight area surrounded by barbed wire. Find the Dragonballs, get the Yellow Key, get to the end of the level, use the Yellow Key to unlock the Reclamation Bin.
Power Puncher
Time Tower Monomat, 12500 Cost
Gravity Cup
Time Tower Monomat, 17200 Cost
Gravity Plate
Time Tower Monomat, 15000 Cost
Gravity Core
Time Tower, Part of the final puzzle. Throw a core into the Reclamation Bin before you finish the fight.
Nimbus
Time Tower Monomat, 24500 Cost
The Wasp
Hover Junkers Sandbox, Find the Dragonballs, get the Yellow Key, get to the end of the level, the gachapon is next to the Reclamation Bin.
Omniway
Streets, In the Bonebox at the end of the Yellow Key/StressLevelZero/FanstasyLand Room
Pallet Jack
Gun Range Sandbox, Near the end portal, above the catwalk (on the crates with the pallet jack)
Читайте также: