
Gemcraft labyrinth прохождение
Обновлено: 05.07.2024
You now have control of a gem's color when creating one. There are restrictions to this -- each level (barring crafting pylon levels) has only two colors of gems available from the beginning, though you can opt to unlock the other colors with a mana investment.
Non-damaging secondary effects now have a guaranteed infliction rate, though their effects are less potent to compensate. For instance, Armor Tearing gems always reduce armor by 0.7 per hit instead of each hit getting a 70% chance to reduce armor by 1. Shock gems are exempt from this change.
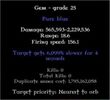
Pure Gems - Grade 25


Mana Shards [ ]
In certain levels, there are "mana shards." If you place a gem in range of these shards, they will shoot the shards and give you mana for each shot. This map (created by Lurlock) shows the mana shard values for each level.
The colours are just gradiated: Green means more mana.
Gameplay [ ]
The most notable change between Labyrinth and previous GemCraft games is in the scoring system. Instead of scoring based on the number of monsters killed, each field has a set amount of experience that must be increased through various multipliers. These include battle amulets, summoning, and battle settings selected prior to starting. Labyrinth also takes advantage of having the Sorcerer's Package or formerly, Premium Edition, which allows players to purchase additional skills, skill points, and battle settings for a $4.99 donation. This is a one-time fee and is not required to complete the main storyline, but it is mainly for making the game more challenging to get more scores and xp, and in some cases, making the game easier to complete.
GemCraft Labyrinth has a total of 8 gem types just like in the previous 2 games, 27 skills with 9 of them only in the Sorcerer's Package, and 30 battle settings with 10 settings exclusive to the Sorcerer's Package.
There are 8 types of gems in GCL:
Red Gem: Bloodbound gem
Orange Gem: Mana Gathering
Yellow Gem: Multiple Damage gem
Lime Gem: Chain Hit gem
Green Gem: Poisonous gem
Cyan Gem: Shocking gem
Blue Gem: Slowing Gem
Purple Gem: Armor Tearing gem
Battle Settings have four different modifications, including Amount of Monsters, Monster Hit Points, Wave Composition, and Number of Waves, all of which have different subsets. In addition, there are also six additional options that can be turned on and off individually. These include Higher Monster Armor, Faster Monsters, Banished Monsters Heal, Banishment Cost Extra Increase, Waves Getting Tougher Faster, and Shadow Clash. Each of these options provide multipliers towards the field experience, allowing players to replay with higher difficulties for more experience.
The fields in GemCraft Labyrinth are organized into a 13x13 grid, giving a total of 169 Fields that the player navigates by completing connecting fields or by completing certain conditions to unlock corner fields. All Fields are marked by co-ordinates from A to M which are Columns, and 1 to 13 which are rows, giving players easy reference to each field. The player starts with Field G13 unlocked, and unlocks fields in a semi-linear order until reaching the final battle at Field G7. This process allows players to unlock up to 165 fields. The four corner fields do not have connecting paths and unlock by earning specific accomplishments, which then opens them for play regardless of progress.
Field A1 (Northwest corner): In 1 game, do 7000 kills on Field L9
Field A13 (Southwest corner): Kill at least 12 Apparitions
Field M1 (Northeast corner): 200000 monsters
Field M13 (Southeast corner): Beat at least 100 waves on Field K9
Other changes [ ]
- Gem and monster hue removed. The colors of the numbers on the wavestones now indicate progress in the waves from green to red.
- There are now 12 different shapes of gems. New shapes have been added in between the 6 different shapes from the previous games.
- Gems can now fire at structures to destroy them.
- Gems have targetting priorities. Selecting a monster also causes towers to focus fire on it.
- Gem targetting seems to be "smarter" and gems avoid wasting their shots by not targeting monsters that are going to be killed by a shot from another gem.
- The gem combining mechanics have changed to disallow supergemming.
- New shortcuts have been added: D to duplicate a gem, U to upgrade a gem and X to recycle a gem to return 70% of its mana value.
- Demolition is now possible.
- The wizard tower is replaced by the Magic Orb as the player's base.
- "Restart Battle" and "Return to the map" now need confirmation by clicking on the button again.
- The skills panel now appears after selecting a field and battle traits, rather than having its dedicated button on the map screen.
- Certain skills have no upper limit, providing a reward for players who reach high wizard levels.
- Moving the mouse over a shrine displays its area of effect.
- "Stats" and "battle amulets" info boxes can be viewed during battles.
- A notification pops up when an amulet is earned.
Story [ ]
The story of GemCraft Labyrinth follows a wizard who has spent a few decades guarding a small, remote village while awaiting a great test from the Wizard council.
Two weeks prior to the start of the game, the weather had become strange and sinister as monsters gathered to attack. While the wizard's defenses have held strong, the attacks on the town grew fiercer over time even as he's forced to upgrade them. Ten days later, all of the townspeople had either fled from the town or got killed by the monsters, leaving the main character as the remaining human inhabitant of the village.
It is at this time that the location of the great test - the Labyrinth - appears on the map, located only days away from the wizard's location. The game begins at Field G13, the entrance to the Labyrinth, and the player has to make his way to Field G7. The wizard found his way to the center, using the four Crafting Pylons inside the Labyrinth to make a new Gem of Eternity. He then travels to return the Gem to the Spiritforge, leading up to Chapter 2.

Below is a list of all the Fields in Gemcraft Labyrinth, categorized for easy access. Most fields can be beaten in the free game, but some are unlockable only with the Sorcerer's Package (in the non-premium version).
Contents
Fields [ ]
The following map displays the shortest path to get from G13 to G7, and was created by Lurlock .
RED indicates the first level, pylons, and the final level. ORANGE are shortest-path levels you must take. YELLOW are "choices," where you must choose one of the paths but do not need to do both. GREEN are completely optional levels. BLUE are dead ends. PURPLE are the hidden corner maps.
Base XP [ ]
This shows the base experience for each of the fields. Colour shades from red (higher base XP) to green (lower the XP). Generally, larger the field number (8+), fewer the XP.
Maximum Scores [ ]
The following scores are the maximum scores possible for each map with the battle settings screen multiplier maxed out, and assuming the level is completed with all tombs opened and all battle amulets achieved. Achieving maximum scores on all maps, combined with getting all achievements, will result in a wizard level of 11,675. Examples of maximus are E8, I6, I7.
| A | B | C | D | E | F | G | H | I | J | K | L | M | |
|---|---|---|---|---|---|---|---|---|---|---|---|---|---|
| 1 | 102,743,408 | 83,977,487 | 93,802,535 | 92,347,970 | 81,408,125 | 90,793,842 | 87,562,890 | 78,930,763 | 74,107,406 | 75,902,729 | 78,890,389 | 63,310,300 | 102,300,294 |
| 2 | 95,374,432 | 94,676,542 | 85,794,308 | 92,347,970 | 90,154,677 | 116,195,773 | 91,693,600 | 89,145,333 | 78,074,524 | 74,126,282 | 73,862,017 | 66,173,169 | 59,430,222 |
| 3 | 83,677,568 | 97,139,343 | 100,611,489 | 106,950,175 | 117,972,220 | 111,673,908 | 114,378,953 | 76,831,326 | 79,219,672 | 65,203,674 | 66,293,766 | 62,993,254 | 63,225,358 |
| 4 | 91,164,022 | 102,899,687 | 102,307,189 | 44,524,341 | 110,462,695 | 111,916,151 | 112,481,384 | 81,797,302 | 69,485,918 | 31,442,673 | 59,318,527 | 60,843,304 | 61,747,955 |
| 5 | 87,853,236 | 100,127,004 | 105,102,265 | 102,791,674 | 106,376,028 | 106,950,175 | 114,351,163 | 77,941,589 | 85,967,863 | 62,574,134 | 60,156,950 | 60,202,043 | 59,430,222 |
| 6 | 95,039,906 | 94,704,537 | 100,936,577 | 106,318,947 | 108,403,631 | 108,077,917 | 106,253,334 | 112,966,675 | 120,273,526 | 118,618,201 | 57,936,391 | 58,703,493 | 58,703,493 |
| 7 | 99,259,754 | 92,756,952 | 35,084,825 | 100,417,577 | 108,406,114 | 103,101,924 | 56,818,485 | 116,357,268 | 119,504,327 | 114,782,690 | 57,169,289 | 52,122,565 | 56,321,440 |
| 8 | 95,685,887 | 33,187,257 | 33,187,257 | 33,429,500 | 120,879,133 | 117,205,118 | 114,823,064 | 112,220,631 | 115,212,659 | 38,516,597 | 49,942,381 | 54,060,507 | 53,124,120 |
| 9 | 27,810,726 | 28,019,412 | 31,532,456 | 32,177,912 | 32,420,155 | 36,659,403 | 34,277,349 | 38,516,597 | 39,016,813 | 41,060,146 | 49,215,652 | 44,290,050 | 52,445,556 |
| 10 | 24,870,256 | 26,000,722 | 27,810,726 | 13,912,945 | 31,041,678 | 35,131,491 | 30,401,465 | 34,722,510 | 41,511,599 | 18,988,108 | 39,016,813 | 50,590,983 | 50,870,978 |
| 11 | 26,624,681 | 22,493,970 | 24,007,200 | 21,267,026 | 19,702,410 | 19,702,410 | 15,422,789 | 36,094,170 | 40,979,399 | 36,659,403 | 47,594,686 | 48,408,177 | 52,308,704 |
| 12 | 27,454,179 | 23,699,416 | 22,698,460 | 18,248,954 | 19,702,410 | 17,136,315 | 15,623,084 | 16,916,619 | 41,511,599 | 43,965,486 | 41,544,632 | 49,256,026 | 49,931,761 |
| 13 | 102,226,441 | 24,007,200 | 22,698,460 | 21,267,026 | 17,136,315 | 15,623,084 | 14,050,080 | 15,623,084 | 21,267,026 | 43,965,486 | 44,865,245 | 49,967,808 | 102,374,146 |
Beacons [ ]
The following table shows the number of beacons for each level.
Dual gems are superior to pure gems, they get bonuses to their damage, range, and firing speed. Triple gems get even higher bonuses. These bonuses can be further increased with the Dual gem and Triple gem mastery skills.
Pure gems have the strongest special abilities. If you combine two gems of different types, you get both specials but with a decreased power. So if you want to use the special ability of a gem, combine it only with gems of the same type.
If you want a gem to have a strong special ability, but also benefit from the triple (or dual) bonuses, create 2 or 3 grade 1 gems, each of a different type, combine them together, and then build onward using only pure gems of the type you want to boost.
Try to avoid making gems containing more than three base types.

It might be worth placing a tower at one square distance from the path instead of right next to it.
Look at the range indicator (yellow circle) of the inserted gem to see how far it can shoot, and place it in a tower that can give it the longest path to cover.
Click on a monster to view info about it, but also to highlight it for your towers to shoot. If an apparition flies by, and your towers are busy killing monsters, click on the apparition to have the towers target it.
When a monster is just about to crush your orb, the orb will banish it back to its spawning location. This costs you soma mana; tougher monsters take more mana to banish. Each time a monster gets to your orb, its banishment cost increases. Watch our for fast monsters that run by your towers and can reach your orb more than once before being killed.
Giant monsters have high armor and lots of hit points, but they move slowly. If they are along, try to lure them into paths that you can later close and force them to crawl back from the dead end you made. If they are surrounded with lots of other monsters though, they can be very dangerous. A giant monster approaching your orb the second time will take a huge mana toll.
The wave stones on the left side of the screen show you what kind of monsters will appear. Look out for the small icons above the wave numbers on the stones.
Place a trap near a group of towers and place a slowing gem in it, this way the monsters will have to crawl by the towers for a longer time, taking more shots.

Place a trap right next to an other one, place a slowing gem in the first trap and a mana gain/armor reduce/shocking gem in the second one. You can leech more mana from the slowed monster or have a greater chance of shocking it or tearing down its armor.
If you plan to use the Extend mana pool spell, use it early if you can, this way you get more total mana in the long run, thanks to the increased mana gain multiplier.
Adjust your gem type mastery skills to match the gem types you will initially get in the field, or which you plan to unlock. Skills linked to the initially available gem types are marked with a dot on the skills panel.
Place traps at a distance from each other so that the poison effect from the first trap lasts until the monster gets to the next trap.
Poison ignores armor, but cannot be stacked. (A poisoned monster hit by another poisonous shot will go on with the poison effect that is the more harmful over time, but not the sum of the two dosages.)
Combine a row of mana gain traps with a slowing gem in the first trap. This will make some of the monsters spend much more time crawling through your mana traps, making the traps shoot more and give you more mana.

If you have to defeat an enemy with lots of hit points and armor, like tough giant monsters, an apparition, or a shadow making its deadly aviation towards your orb, place towers at different key positions and place your most powerful gem to always have the tough target within range.
Each of the hidden labyrinth fields are tied to a journey or challenge amulet. Achieve the amulet and the field will appear.
Build a strong point: use amplifiers in combination with towers and traps. Use the traps to slow and shock the monsters, and have 3-4 powerful gems, supported by amplifiers, as your main firepower.
Experiment with towers and amplifiers to find what works the best.

Switch to normal speed or freeze the time if you need to do some micromanagement.
If the game lags too much, you can decrease the rendering quality and particle effects in the options screen.
Some of the gem types (like chain hit) are more suitable for power gems, other types (like slowing) are a better fit for supporting.
Shrines are very powerful if used properly. Their initial strike takes away a portion of the current hit points of all targets in range. This means, if you have a monster approaching with a million hit points, a shrine strike with 20% damage will instantly reap down a whopping 200,000 hit points.

Keep some reserve mana for the final waves. If you spend all your mana of upgrading your gems and no mana is left for banishment, some monsters still reaching your orb will bring you defeat. As a last option, you can refund mana by destroying your gems on the gem anvil.
Choose pure gems to place into traps. Pure gems have the highest special values. Dual gems have superior damage, but their specials are weaker.
Shrines are great for achieving overkill damage amulets.
Explore a wide area of the labyrinth and try to get to fields giving more XP as soon as you can, this way you can level up much faster, and will have more options to level up even further. There are some fields with a very long path for the monsters, find them and gather lots of XP.
If you see a giant or armored wave, and a swarm wave coming after that, and your towers are not busy with monsters already, start the swarm wave instantly after the tough wave. The swarm will run up to your towers, and you can finish them before the tough but slow foes get near.
You can build over depleted mana shards.
Epic stages have unlimited waves, but you get xp multiplier for summoning, not for surviving, and you can only win if you charge up the pylon(s).
For swarm only and armored only, choose fields that give the gem types that are strong against the selected monster type. Bloodbound gems can stack up a lot of damage by killing lots of swarms, armor tearing gems are a must have against the armored, but poison gems are useful too (poison ignores armor).

Amplifiers, unlike towers and traps, activate instantly, so you can combine or swap gems into them any time without any delay in your firestorm.
To prevent accidentally tearing tombs open, your towers will fire at tombs only if they have structures set as target priority.
Juggling can save your life. Build walls in key positions, or build a maze for the monsters with two easily swappable entrances towards the orb. When the monsters have almost reached the orb, freeze the time, open the other entrance to your orb and close the one the monsters wanted to use. It will force the monsters to turn around and crawl all the way to the other entrance, while you can keep firing at them. You have only 3 demolitions per battle, which you can increase up to 13 with the Demolition skill.

If you see some paranormal precognition effects, it can mean that either an apparition, a shadow, or the Forgotten is nearby.

Gemcraft Labyrinth features 27 skills.The 9 Extra Starting level Skills are available in when you purchase the Sorcerer's Package/Premium Version. Skill points can be obtained by increasing your wizard level, destroying apparations,completing some Journey Amulets or completing Challenge Amulets. Below is a list of all the skills available.
Skills [ ]
Available to All [ ]
*N means number of the variable of the skill
*N - N means N to N like 1 - 30 = 1 to 30
Increases the amount of initial mana and mana pool size at the beginning of each level.
N% higher Initial Mana and Mana Pool size at the beginning of each battle.
no skill level cap
level 1: 16% increased initial mana and mana cap
level 2: 24% increased initial mana and mana cap
each level increases the initial mana and mana cap by about 7.5% per level on average
first 4 level costs 1 skill points each level
skill point cost per level increases by 1 every about 6 levels
Increases the percent of mana per kill and mana replenish
N% more Mana Replenish over time,and more Mana Gain per kill. - no skill level cap
increases by about 1% per level
first 6 skill levels costs 1 skill point each
aother 15 skill levels costs 2 skill point each
Decreases the amount of mana it costs to create and combine gems.
2 - 30% lower gem creating,duplicating,upgrading and combining Mana cost
Decreases the amount of mana it costs to create towers, traps, walls, and amplifiers.
level 1: 1% more damage
level 2: 3% more damage
increases about 1.5% gem damage each level on average
cost of skill point per level increases by 1 for every about 4.05 skill levels on average
Читайте также: