
Duke nukem the birth baby land прохождение
Обновлено: 19.05.2024
The Birth is the fourth episode of Duke Nukem 3D. The fourth episode was added to the game as part of the Atomic Edition and contains eleven levels, including one secret level. The final boss is the Alien Queen.
None of these levels were created from scratch. In the 20th anniversary developer commentary, Keith Schuler explains (and Allen Blum agrees):
"I don’t think I did either [ XXX-Stacy or Critical Mass ] from scratch. I mean, that was how Plutonium PAK worked, right? It was all a bunch of content that either didn’t make it into the original game or, you know, had been started but not finished. And so we just took all those scraps, and we finished them up."
All of the added levels relied heavily on material from maps that were partly completed or scrapped. For example, the level Derelict was nearly finished and fully playable in the December 1994 prototype, making it one of the oldest levels in the game.
Contents
It's Impossible
| Designer(s) | Randy Pitchford |
| File name | E4L1 |
| Music | Missing? Impossible! |
| Par time | 3:04 |
| 3D Realms' time | 1:32 |
| Enemies | 38 - 96 |
| Secrets | 7 |
Duke-Burger

| Designer(s) | Allen Blum |
| File name | E4L2 |
| Music | Preparation D |
| Par time | 4:00 |
| 3D Realms' time | 2:00 |
| Enemies | 30 - 67 |
| Secrets | 4 |
Shop-N-Bag

| Designer(s) | Richard "Levelord" Gray, George Broussard note |
| File name | E4L3 |
| Music | Baked Goods |
| Par time | 3:30 |
| 3D Realms' time | 1:45 |
| Enemies | 42 - 89 |
| Secrets | 7 |
Babe Land
| Designer(s) | Allen Blum |
| File name | E4L4 |
| Music | Calypso Facto |
| Par time | 6:32 |
| 3D Realms' time | 3:16 |
| Enemies | 45 - 89 |
| Secrets | 4 |
Pigsty
This level contains a secret exit to Area 51.
| Designer(s) | Richard "Levelord" Gray, Randy Pitchford note |
| File name | E4L5 |
| Music | Lemon Chill |
| Par time | 2:02 |
| 3D Realms' time | 1:01 |
| Enemies | 20 - 45 |
| Secrets | 5 |
Area 51 (Secret Level)
This level is reached via the secret exit on Pigsty.

| Designer(s) | Randy Pitchford |
| File name | E4L11 |
| Music | Restricted Area |
| Par time | 4:20 |
| 3D Realms' time | 2:10 |
| Enemies | 29 - 65 |
| Secrets | 7 |
Going Postal
| Designer(s) | Allen Blum |
| File name | E4L6 |
| Music | Pissed Office Box |
| Par time | 3:04 |
| 3D Realms' time | 1:52 |
| Enemies | 26 - 72 |
| Secrets | 4 |
XXX-Stacy

| Designer(s) | Richard "Levelord" Gray, Keith Schuler note |
| File name | E4L7 |
| Music | Warehaus |
| Par time | 1:24 |
| 3D Realms' time | 0:42 |
| Enemies | 16 - 58 |
| Secrets | 3 |
Critical Mass
| Designer(s) | Richard "Levelord" Gray, Keith Schuler note |
| File name | E4L8 |
| Music | Layers of Dust |
| Par time | 3:18 |
| 3D Realms' time | 1:59 |
| Enemies | 13 - 42 |
| Secrets | 4 |
Derelict

| Designer(s) | Allen Blum |
| File name | E4L9 |
| Music | Floghorn |
| Par time | 5:02 |
| 3D Realms' time | 2:51 |
| Enemies | 66 - 180 |
| Secrets | 5 |
The Queen
The boss on this level is the Alien Queen.
| Designer(s) | Randy Pitchford |
| File name | E4L11 |
| Music | Departure |
| Par time | 10:50 |
| 3D Realms' time | 5:25 |
| Enemies | 34 - 91 |
| Secrets | 7 |
Disputed authorship
Authorship of some of the levels in The Birth has been disputed. Specifically, it is known that Richard "Levelord" Gray partially contributed to the episode, but for reasons that are unclear, he was never officially credited for his work on any of the levels.
Initial dispute
The Atomic Edition was published November 27, 1996, but prior to the project's completion, Gray left 3D Realms to co-found Ritual Entertainment. Although the precise date of Gray's departure is unknown, he opened Ritual Entertainment in August 1996, and in the 20th anniversary developer commentary, Gray says he left before Randy Pitchford joined the team, suggesting his departure may have been significantly earlier than August.
Following the commercial release of the Atomic Edition, Gray publicly criticized 3D Realms for neglecting to credit him. He stated that he believes he deserves most of the credit for some of the levels that were attributed to other developers. In particular, Gray claimed that Shop-N-Bag, Pigsty, and XXX-Stacy were mostly his own work, yet these levels were credited to George Broussard, Randy Pitchford, and Keith Schuler, respectively.
In one interview, Gray claimed that XXX-Stacy was "mostly mine" and that Pigsty was "99.44%" his original work. Emphasizing the degree to which Gray felt the latter map was his own work, he added that Pigsty was his favorite creation and that, as far as he could tell, Pitchford merely added the hanging jurors at the end of the level. In another interview, Gray described his fellow developers in extremely vulgar language and stated that, if George Broussard "hadn't screwed it up so much, I'd say that [ Shop-N-Bag ] was mine, too."
Signature on Critical Mass
Following these public statements, some players observed that Gray's signature appears in the top-right corner of the map on Critical Mass. For this reason, players have argued that Gray deserves credit for Critical Mass as well, though Gray has never publicly taken credit for the level.
Precedence
In 2014, was given the complete archive of Duke Nukem 3D development files. In the time since then, he has posted online several screenshots from work-in-progress drafts of the disputed levels. Each of these screenshots depicts the map blueprints at various points during development of the Duke Nukem 3D prototypes.
The screenshots from Pigsty seem to make the strongest case in Gray's favor. Although it is unknown whether any of these iterations were modifications by Pitchford in which he failed to remove Gray's signature, the last two versions clearly show that negligible changes were made when Gray's signature ("SUYT" in the top-right corner) was removed from the map.

Early build of Pigsty

Later build of Pigsty

Last build of Pigsty with Gray's signature

Final build from one month later, where Pitchford replaced Gray's signature with his own (not visible in this screenshot)
The following maps are also believed to have been authored by Gray:

Early build of Shop-N-Bag

Later build of Shop-N-Bag

Early build of XXX-Stacy, titled "El Segundo" in the development files

Later build of XXX-Stacy, which happens to be the last iteration with Gray's signature

Early build of Critical Mass; Gobeille shared that the map has a development history extending back to LameDuke
20th anniversary
Despite previously saying he would "never forgive them," Gray appeared to be on friendly terms with the other Duke Nukem 3D developers when he returned for the 20th anniversary. In fact, he collaborated with Pitchford on Bloody Hell, a map featured in Duke Nukem 3D: 20th Anniversary World Tour. His positive relationship with the other developers was further evidenced in the developer commentary.
In the 20th anniversary developer commentary, Schuler claims and Blum concurs that the purpose of the Atomic Edition was to salvage materials that did not make it into the April 1996 release. The two developers further explain that their maps in The Birth were not started from scratch but instead relied heavily on scrapped or unfinished materials that were gathered across the studio. It is unclear in the commentary whether Gray was previously aware of this; elsewhere in the commentary, Gray explains that he left 3D Realms even before Pitchford joined the team, suggesting he may have left before the developers solidified their plans for the Atomic Edition.
Silence during Schuler's commentary
In Duke Nukem 3D: 20th Anniversary World Tour, Schuler leads the developer commentary on XXX-Stacy and Critical Mass, and he takes credit for both levels. Gray, who is audibly present in the room throughout the commentary, is never heard objecting to Schuler's assertions. Although it is possible Gray's objections were cut from the commentary, strong disagreements about the development process were not removed from other parts of the commentary, such as on L.A. Rumble.
Current status
The degree to which the various developers deserve credit for each of the levels remains controversial. Some online guides (such as this one) continue to diminish Pitchford's contributions to Pigsty, and users in the Duke4 forums frequently express dismay at Gray's mistreatment and hope to play his original versions of the maps someday. Gray has not publicly spoken on the issue since the release of the 20th anniversary developer commentary.

"Babe Land" is also the name of the theme park in which the level is based. The theme park revolves around animatronic female pirates who are shown fighting each other and taking men as slaves.
Contents
Secrets
Secret 1: Fire extinguisher
Upon entering the shooting range after disabling the blue key forcefield, blow up the fire extinguisher on the opposite wall. Be prepared as 1-2 alien beasts will jump from the hole in the wall that the explosion created depending on the difficulty setting.
After killing them, carefully go inside that hole, watching out for the fires. Unfortunately the only thing you will find there is shotgun ammo.
Secret 2: Red Access Card
The room with the Red Access Card beside the shooting range is considered a secret. This secret is unavoidable.
Secret 3: Crack in the door
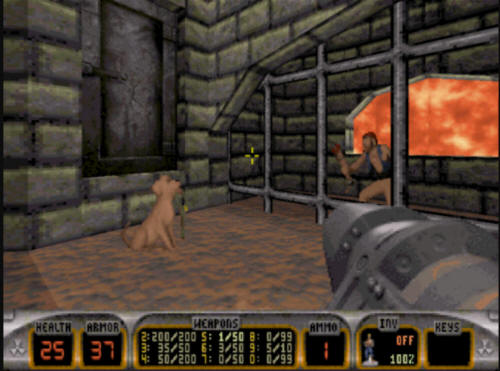
When you reach the slime river that has some wooden boats swimming along it, jump in one of these boats. After the first turn, there will be a small place on your right with a dungeon and some fire. There will be a pirate statue waving assault trooper's leg behind the bars and a dog sitting on the other side and ironically having the keys.
Blow up the cracked grey door behind the dog (probably along with the dog) and go inside a small corridor which is the place you were looking for. There will be RPG ammo inside.
Secret 4: Above the pirate ship
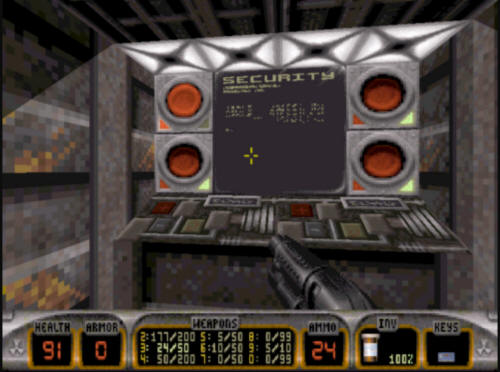
This secret will require a jet pack - if you do not have one, you can find it towards the end of the level inside the pirate fortress, after you open the big spotlight from the service corridor, on the right of the 4-button combination.
The secret located in the room with the ship model. You have to fly as high as the fake "sky" lets you towards the ship. Fly into the wall (faking a sunset landside) above the bow of the ship, right of the security camera. You might need to just fly along the wall trying to push into it to find the secret. The secret place itself is a ventilation shaft with atomic health.
Babe Land
Episode 4, Level 4
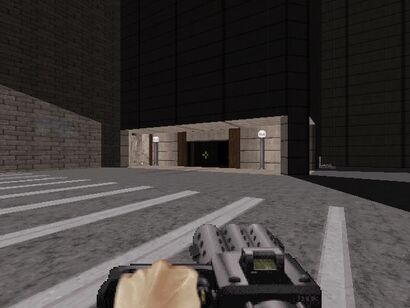
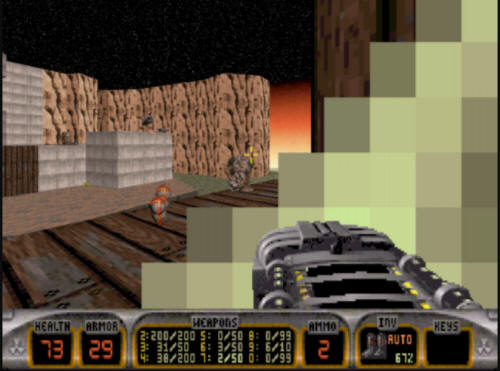
Babe Land is a level with several unique looking areas. The entire level is based off of Disneyland (in theory if not actual rides for the most part). The first thing you'll want to do is get rid of the "Mickey Mouse" looking thing that is dancing. It won't hurt you, but you get to a hear a Duke quip when you do.
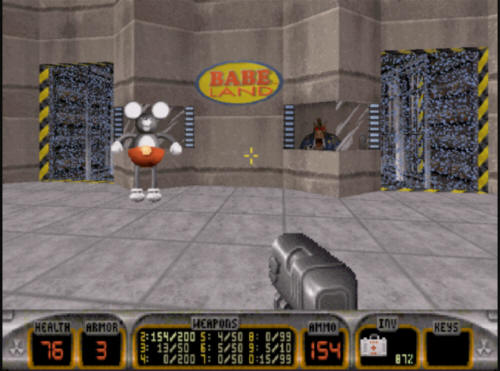
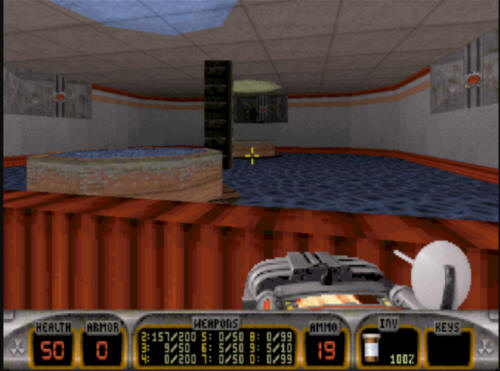
You will need to take out the pig cop in the control booth, go in there, hit the switch, and it will drop the forcefield in front of the doors. Make your way into a large room with a fountain in the middle. You can go into the water, where you will fight several Octabrains and some slimer eggs. Some ammo is available down here which you can get if you need it.
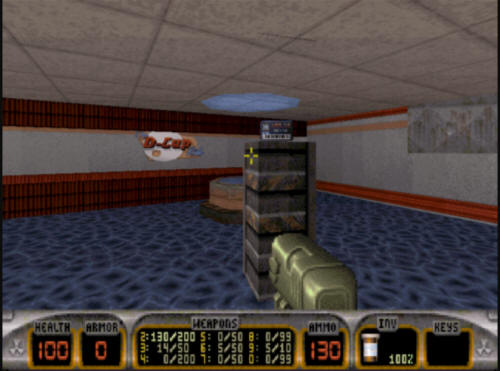
The first place you need to go is to the D-Cup ride. You can see the way to that in the screenshot above. Once in there, a trooper and another of those dancing mouse things are in here. Once you've taken care of the enemies (and the turrets) in here, you will need to deal with an interesting switch puzzle.
You can deal with this switch puzzle a few ways. You can shoot the switches with your pistol from the platform, or you can hop in the cars and use them to jump up to each individual platform, pushing the buttons (or shooting from the cups), or you can jetpack from one button to another. Either way, you need to flip all three of them. Doing so will drop the central column in the room revealing the blue key - go grab it and head out of the room. A note about the water, if you go down there, there is a lot of facehuggers down here as well as an Octabrain, but there is a medkit available on a sunken cup in the water if you need it.
When you get back to the fountain area, you will see that the path to the blue key is blocked. What you will need to do is in the fountain area. You will find a few crates at the far end of the room that look similar to a stairwell. Go jump up on them, and then onto the ledge behind them.
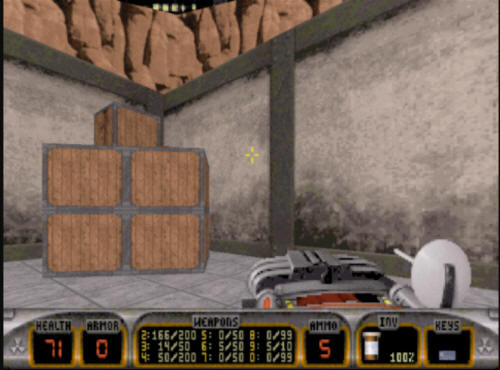
Once you are up here, you will then need to make your way into a control panel room, which involves some jumping (or jetpacking). You need to first jump onto the small wooden platform, then the even smaller stone platform with an Atomic health on the top, and finally into the control panel area.
Once across, you will run into a switch puzzle which you will need to solve to drop the panel allowing you access to where the blue key can be used. The correct combination is to leave only the button in the upper left hand corner untouched. Flip the other three, and now you can access the blue key door.
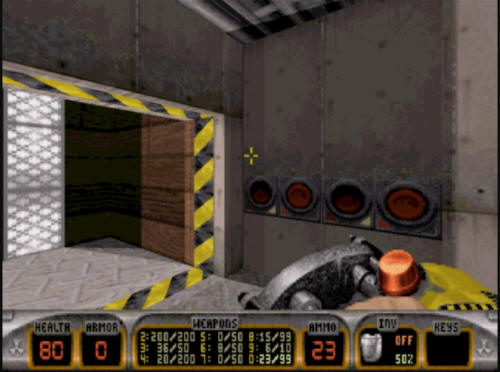
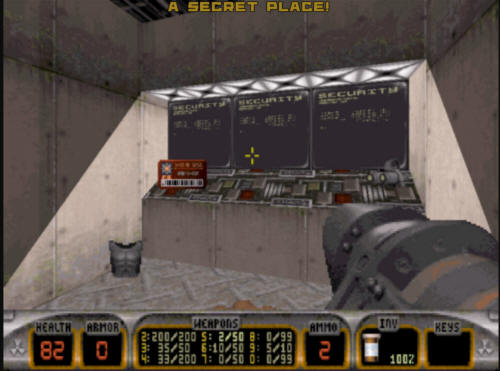
Get past the blue key door, and you will be at "One Eyed Pete's Shooting Gallery". In this room is the red key, so you have to solve the shooting puzzle to get it. First off, behind the target is an RPG, so run over there and get it. The correct combination you need to hit are the second and fourth targets.
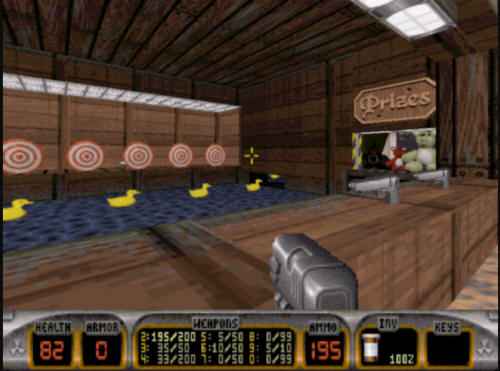
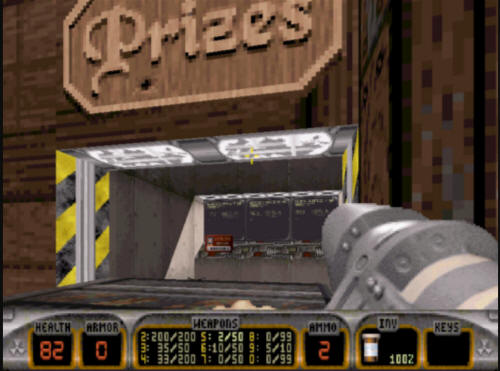
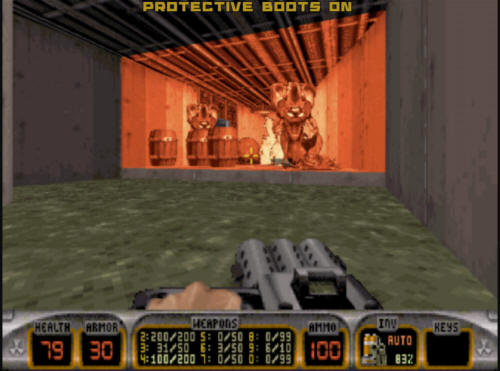
Shoot them with a pistol (rocket weapons are no good here), and the wall underneath the prize area will drop, allowing you access to where the red key is. Take out the teddy bears and send a rocket in there to take out the couple of pig cops back here. Then grab the red key.
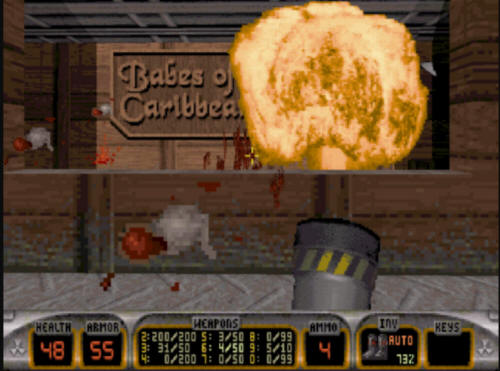
After you get the red key, make your way back to the "Babes of the Caribbean" ride entrance. You will need to use the red key to drop the forcefield. You can do this in the small control room right next to the door.

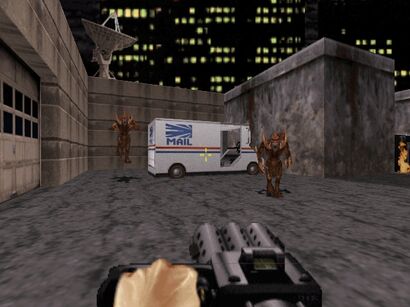
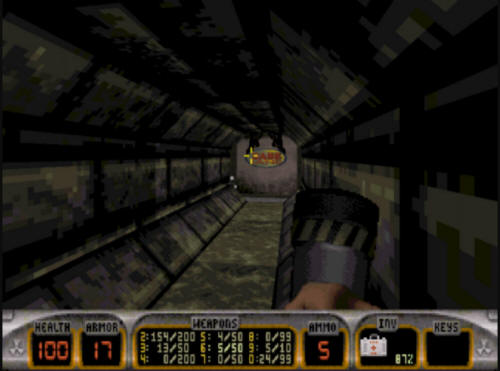
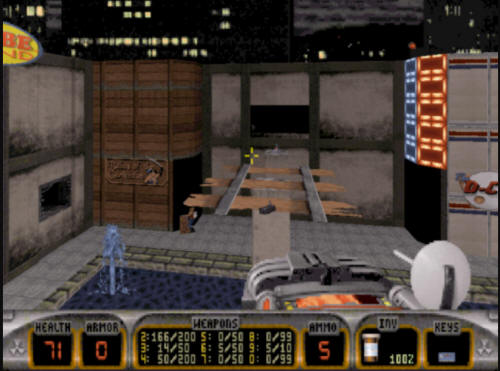
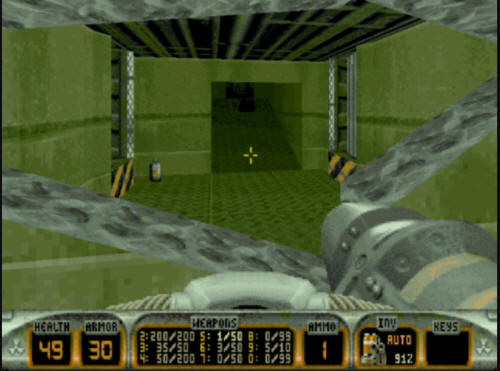
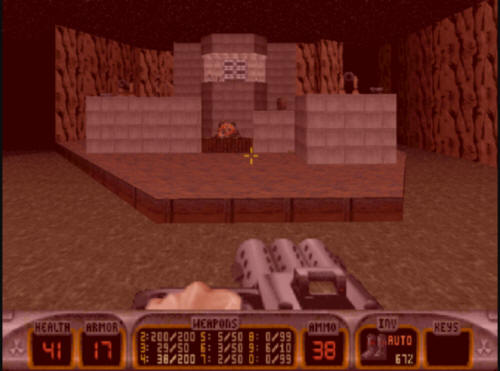
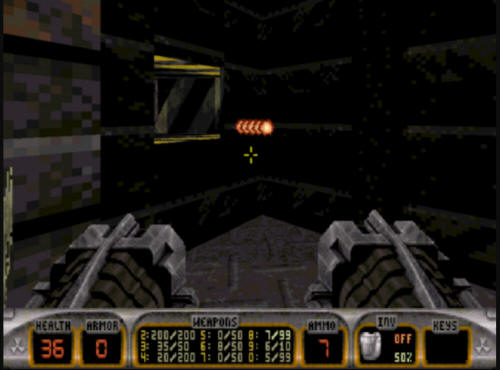
Once the red key is down, you will follow a fairly straightforward path through the entrance way to this ride. You will go through several kinds of enemies, and you will eventually end up at a platform that looks like this:
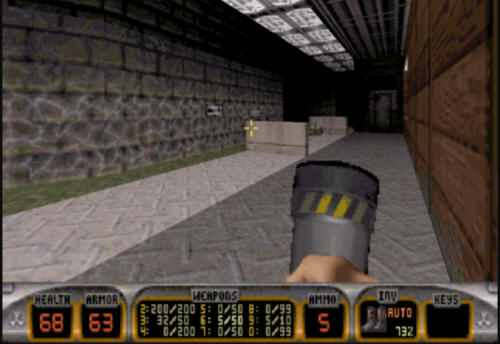
As you make your way along this platform, you will be spotted by more pig cops in the control room to your right. Take them out, a nice pipebomb will do the trick. Additionally, a platform on the other side of the ride will open up as well with three more pig cops to deal with, so don't get shot in the back.
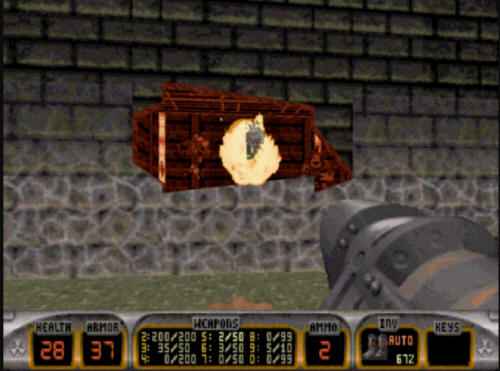
As you get partially down the first part of the ride, a wall will explode to your left, revealing another platform with three pig cops on it. You'll want to take them out, otherwise they'll likely take you out.
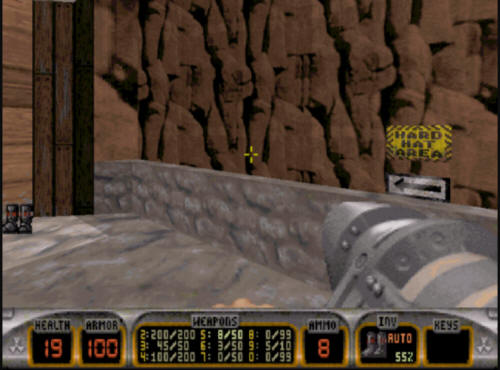
Continue on in the ride, and you will come across a few platforms where you can take a rest from the ride, but not from combat, as a few pig cops and troopers are also back here. Once you take them out, you can explore the doors here, which will reveal a few items you might need, as well as a pair of protective boots you likely DO need.
Near the boots, you will see a sign that says "Hard Hat Area" with an arrow. That is the way you want to go. If you follow the path where the ride cups go, that will lead you back to the platform. You need to follow the arrow to progress to the final area of the level.
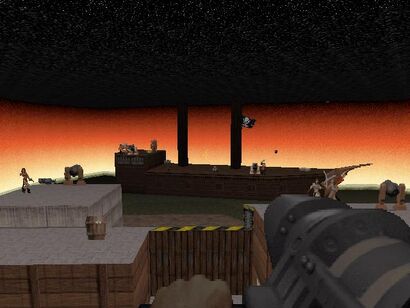
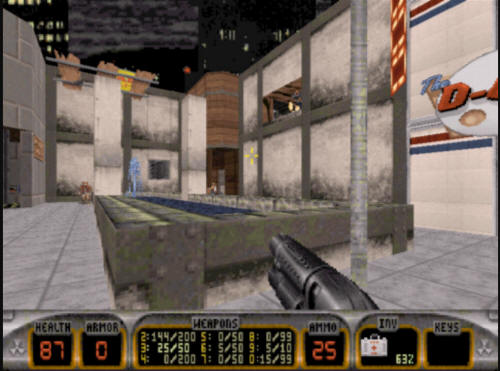
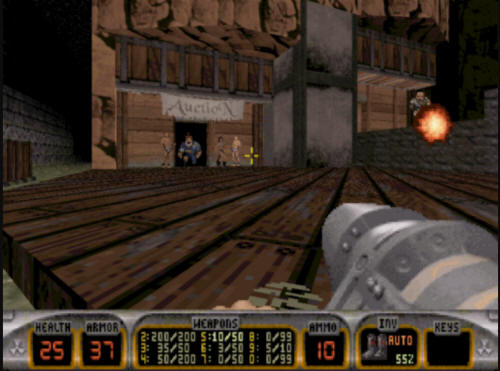
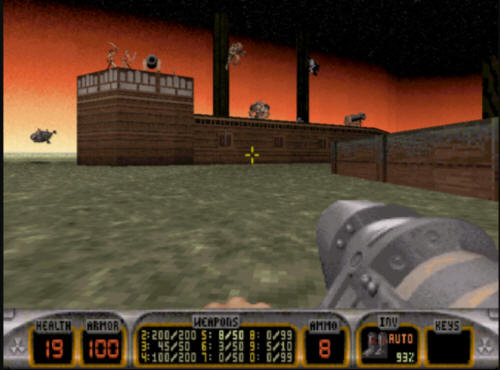
When you make your way into the main room here, you will encounter a part of Babe Land that has a boat and a castle attacking each other. You can see it in the screenshot below. This area is rather tricky, as there are two Battlelords to contend with, not to mention a ton of various other enemies, plus two cannonballs shooting from side to side, so health will be at a premium here. If you are low on health, the best thing you can do here is submerge as soon as you get into this room, otherwise the Battlelord on the boat will take you out.
Once submerged, you can spend some time looking around for items down here. There are two groups of slimer eggs guarded by Octabrains. The one on the far side of the underwater area is guarding some scuba gear, so if you don't have any, go there first.
If you go to the other side of the underwater area, the other group of eggs and Octabrains are guarding a secret room, but it is not a true "secret" in the level. Take out the crack in the wall, and it will reveal another room where you can get a health pack and some ripper ammo.
Once you are done exploring the underwater area, it is time to get on with progressing in the level. You need to make your way under the boat, and then surface inside the boat. The inside of the boat is mostly emtpy, but the far end of the room has several barrels and various enemies (mostly Octrabrains) all guarding a teleport.
After you clear out the end of the room, make your way through the teleport, and you will be on top of the boat, but be careful up here, as you will be point blank up against a Battlelord. You can try taking him down with the shrinker that is provided next to the teleport, it is probably the easiest way to deal with him from point blank range. The cannons on the castle and the boat are an annoyance up here.
Once you deal with the Battlelord, you will find two switches up here. One looks like a light switch, which turns on some of the lights in the castle across the way. The other switch, though drops the door to the castle, which unleashes the second Battlelord in this part of the level.
There is a freezer weapon and some health up on the upper portion of the boat which can be useful against the second Battlelord. There is also another teleport up here, but it leads back to the start of this particular ride, this is pretty much a Dukematch teleport. Once the second Battlelord is taken down, make your way to the other side, either by jumping off the boat and across, or by going back the way you came. Once inside the castle, you will see a small platform with three barrels on it. If you jump up on the box, and then up onto the wall, you can make your way around the edge of the wall here to the door on the back side.
You will find yourself at a door with an "Authorized Personnel" sign next to it. It is not locked, so open it and head in. Beyond this door is a switch puzzle, and a door to the right. First, take the door to the right, it will put you out on the platform in the middle of the castle. Grab the items here, in particular the jetpack, and head back in.

To get to the end of the level, you have to deal with another switch puzzle. The combination here is to hit the first and third buttons, leaving the other two alone. Doing this will open the door to your left.
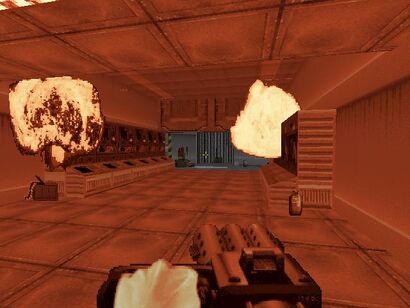
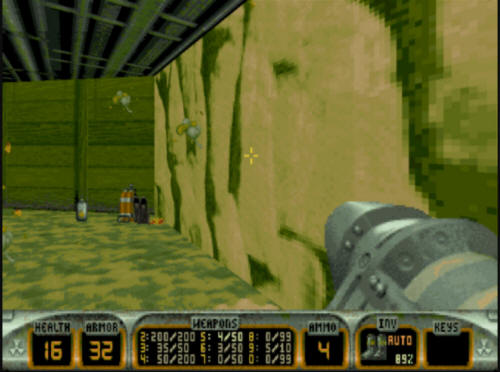
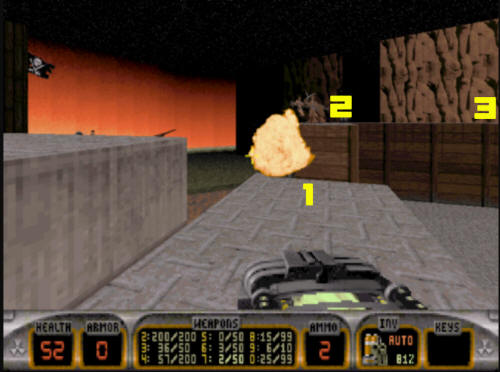
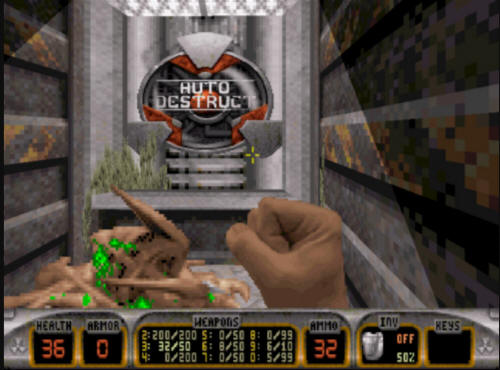
Going through this door will reveal a few more enemies for you to deal with (at quite close range). Get past them and open the next door, and you will see a rather tricky path to take. You will see a rather fast firing gun shooting down the next corridor. It kind of looks like this (it is hard to represent this thing in a single screenshot):
The projectiles coming out of this gun will kill you in two shots, so what you need to do is crouch, and stay crouched the entire way down this section of hallway. When you get to the end, you can go into the next section and uncrouch. There is another door at the end of this hallway. Open it to have the exit to the level revealed (and yet one final enemy).
Hit it and be taken to Level 5, "Pigsty".
Babe Land Secrets
Despite its size, Babe Land only has four secrets in all, and one of those you have no choice to get, it cannot be skipped. These are the areas that are recognized as secrets by the game. There are a few other areas that are not recognized by the game as secrets. This secrets area will only show the "true" secrets in the level.
This is another one of those stupid secrets. When you get the red key in the normal level progression, you are awarded a secret. Seems somewhat silly, but there you are.
Before you leave the shooting gallery room, you will notice a rather large crack in the wall. Shoot it, and one or two enemies will come out after you. When you take them down, a room will be revealed behind where the crack was. Jump up in there to get the second secret of the level.
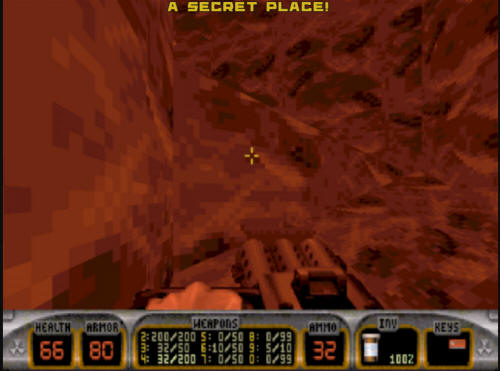
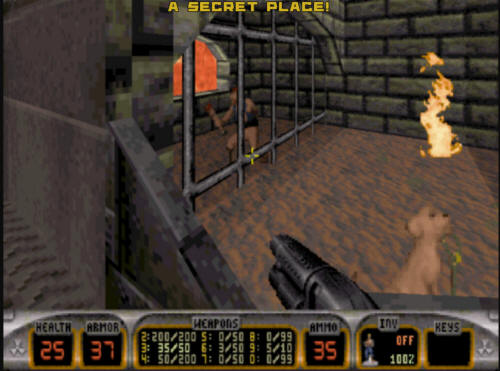
As you make your way along the path on the Babes of the Caribbean ride, you will come across a platform that looks like this. The metal door has a crack on it.
Shoot it, and it will reveal a secret room with some RPG ammo in it.
This last secret is an odd one. The reason for this is that most of the secrets in the game give you some sort of hint they are there, but this one does not. It appears to be completely random. It absolutely requires the jetpack to get it, so make sure and not waste the jetpack that is in this level. Fly over on top of the boat, and you will see a security camera up near the ceiling to the right of the boat. To the right of it is a secret wall area that is marked here with an "X".
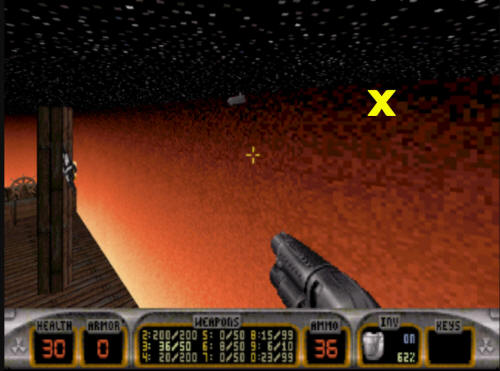
Flying in there will reveal a path of vents. Follow the path, and you will fiind an Atomic health and the final secret of Babe Land.

The levels in Duke Nukem 3D are divided into sequences known as episodes. Three episodes were included in the classic edition of Duke Nukem 3D, but two more episodes were added in the Atomic Edition and 20th Anniversary Edition.
Contents
Episode 1 - L.A. Meltdown
The first episode takes place in Neo Los Angeles.
The final boss is the Battlelord.
Episode 2 - Lunar Apocalypse
The second episode takes place in outer space.
The final boss is the Overlord.
Episode 3 - Shrapnel City
The third episode takes place back on Earth.
The final boss is the Cycloid Emperor.
Episode 4 - The Birth
The fourth episode was added to the game as part of the Atomic Edition. None of these levels were created from scratch but were instead refined and repurposed from materials that were scrapped before the initial release.
The final boss is the Alien Queen.
Episode 5 - Alien World Order
The fifth episode was added to the game as part of the 20th Anniversary Edition. Levels in this episode are based in cities from around the world, including Amsterdam, Moscow, London, Giza, Paris, San Francisco, Hollywood, and Rome.
Demo levels
The following three maps are extra levels that come with Duke Nukem 3D and showcase various effects and sprites. These can be imported and played as user maps, but they are merely demonstrative and were not meant to be played as part of the singleplayer campaign.
Читайте также: