
Как создавать аддоны для left 4 dead 2
Обновлено: 04.07.2024
There are six basic steps to creating your own custom campaign Add-ons for Left 4 Dead 2:
- Make an Add-on folder and content sub-folders.
- Create game assets and place them in the proper sub-folder.
- Create metadata files and place them in the proper sub-folder.
- Pack the contents of the Add-on folder into a .VPK file.
- Test the VPK thoroughly and make changes accordingly
- Create a homepage for the add-on where it can be downloaded by players.
Contents
Существует шесть основных шагов для создания собственной пользовательской кампании. Аддонов для Left 4 Dead 2:
- Создайте папку надстройки и подпапки содержимого.
- Создайте игровые ресурсы и поместите их в соответствующую подпапку.
- Создайте файлы метаданных и поместите их в соответствующую подпапку.
- Упакуйте содержимое папки Add-on в файл .VPK.
- Тщательно протестируйте VPK и внесите соответствующие изменения
- Создайте домашнюю страницу для надстройки, где ее можно загрузить игроками.
Загрузка и Установка
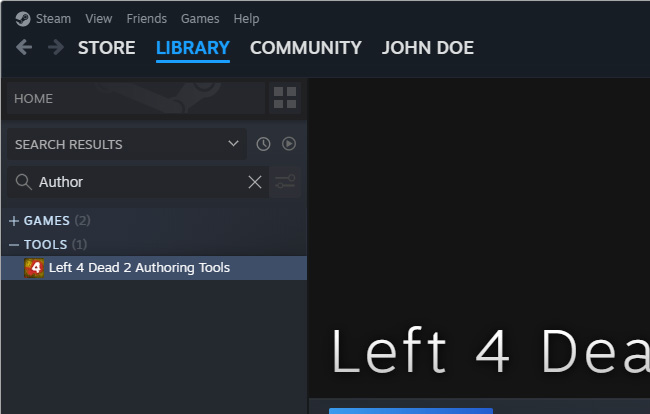
Чтобы установить Left 4 Dead 2 Authoring Tools, либо здесь, либо:
- Перезапустите Steam, если он запущен.
- Откройте окно Steam.
- Перейдите на вкладку Tools.
- Дважды кликните на Left 4 Dead 2 Authoring Tools.
- Left 4 Dead 2 Authoring Tools будет загружаться на ваш компьютер через Steam.
- Когда он полностью установится, вы можете запустить его таким же образом, как и установили (через вкладку Tools)
Вы так же можете создать ярлык на рабочем столе, кликнув правой кнопкой мыши на Left 4 Dead 2 Authoring Tools и кликнув на Create desktop shortcut в контекстном меню.
You may also want to install the L4D 2 Add-on Support which can be found in the tools section of Steam as well. This will give you access to additional assets from L4D 1 which you may include in your L4D 2 campaigns.
Create an Add-on folder
Для начала перейдите в папку «addons» вашего места установки игры Left 4 Dead 2. Для большинства пользователей это будет похоже на:
Note: Папка «addons» может отсутствовать в Authoring tools.
Создайте новую папку внутри каталога «addons» и присвоите ей соответствующее имя. Эта новая папка будет именем файла .VPK, который в конечном итоге будет создан и распространен, поэтому рекомендуется избегать пробелов и использовать все строчные буквы. Вы также можете включить игру в заголовок, чтобы отличить ее от надстроек для других заголовков и, возможно, номер версии. Мы будем использовать "deadline" вместо "l4d_deadline" для нашего примера и удобства чтения.
Концептуально эта дополнительная папка будет служить базовой папкой «игры» для ваших активов и будет отображать макет в отправляемых файлах .VPK, как мы увидим ниже.
Create secondary game assets
Secondary assets such as poster and thumbnail images are not strictly required, but they can give your campaigns an extra level of polish. (Besides, the poster/concept art was likely the first thing you created, wasn't it?) If you haven't already, go ahead and make a materials folder and a vgui folder inside of it:
Campaign Poster
Inside the vgui folder you'll want to place at least two .VTF files, along with .VMTs that reference them:
Map Thumbnail Previews
In addition to these two, you'll also want to make thumbnail images for each map in your campaign. These serve to provide a visual reinforcement indication for users while they're selecting map "chapters" in the UI.
To do so, create a new folder named ' maps ' under the vgui folder:
In this folder, you'll want to create a .VTF/.VMT pair for each map you wish to create. They should each be 256 by 128 pixels. If appropriate, you may use a single thumbnail image to represent multiple .BSP maps, such as when you have a versus or survival variant of the same level.
.VMT files which are used for interface elements such as posters, thumbnails, etc., (I.e. Those typically found in the materials/vgui folder,) often need to specify an UnlitGeneric material. See Deadline vgui .VMT File for an example.
Creating a sound.cache file
If you wish to have custom sounds in your add-on, you need to build an audio cache file that the engine uses to load your sounds. Place your sounds in a "sound" folder in your add-on directory, then while Left 4 Dead 2 is running enter the command "snd_buildsoundcachefordirectory <path>" with the path of your sound folder. For example, in the Deadline example, we would place sounds in:
Then rebuild it with:
This will generate a sound.cache file in the sound folder that you should include when building your VPK file.
Test it out
At this point, your add-on should be fully functional. You should be able to launch the game, go to Extras->Add-ons, and enable your add-on. If you type path into the console, you should see the root directory of your add-on near the bottom. This means that the game will search your add-on folder for files that it cannot find in the standard game .VPK files. Play a full game on other computers to check for an errors such as crashes and missing assets. You can continue tweaking your content in folder form until you're ready for that magical moment: Release into the wild.
Создание вторичных игровых assets
Вторичные активы, такие как плакат и миниатюры, не обязательны, но они могут дать вашим кампаниям дополнительный уровень полировки. (Кроме того, poster/concept, вероятно, первое, что вы создали, не так ли?) Если вы еще этого не сделали, перейдите в папку materials папку и vgui внутри нее:
Плакат кампании
Внутри папки vgui вы захотите разместить по крайней мере два файла .VTF вместе с .VMT, которые ссылаются на них:
Предварительный просмотр миниатюр
В дополнение к этим двум, вы также захотите сделать миниатюрные изображения для каждой карты в своей кампании. Они служат для предоставления визуальной подкрепления для пользователей, когда они выбирают «главы» карты в пользовательском интерфейсе.
Для этого создайте новую папку с именем ' maps ' в папке vgui:
В этой папке вы захотите создать пару .VTF / .VMT для каждой карты, которую вы хотите создать. Каждый из них должен быть 256 на 128 пикселей. Если необходимо, вы можете использовать одно эскизное изображение для представления нескольких карт .BSP, например, когда у вас есть вариант versus или survival того же уровня.
.VMT-файлы, которые используются для элементов интерфейса, таких как плакаты, миниатюры и т.д. (Например, те, которые обычно находятся в папке материалов /vgui), часто должны указывать материал UnlitGeneric. См. Deadline vgui .VMT File для примера.
Как создавать аддоны для left 4 dead 2
Итак начну из далека пошарив по просторам рунета я заметил интересный факт встречаются довольно не плохие моды но вот их оформление оставляет желать лутшего практически все предлагают редактировать pak. vpk архивы, а в чом причина ? обычно это либо банальное не знание или что чаще бывает просто касолапость чела который делает вид что много знает по этому усложняет установку своего мода во много раз. Ведъ не для кого не секрет что не умелое редактирование pak-ов приводит к не минуемым лагам или тупо игра крошится! Чтоб этого избежать моды надо поковать в vpk архивы подобно картам тут в общем секрета не какова нет через папку addons можно к игре подключить практически любой фаил хоть модель хоть текстуру и это позволит подключать отключать мод на премую меню игры в допалнениях и так рассмотрим пример.
Вот я хочу заменить унылы бакграунд где четверка выживших стоит на зелёном фоне.
Для этого создаём новый бакграунд. Я выбрал в стиле аниме, обзываем его background01.vtf
Создаём папку для нашего мода обзываем её к примеру background это и есть имя нашего мода. В папке background создаём папку materials а в ней папку console и кидаем в нее наш background01.vtf Создаём addoninfo.txt в нём пишем название мода, версию, автора, урл и тд и тп. Я написал так:
"AddonInfo"
<
addonSteamAppID 500
addontitle "valt"
addonversion 0.1
addontagline "background"
addonauthor "walt"
addonSteamGroupName ""
addonauthorSteamID ""
addonDescription "new background the walt mod"
>
"AddonInfo"
<
addontitle "" // Заголовок аддона на английском языке (максимально 20 символов).
addonversion 1 // Версия аддона
addontagline "" // Тэги скина/мода
addonauthor "" // Имя автора на английском языке
addonauthorSteamID "" // Steam-профиль автора.
addonContent_Campaign 0 // Показывает, что этот аддон включает в себя новую кампанию (0-нет,1-да).
addonURL0 "ссылка" // Домашняя страница с возможностью скачки кампании (нужно только, когда есть кампания).
addonDescription "" // Описание аддона (максимум 100 символов)
addonContent_Script 0 // Показывает, что мод включает в себя новые скрипты (0-нет,1-да)
addonContent_Music 0 // Показывает, что мод включает в себя музыку (0-нет,1-да)
addonContent_Sound 0 // Показывает, что мод включает в себя звуки (0-нет,1-да)
addonContent_prop 0 // Показывает, что мод включает в себя модели (0-нет,1-да).
addonContent_Prefab 0 // Новые префабы (0-нет,1-да).
addonContent_BackgroundMovie 0 // вступительный ролик (0-нет,1-да).
addonContent_Survivor 0 // Новая модель персонажа (новой выживший npc) (0-нет,1-да).
addonContent_BossInfected 0 // Новый инфицированный босс (npc, не модель).
addonContent_CommonInfected 0 // Новый обычный зараженный (npc).
addonContent_WeaponModel 0 // Изменение существующего оружия, но функции остаются те же.
addonContent_weapon 0 // Новое оружие,способности зомби и прочее.
addonContent_Skin 0 // Показывает, что мод включает в себя новые скины (0-нет,1-да)
addonContent_Spray 0 // Новые спреи (0-нет,1-да).
addonContent_Map 0 // Одиночная карта (0-нет,1-да).
Create primary game assets
The assets you create will essentially append those shipped with the game. For a campaign, the primary assets are the .BSP and .NAV files for your map levels.
Make a folder called ' maps ' inside your add-on project folder:
Into this maps folder, copy the .BSP and .NAV files you're using for your maps. For this Dead Line tutorial example, there are three map file bsp.nav pairs:
| File | Description |
|---|---|
| l4d_deadline01 | Minimal starting map for co-op, versus |
| l4d_deadline02 | Final map for co-op, versus, survival, scavenge |
The advantage of having a single map function for multiple game modes is size reduction, which can be worth the additional authoring complexity.
You may also optionally create custom .VTF texture images, custom .VMT material description files, and custom .MDL models which your maps can utilize. In order to keep the size of your add-on small, it's advisable to use as many textures and models from the game as possible.
Additional .VMT and .VTF materials (see Creating a Material) should go under this folder:
It should be noted that L4D2 treats the /deadline2 folder much the same way as the /left4dead folder, so any folders you use inside the /materials and /models that you employ must also be present in your campaign's folder.
Create metadata files
There are a few more files that you will make in order to allow your add-on content to function in game.
addoninfo.txt
The first is the addoninfo.txt file. This allows your content to be recognized by the game. It should go inside your add-on root folder, which was the first one we created way back at the top:
This file is used by the game in the Extras->Add-ons screen. It describes your add-on in general and what it provides. The example Deadline AddonInfo File includes full comments and instructions for using it as a template for your own add-on.
addonimage.jpg
Another file you can create in the root folder is an image named addonimage.jpg. This serves as an icon to help differentiate your add-on and is displayed when an add-on is selected in the UI along with add-on details listed in the addoninfo.txt. Some JPG files may not work, depending on which application they are saved from. If you're having trouble getting you JPG to work, try exporting it from VTFEdit.
Mission File
The second required file is the mission file. This describes the structure and content of your campaign and is used by the campaign selection UI, matchmaking, and the game server. This should be a .TXT file with a unique name in the ' missions ' folder, which you will also need to make:
The example Deadline Mission File includes full comments and instructions for using it as a template for your own mission.
L4D2 Campaign Add-on Tutorial
This article needs to be cleaned up to conform to a higher standard of quality.
For help, see the VDC Editing Help and Wikipedia cleanup process. Also, remember to check for any notes left by the tagger at this article's talk page.
Packaging and shipping
The final remaining step is to package your add-on into a .VPK for distribution.
The .VPK serves as a convenient, one file method for others to install your add-on folder. They need simply put the .VPK in their own add-on folder. Or, assuming they, like most non-authoring players, haven't associated the .VPK extension with something else, they can double click on it and it will install itself in the correct place.
Every .VPK file contains a unique ID that allows the game to ensure everyone is running the same content. If you've put in meta-data properly, the game will also prompt users to download a newer version if it is required to play.
Navigate to this folder:
Locate the vpk.exe packaging utility and make a shortcut to it on your desktop. Drag your add-on root folder and drop it onto the shortcut. The utility should make a new .VPK next to your original folder. By default it will not include source files such as .VMF, .TGA, .SMD, .QC etc., and it will always strip out executable binaries. Remove the folder version of the add-on (or move it to a safe location) so that the .VPK is alone and test it out. The .VPK should function exactly as the add-on folder does. If it works, you're ready to upload it to a location you specified in the metadata files and from which it is available.
Ideally, you'll want an add-on "homepage" that includes ratings, screenshots, and player comments. A simple example can be found here.
Compression
Since full Left 4 Dead 2 campaigns can be very large it is advisable to compress them before uploading to file sharing sites for distribution. The open source Windows utility 7-zip supports compressing files in the 7z format/LZMA algorithm, which provide a very high compression ratio. The bulk of a campaigns size comes from the .bsp map files, which are highly compressible, so a vpk can be reduced to 25% or less of its original size. For example an unofficial version of Death Aboard was packaged up by a fan; the vpk was 267MB uncompressed, 92MB zipped, and 55MB with 7z.
Доступность
Left 4 Dead Authoring Tools находится в свободном доступе для всех покупателей PC версии Left 4 Dead 2.
Install the Authoring Tools
In order to author content for Left 4 Dead 2, you will need to install the Left 4 Dead 2 Authoring Tools. This provides you with the applications and utilities you will need to create game content. Mainly, you will be using the Hammer application to create levels, and the other utilities to create custom textures and models.
A description of how to create these assets is beyond the scope of this tutorial, but you can find useful information in the L4D Level Design Basics Tutorial. Because the focus of this article is how to assemble the assets into a campaign Add-on, we will assume that you have already learned how to successfully create these assets from this point forward.
The Authoring Tools provides an example Add-on campaign called Dead Line that has source examples.
Create an Add-on folder
To begin, navigate to the 'addons' folder of your Left 4 Dead 2 game install location. For most users, this will be similar to:
Note: The 'addons' folder may not exist in your L4D2 Authoring tools install.
Make a new folder inside the 'addons' directory, and give it an appropriate name. This new folder will be the name of the .VPK file you'll ultimately create and distribute, so it's good practice to avoid spaces and use all lowercase letters. You may also include the game in the title, to differentiate it from add-ons for other titles, and optionally a version number. We'll use "deadline" instead of "l4d_deadline" for our example for the sake of readability.
Conceptually, this add-on folder will serve as the base “game” folder for your assets, and will mirror the layout in the shipped .VPK files as we shall see below.
Authoring Tools/SDK (Left 4 Dead 2):ru
Left 4 Dead 2 Authoring Tools, так же известный как SDK, представляет собой набор программных утилит, которые позволят вам создавать свои собственные уровни, кампании, обычных зараженных, и другие элементы геймплея. Он содержит обновленные версии инструментов Source SDK, позволяющие работать с Left 4 Dead 2 движком.
Установка Authoring Tools
Чтобы создать контент для Left 4 Dead 2, вам нужно будет установить Left 4 Dead 2 Authoring Tools. Это дает вам приложения и утилиты, необходимые для создания игрового контента. В основном, вы будете использовать приложение Hammer для создания уровней, а другие утилиты для создания пользовательских textures и models.
Описание того, как создавать эти ресурсы, выходит за рамки данного руководства, но вы можете найти полезную информацию в L4D Level Design Basics Tutorial.
В Authoring Tools представлена кампания Add-on Dead Line с примерами кода.
Final testing
At this point, you should test out the download prompt. Start a lobby with a local server, and invite a friend to join. When they accept, they should be prompted to download the necessary add-on, after which a browser window will opened to your add-on homepage. They should be able to download and install the add-on without having to restart the game, and then join your lobby.
Создание основных игровых ресурсов
assets, которые вы создаете, по существу добавят тех, которые были отправлены в игру. Для кампании основными assets являются файлы .BSP и .NAV для ваших уровней карты.
Создайте папку с именем ' maps ' внутри вашей папки проекта надстройки:
В эту папку с картами скопируйте файлы .BSP и .NAV, которые вы используете для своих карт. Для примера примера Dead Line есть три файла карты bsp.nav:
| File | Description |
|---|---|
| l4d_deadline01 | Минимальная стартовая карта для режима ко-оп versus |
| l4d_deadline02 | Окончательная карта для режима ко-оп, versus, выживания, сбор |
Преимущество наличия одной функции карты для нескольких игровых режимов - уменьшение размера, что может стоить дополнительной сложности разработки.
Кроме того, вы также можете создавать пользовательские .VTF-изображения текстур, пользовательские файлы описания материала VMT и пользовательские модели .MDL, которые могут использовать ваши карты. Чтобы сохранить не слишком увеличивать размер вашего дополнения, рекомендуется использовать как можно больше текстур и моделей из игры.
Дополнительные материалы .VMT и .VTF (см. Creating a Material) должны находиться в этой папке:
.MDL и связанные с ними файлы моделей (см. exporting and compiling a model) должны находиться здесь:
И материалы для ваших моделей должны быть здесь:
Следует отметить, что L4D2 обрабатывает папку /deadline2 так же, как и папку /left4dead, поэтому любые папки, которые вы используете внутри /materials и /models , которые вы используете, также должны присутствовать в папке вашей кампании.
Читайте также: