
Fnf как создать свою неделю
Обновлено: 05.07.2024
Не надо там открытый код. Надо уметь делать музыку и нормально рисовать.
Там код открытый, полазай в папке с игрой там найдёшь все песни всех персонажей тебе просто надо поменять песни и нарисовать новых персонажей. А что бы их поменять надо нажать на картинку с персонажем открыть во флеше или фотошопе и нарисовать что то новое. А вот что бы делать музыку надо уметь её делать.
Максим Скоробогатов, Попробуй поискать на gamebanana, движок называется modingplus
а куда нажимать чтобы скачать

Модинг Плюс опсалютно непонятный, я тратил 2 дня, и не смог ничего сделать, даже использовал гайд, ничего не работает, надо скачать сам исходный код
Fnf moding plus это невозможно, там персонажа невозможно добавить
Konstralit, Если буду обьяснять как скомплимировать fnf то уйдет довольно много времени, к тому же я сам не до конца разобрался в коде игры
Это надо понимать что за что отвечает, например персов нарисовать не сложно, но сделать так чтобы они двигались это уууу.
В основном, я скачиваю Kade Engine, а дальше по старой схеме: Рисую персонажа и Спрайты через Пэйнт, но в основном только на Пэйнте и работаю, ибо у меня бывают проблемы: Не знаю как создать диалог, не знаю как поменять название трека внутри игры и не могу найти сэмплы на разных источниках для FL Studio (Где я делать музыку собирался)
Controls
- Mouse - Used for placing notes and changing tabs in the Debug Menu.
- W or Up arrow and S or Down arrow/Scroll Wheel - Scroll the note chart up and down.
- A or Left arrow and D or Right arrow - Change the section of the song being edited.
- CTRL - Holding this while placing a note will copy the note to the other side of the chart.
- Q and E - Change the most recently placed note’s sustain length, turning it into a hold note.
- R - Jumps the editor to the start of the SECTION.
- Holding Shift, then press R - Jumps the editor to the start of the SONG.
- Holding Shift, then press Left/Right arrow - Jumps the editor 4 sections to the left/right, respectively.
- Shift - Holding this will disable the grid, allowing placement of notes other than 1/16ths.
- Spacebar - Plays a preview of the song on the editor, to help with timing notes.
- Enter - Loads the current note chart in-game with any edits done.
This tab only has one function so far, which is changing the sustain length of the most recently placed note by inputting a value. If the note only requires a tap, the value is 0. Attempting to change the length without placing a note in the current section will cause the game to crash. It is unknown what the "Apply" option does.
Creating your own custom .XML files - A Tutorial for Friday Night Funkin'
Now before we begin, let's get the elephant(s) out of the room. You're going to need Adobe Animate to do this, so make sure you have it through whatever means you can (wink wink). Also, this tutorial will not be going into how you create your own sprites, as I'm assuming you've already finished your sprite sheet and need help making it look good in game. This tutorial is also more so aimed at modding the week 1-3 opponents rather then modding Boyfriend, but it should still work if you want to mod him instead.
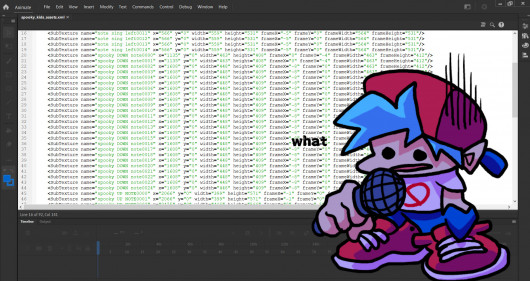
"What is a .XML file" is a question you might be asking your self, so I'll give a quick explanation. In your Friday Night Funkin' folder, under "assets/images" you'll find most of the games artwork and it's sprite sheets. For each character and background sprite sheet, there is a ".XML" file with the same name as the sprite sheet its related to. These files are generated by Adobe Animate, and tell the game each sprites height and length and where they should be placed on the stage using X and Y coordinates.
So how do you make a custom one? Well you could always open the .XML of the character your modding and edit the coordinates by hand, but that's stupid and time consuming. So let's just make a custom one.
Step 1: Open Adobe Animate and have your sprites ready, I HIGHLY recommend having each individual sprite saved as separate .PNG files in one folder for easy access.
Step 2: Create a new canvas, doesn't matter the size since we won't be using the actual canvas.
Step 3: Now that you've got your canvas ready, you're going to want to open the .XML file of whatever character your editing. You can either open it in a different program or go to file/open in Animate, it doesn't matter as we're just going to be using this as a reference
Step 4: The .XML file you opened should have multiple strings of text, most starting with o to your library. Hold down CNTL on your keyboard and click all your symbols, then right click and press "generate sprite sheet". A window will pop up, click on "data format" and change it to "Sparrow V2" (I've heard you can also use Starling, but I don't think it matters which one you choose. Starling will add "pivotX and pivotY" points to the start of each sprite set, but from my testing this doesn't make a difference), then click on "Image Dimensions" and change it to "Custom", set Width to 4096 and Length to 2048 (unless you're modding Boyfriend, in which case the Width would be 8192 and Length would be 4096 or girlfriend, where the Width would be 8192 and the Height also 8192). Go to the bottom of the screen and click "browse", change the file name you're saving it as to the same file name the character you're editing was called (so "BOYFRIEND" if you're editing BF, "DADDY_DEAREST" if you're editing daddy dearest, "Pico_FNF_assets" if you're editing Pico, "spooky_kids_assets" if you're editing Skid 'n' Pump, and "GF_assets" if you're editing the girlfriend).
You can choose whatever save destination you want, I'd recommend creating a folder for them or just putting them on your desktop. This should generate a .PNG (the sprite sheet) and a .XML file (the data) both with the same name as what you saved them as. Finally, put them in your FNF assets/images folder, replacing the ones currently in there. Congratulations! You can now open FNF and see your mod in action.
After seeing your mod in game, you might notice your sprite is floating or similarly off center. Don't worry! There's nothing wrong with your sprite sheet or .XML file, this is actually happening because the game has hardcoded offsets for each character, so sadly this cannot be altered (at least not at the time of making this guide, perhaps we will be able to change it in a future update).
And that's my tutorial! Got a bit lengthy, if anyone has questions post them in the comments and I'll make sure to answer, happy modding! - Lunar
Как сделать свой мод на Friday Night Funkin' ?

Некоторая информация взята из этого видео, я лишь написала некоторую информацию из видео в письменном виде и с дополнениями. Этот пост был создан *только* для познавательных целей!
Привет, с вами я, и я расскажу как сделать свой мод на Friday Night Funkin. Заранее извиняюсь если тут какие-то ошибки и недочёты :no_mouth:
Сперва нужно найти подходящую для нас графические редакторы, например:

Что-то среднее с Paint и Adobe Photoshop.
Альтернатива Adobe Photoshop.
Но в любом случае подходит любая программа, которая может экспортировать прозрачные PNG файлы.
Если вы никогда не пользовались графическими редакторами, то вы можете посмотреть длиннющие видео уроки и обучающие сайты.
Всё же лучше использовать Adobe Animate для улучшения процесса.
Сначала нужно редактировать спрайты, которые находятся в файлах игры.
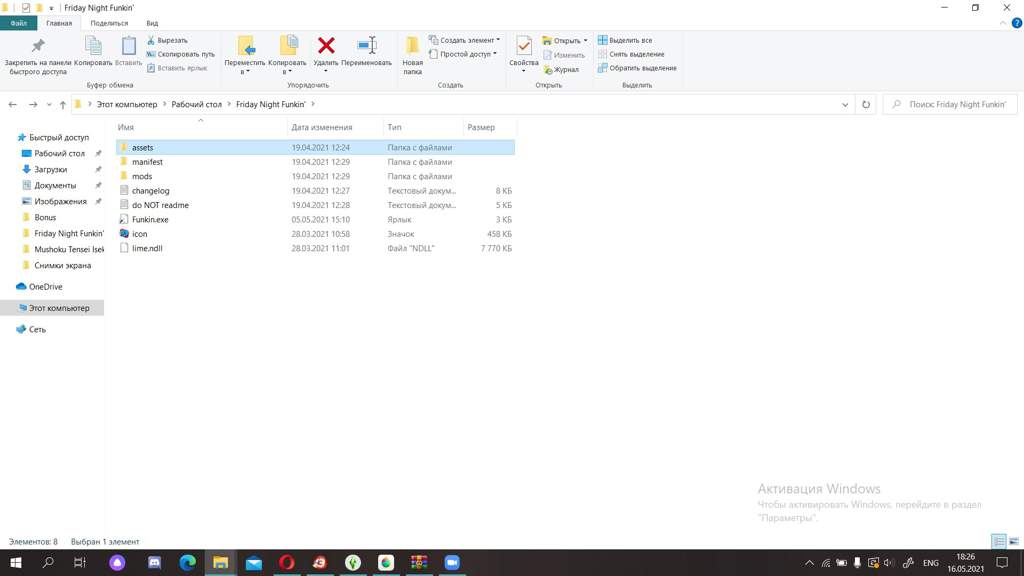
Нажимаем на "assets" и нужно найти нужные файлы с спрайтами для ваших персонажей.
Для этого нам нужны программы для создания песен, например:
Профессиональная программа, чтобы разобраться с программой, нужно несколько дней или неделя(и). Но всё же рекомендуется.
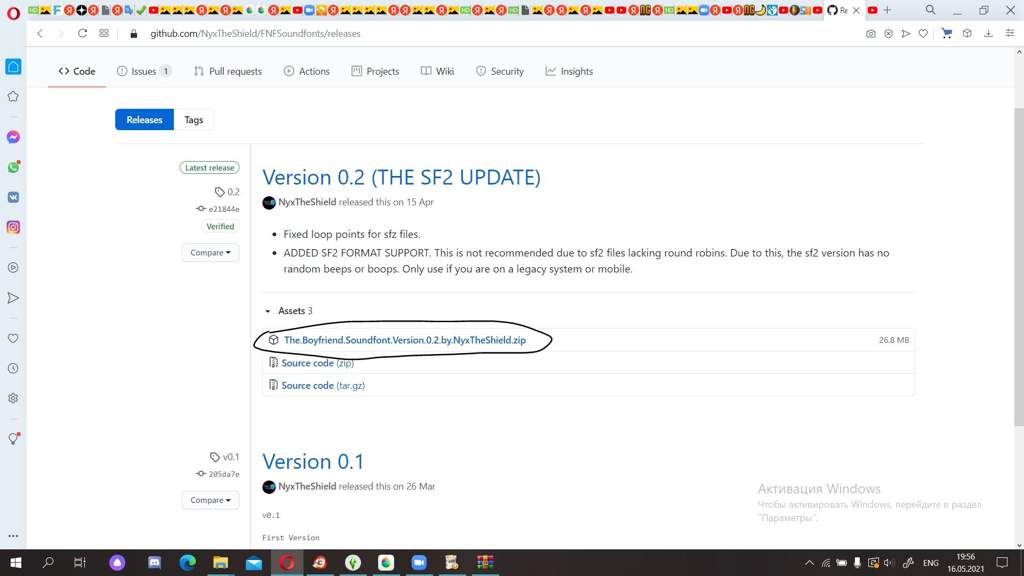
Файл с голосом Бойфренда.
Отправка песен в саму игру.
Сперва нужно засунуть наши голоса и минус в саму программу, потом нажимаем на "File", который находится на правом верхнем углу, потом нажимаем на "Export", дальше "Export as OGG" и заменяем выбранную песню.
Чтобы создать стрелки для вашего трека, нужно выбрать неделю и нажать на цифру "7" на вашей клавиатуре.

Кнопки клавиш W и S позволяет нам перемещаться вверх и вниз по разделу песни, чтобы размещать наши стрелки.
С помощью левой кнопки мыши, вы можете размещать стрелки где угодно.
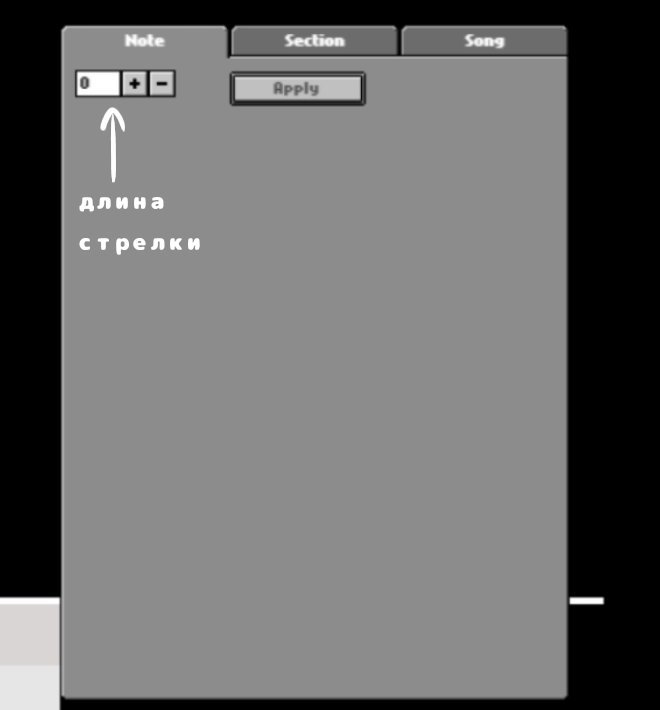
Первый раздел называется "Note", этот раздел увеличивает только длину нот.

Второй раздел называется "Section", этот раздел не будет использоваться большую часть для создания стрелок, но имеет весьма полезные функции.
Третий раздел называется "Song", этот раздел. Ну вы поняли ಠ ͜ʖ ಠ
На этом всё, надеюсь мой пост был для вас полезен, до скорых встреч :wave:
Contents
Friday Night Funkin' Wiki
Welcome to the Friday Night Funkipedia! Before getting started, please make sure to carefully read through the Rules and Style Manual, as violating them may result in a block. Thank you!
If you have any questions or inquiries, please ask our wiki staff.
Section
Section Length
The length of the chart in 16th notes. This is not a functional command since no matter what number is written there, the length will always be 16.
Must Hit Section
Ticking this option on will make the left half of the chart become the player's notes. This also causes the camera in-game to focus on the player.
Copy Notes in Section
Change BPM
Changes the BPM for this section when box is checked. This function is ONLY functional as of version 0.2.7.1 of the game.
Clear
Clears all the notes from the current section.
Swap Section
Swaps the player's notes with the AI's notes and vice versa.
Alt Animation
Ticking this on will play an alternate singing animation for the opponent in the current section. The only official antagonists with an alt animation are Daddy Dearest and Mommy Mearest during Week 5, and Tankman during Week 7.
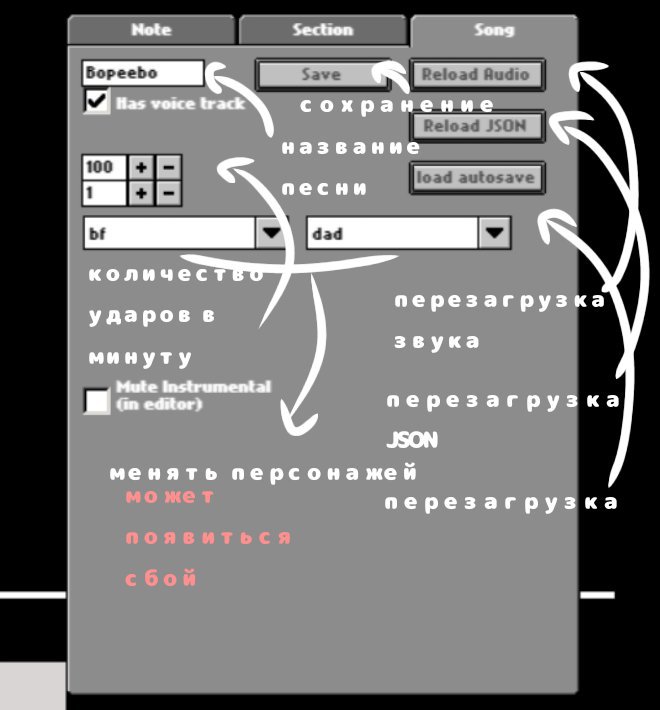
Song Name
The name of the song it will try to load.
Saves the current note chart into a JSON file.
Reload Audio
Supposed to go back to the beginning of the chart, but only starts the song from the beginning in the editor.
Load autosave
Loads the last saved state of the Debug Menu. This is very useful to recover data in case the game freezes or crashes.
Reload JSON
Takes the editor into the chart upon typing a different one in the text.
Has Voice Track
Ticking this off will disable the voice track in-game. The only official song with this turned off is the Tutorial.
Chart Options
- The top one changes the BPM of the entire chart.
- The bottom one changes the note chart's speed. The higher the number, the faster the notes approach the screen.
Characters
These change the characters in the track.
- The left one changes the player's character. This can be used to play as the other antagonists.
- The right one changes the AI's character.
The character list is as follows:
- bf = Boyfriend
- dad = Daddy Dearest
- gf = Girlfriend
- spooky = Skid and Pump
- pico = Pico
- mom = Mommy Mearest
- mom-car = Mommy Mearest (Week 4)
- bf-car = Boyfriend (Week 4)
- parents-christmas = Daddy Dearest and Mommy Mearest (Week 5)
- monster-christmas = Monster (Week 5)
- bf-christmas = Boyfriend (Week 5)
- gf-christmas = Girlfriend (Week 5)
- monster = Monster
- bf-pixel = Boyfriend (Week 6)
- senpai = Senpai (Senpai)
- senpai-angry = Senpai (Roses)
- spirit = Spirit
- tankman = Tankman
- pico-speaker = Pico (Stress)
- bf-holding-gf = Boyfriend and Girlfriend (Stress)
Hidden Characters
Characters that were not added to the Debug Menu. To get those characters, players need to go to assets > data > scroll down and find character list and add them.
The hidden character list is as follows:
Mute Instrumental (in-editor)
Mutes the instrumental of the track in the editor. This is useful for timing notes only to the vocals.
Debug Menu

The Debug Menu is a menu that can modify the game. When in any track, press the "7" key to open it up.
In the menu, players can change the opponent and/or player characters, see the keys they are going to have to hit in each section and change the song. Custom note charting can be done by left clicking on a space in the 8x16 grid which places a note down. The player and AI sides are noted by the icons on top of the grid. Like all other menus in the game, hit enter to exit the Debug Menu with the changes saved. However, after doing this, the menu has to be opened again to replay the track or choose another one.
Читайте также: