
Building tools roblox как пользоваться
Обновлено: 17.05.2024
Contents
Tools
Move Tool
The move tool allows the user to move the selected objects in any direction. On the side menu, the user can customize the increment used, and the axes to be used (Local, Global, or Last).
Resize Tool
The resize tool allows the user to resize the selected objects in any direction. On the side menu, the user can customize the increment used, and whether or not the part will be expanded in both directions.
Rotate Tool
The rotate tool allows the user to rotate the selected objects in any direction. On the side menu, the user can customize the increment used, and the pivotal point (Center, Local, or Last).
Paint Tool
The paint tool allows the user to select a color from a full color palette, or 132 choices. Parts that are selected at the time will be changed, and parts that are clicked will be instantly changed.
Surface Tool
The surface tool allows the user to change the surface type of all or specific sides of the selected parts.
Material Tool
The material tool allows the user to change the material, transparency, and reflection of the selected parts.
Anchor Tool
The anchor tool allows the user to set whether or not the selected parts are anchored.
Collision Tool
The collision tool allows the user to set whether or not the selected parts can collide with other parts.
New Part Tool
The new part tool creates a new part at the mouse's position. Normal, truss, wedge, corner, cylinder, ball, seat, vehicle seat, and spawn are all different options for part creation.
Mesh Tool
Texture Tool
Weld Tool
The weld tool allows the user to weld two or more parts together, keeping their relative distance the same but the parts move together.
Lighting Tool
The lighting tool allows the user to add a SpotLight, PointLight, and/or SurfaceLight to the selected parts, and can be customized fully.
Decorate Tool
The decorate tool allows the user to add Smoke, Fire, and/or Sparkles effects to the selected parts, and can be customized fully.
Trivia
This section is a trivia section. Please relocate any relevant information into other sections of the article.
Building Tools by F3X

Building Tools by F3X (also known as simply F3X or BTools for short) is a widely-known building tool created by GigsD4X. The tool contains 14 default tools for creating, editing, and deleting parts in-game and in studio. Each tool has its own purpose, which allows lots of customization when used.
Setting Up the Tool Script
If the tool hits a harvestable object and the player has enough space in their bag, the player’s item count will go up by 1 on the leaderboard. Harvesting an item will make it disappear for a few seconds and become unharvestable for a few seconds before reappearing. This encourages players to explore to find more items, instead of just clicking the same item.
Create a new Script
- Go back to StarterPack, under Scoop, add a new script named ToolScript.
- Add a comment at the top.
- In ToolScript, type:
Check if Item is Harvestable
Whenever the tool touches an object, it’ll check if that object has CanHarvest inside and if the boolean is set to True.
- Create a new function named onTouch with a parameter named partTouched .
- In local function onTouch , type local canHarvest = partTouched.Parent:FindFirstChild(“CanHarvest”)
- Under local canHarvest , type if canHarvest then and press Enter autocomplete add end
- Under if canHarvest then , type print("Found an item") . This will help you check if your script is working.
- Under the function’s end , type scoop.Touched:Connect(onTouch) . This lets the script check if anything is touching the scoop and if so, will call onTouch .
- Play the game and use the tool on a cupcake. Check in the Output Window that you get the message: "Found an Item" when touching that cupcake.
Troubleshooting Tips
If you can’t see the cupcake in the game, make sure it’s unioned part is Anchored.
If you didn’t get the message: Found a Item in the Output Window, try the following:
- Check that scoop.Touched:Connect(onTouch) is under your function.
- Check that the object your tool is touching has a BoolValue named CanHarvest under it and that the value is checked.
- Make sure that the harvestable object is a Model. The code assumes there is a CanHarvest object attached to a model.
Get the Leaderboard Stats
Before increasing the player’s items, the tool must find the location of how many items a player has in that player’s leaderboard.
- First, get the player using the tool. In the ToolScript, under local scoop = toolScoop , and above the custom function, type:
- On the next line, find the player’s leaderstats. Type local playerStats = player:FindFirstChild(“leaderstats”)
- Under local playerStats , create variables for the items and spaces stats. Type:
Check Variable Names in PlayerSetup
The strings inside the () for FindFirstChild need to be the same as the IntValue names in the PlayerSetup script.
Check If the Object is Harvestable
Now that the tool script has the playerItems and playerSpaces variables created, you can start giving players an item point for each cupcake they harvest. Use the function created to check if the object touching the tool can be harvested, and if the player has enough space in their bag to increase the items shown on the leaderboard by one.
- To check if the item can be harvested, type if canHarvest.Value == true . Don’t autocomplete the function yet.
Getting The Contents of Value Objects
If you want to get a value from an IntValue object or BoolValue object, you need to use .Value at the end.
- To check if the player has space for more items, on the same line, add and playerItems.Value < playerSpaces.Value then and press Enter to autocomplete the if statement. If statements within other if statements are called nested if statements.
Check the Ends Before Moving On
Since you made a nested if statement that has more than one ends, it’s important to check that you don’t have too many ends or too little. Make sure your onTouch function looks exactly the same as above.
- Under then , type playerItems.Value = playerItems.Value + 1
Keep Code Indented For Better Readability
When making nested if statements, it’s especially important to make sure your code has indented spaces, like the above code sample. This helps you see where each if statement starts and ends.
- Play your project; use your tool to harvest a cupcake.
Make the Object Reset
After a player harvests the item, the item should disappear and CanHarvest set to false for a short time before becoming harvestable again.
Current building tools
The most widely used building tools as of now due to its higher capabilities. Everything is stored in one tool as opposed to 3 or 5. It is more advanced than regular building tools.
Обзор функций Roblox Studio

Всем привет новые игры, открывать существующие и просматривать последние статьи в Wiki. Чтобы создать новую игру, нажмите на один из шаблонов игры. Вам предоставлен широкий выбор: Обычная заготовка, включает в себя пустую игру; Тематические заготовки, включают в себя основы игр, которые определенно настроены; и Геймплейная заготовка, включающая в себя встроенный пользовательский геймплей.
Управление камерой. [ ]
Камера в Studio свободно плавает, потому вы можете свободно перемещать ее туда, куда вам нужно. Зажав правую кнопку мыши и перемещая ее, вы можете повернуть камеру. Используя колесико мыши вы можете приближать или отдалять камеру.
Также для камеры существуют некоторые команды. Камера двигается вперед и назад при помощи клавиш [W] и [S], в стороны при помощи [A] и [D], и вверх, вниз при помощи [E] и [Q]. Если вы зажмете [Shift], во время движения камеры - она замедлится.
Вы также можете вертеть камерой используя команды. Нажатие [,] и [.] повернет камеру, а [Page Up] и [Page Down] наклонит камеру вверх или вниз.
Фокусирование камеры. [ ]
Вы можете сфокусировать камеру на определенном объекте во время 3D-просмотра. Щелкните по Детальке или Модели и нажмите клавишу [F]. Эти действия заставят вашу камеру сфокусироваться на выбранном объекте и приблизит камеру, для детального осмотра модели. Если вы используете клавиши, для поворота камеры ( [,]; [.]; [Page Up]; [Page Down] или Нажатие правой кнопки и движение мышью ), то камера будет двигаться вокруг выбранного объекта.
Вы можете выйти из фокусировки при помощи любой из клавиш, для передвижения камеры: [W]; [A]; [S]; [D]; [Q] или [E] .
Создание новых деталей. [ ]
Нажмите на кнопку Part, чтобы вставить новую детальку в вашу игру. Вы можете нажать на стрелочку под кнопкой, чтобы выбрать тип детальки: Прямоугольник, Сфера, Треугольник или Цилиндр.
Туториал [ ]
Вы можете перемещать детальку по нажатию на нее и передвижению мыши. Также вы можете использовать инструменты Move и Rotate. Вы можете изменить внешний вид детальки, при помощи инструментов: Scale, Color и Material tools.
Инструмент Move позволяет вам двигать выбранную детальку по осям.

Инструмент Scale позволяет вам изменять размеры детальки.

Инструмент Color позволяет вам изменять цвет детальки.

Инструмент Material позволяет вам изменять материал детальки.

Toolbox. [ ]
Toolbox содержит библиотеку моделей и текстур, сделанных Roblox-комьюнити. Эти вещи - бесплатны для использования в вашей игре. Позже, когда вы начнете публиковать собственный модели, у вас также будет доступ к Toolbox. По нажатию на любую вещь из Toolbox, она переместиться в вашу игру.
Несколько моделей в Toolbox помечены, как "Высококачественные" и отмечены специальной иконкой
Эти модели были проверены Roblox для обеспечения качества и будут работать сразу же после перемещения в вашу игру.
Play. Вы можете играть в игру прямо в Studio. Когда вы хотите начать играть в вашу игру - нажмите на кнопку Play. Это воссоздаст вашего персонажа в вашей игре.
Когда вы наиграетесь или захотите отредактировать что-нибудь - нажмите на кнопку Stop. Это отменит все изменения, сделанные во время игры.
Exporting
F3X provides the ability to export in game builds to studio through the Import from Building Tools by F3X plugin. When the user presses the export button, the model is sent to a third party website where a code is sent back which allows the model to be loaded into Roblox Studio.
Contents
Creating Tools
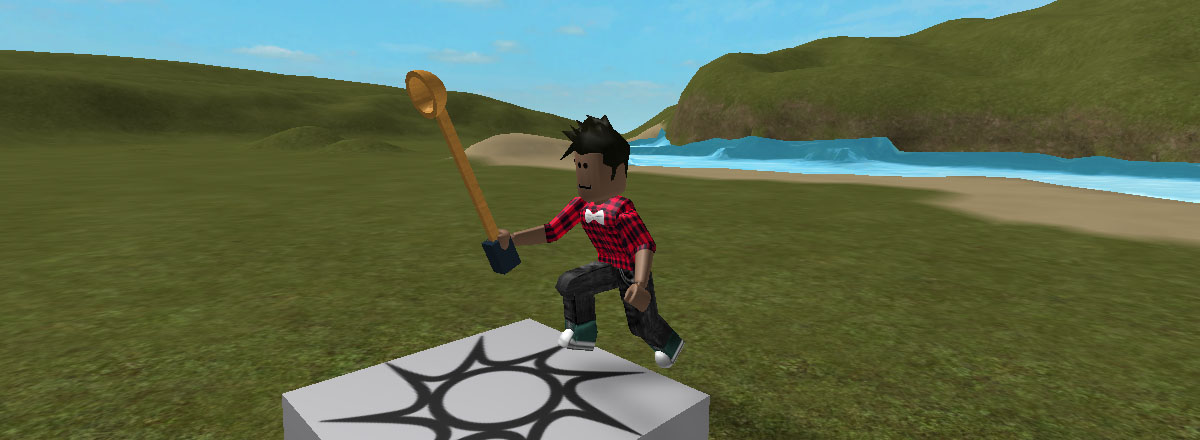
Players will need something like an ax or a shovel to gather items with. In Roblox, items that players can equip and use are called tools. This lesson uses a starter tool with all the parts and an animation already made that can be customized later.
Uh oh! Your browser doesn't appear to support embedded videos! Here is a direct link to the video instead.Old building tools
- Move - moves bricks.
- Copy - copies bricks.
- Delete - deletes bricks.
Setting up the Tool
To give players a tool at the start of the game, place it into the StarterPack.
Add the Tool to StarterPack
- Download the starter tool here if it’s not already on your computer. Remember where you save it to.
- In Explorer, under Workspace, right-click on StarterPack.
- Select Insert from File.
- Find the downloaded starter tool on your computer and open it.
- Rename StarterTool to the name you want players to see. For example, Scoop.
- Playtest your game. Players should be equipped with the scoop as soon as they start the game.
Tool Controls
- Press 1 to equip or put away the tool.
- Left-click to swing the tool.
Building tools roblox как пользоваться

Check Remember my choice and click in the dialog box above to join experiences faster in the future!
Thanks for visiting Roblox
Click RobloxPlayer.exe to run the Roblox installer, which just downloaded via your web browser.
Click Run when prompted by your computer to begin the installation process.
Click Ok once you've successfully installed Roblox.
After installation, click Join below to join the action!
Читайте также: