
Как открыть toolbox roblox studio
Обновлено: 05.07.2024
This article is a stub. You can help the Roblox Wiki by expanding it.
Toolbox (not to be confused with the user) is a selection in Studio that allows a user to access the library for free models, decals and sets.
Opening the toolbox
To open the toolbox, start Roblox Studio, and open a project. Once a project is opened, press either the "Home" or "View" tabs on the top of the screen. Click the button that says "Toolbox", and the library should open on the left side of the screen.
The Toolbox contains a selection of models, images, meshes, audio, and videos made by Roblox or Roblox community members. The Toolbox also includes all of the models, images, meshes, audio, videos, and packages you’ve published or those published by articles/Group Games|groups you belong to.
About Roblox Models »
In Roblox development, the term “model” can refer to any game element, not just to parts, groups of parts, or a Model object. Because Roblox does not restrict what game elements can be published and shared, this mechanism is a useful way to create and share scripts, remote events, constraints, and other non-visible game elements.
Toolbox Sections
The Toolbox is organized by sections and categories:

| A. Marketplace | |
|---|---|
| Models | Models published by the community. |
| Images | Images published by the community. |
| Meshes | articles/Mesh Parts|Meshes published by the community. |
| Audio | articles/sounds and music|Audio published by the community. |
| Plugins | articles/Intro to Plugins|Plugins published by the community. |
| Videos | Curated videos published by the community. |
| B. Inventory | |
|---|---|
| My Models | Models you have published or taken from the website's library. |
| My Images | Images you have published or taken from the website's library. |
| My Meshes | articles/Mesh Parts|Meshes you have published or taken from the website's library. |
| My Audio | articles/sounds and music|Audio you have published or taken from the website's library. |
| My Packages | Articles/roblox packages|Packages you have published. |
| My Plugins | articles/Intro to Plugins|Plugins you have published or taken from the website's library. |
| My Videos | Videos you have taken from the website's library. |
| Group Models | Models published by groups you belong to. |
| Group Images | Images published by groups you belong to. |
| Group Meshes | articles/Mesh Parts|Meshes published by groups you belong to. |
| Group Audio | articles/sounds and music|Audio published by groups you belong to. |
| Group Plugins | articles/Intro to Plugins|Plugins published by groups you belong to. |
| Group Packages | Articles/roblox packages|Packages published by groups you belong to. |
| C. Recent | |
|---|---|
| Recent Models | Models you have used recently. |
| Recent Images | Images you have used recently. |
| Recent Meshes | articles/Mesh Parts|Meshes you have used recently. |
| Recent Audio | articles/sounds and music|Audio you have used recently. |
| Recent Videos | Videos you have used recently. |
| D. Creations | |
|---|---|
| Models | Models you have published. |
| Images | Images you have published. |
| Audio | articles/sounds and music|Audio you have published. |
| Meshes | articles/Mesh Parts|Meshes you have published. |
| Plugins | articles/Intro to Plugins|Plugins you have published. |
| Group Models | Models published by groups you belong to. |
| Group Images | Images published by groups you belong to. |
| Group Audio | articles/sounds and music|Audio published by groups you belong to. |
| Group Meshes | articles/Mesh Parts|Meshes published by groups you belong to. |
| Group Plugins | articles/Intro to Plugins|Plugins published by groups you belong to. |
Sorting and Searching
Within any of the Toolbox sections, you can filter items by one of the categories above. Additionally, within the Marketplace section, you can click the button to:
- Search items by Creator (the Roblox user who published the item).
- Search articles/sounds and music|audio items by Sound Length to more easily distinguish short sound effects from longer background music tracks.
- Sort items by relevance, most frequently taken, number of “favorite” votes, most recently updated, or highest rated.
Item Inspection
A model, image, or mesh item can be closely inspected by hovering over its thumbnail and clicking the “magnify” icon.
Preview
The preview frame lets you see the item up close and, for 3D items like models and meshes, move the virtual camera around.

| Action | Description |
|---|---|
| Left Mouse Button | Rotate around the item. |
| Right Mouse Button | Pan (slide) left, right, up, or down. |
| Mouse Scroll Wheel | Zoom in or out. |
Composition
In the lower-right corner of the preview frame, the composition button reveals the full object hierarchy of the item including meshes, scripts, animations, and more.

Info and Actions
Below the preview frame is additional info and context actions for the item:
- Mark the item as one of your favorites using the button.
- Vote on the item using the voting widget.
- View the item’s creator, type, creation date/time, and when it was last updated.
- Use the button to copy the item’s ID, URI, view it in your browser, or edit it.
- Click the Insert button to insert the item into the current place.
Editing Assets
Assets which you created can be directly edited within Studio as follows:
- From the inspection window, click the button.
- Select Edit Asset from the context menu.
- In the configuration window that appears, you can change the title, description, and more.
- When ready, click the Submit button to register your edits.
This guide outlines the basic functionality of Roblox Studio , the all-in-one tool for building, scripting, and testing games in Roblox.
Studio Interface
The Studio interface is divided into several sections:
Menu Bar
At the very top of the Studio window is a menu bar with the following items:
Ribbon Bar
Below the menu bar is the ribbon bar. The tools displayed in the ribbon change when you click on the Home, Model, Test, View, and Plugins tabs.

Game Editor Window
This is where most of your game design happens. Here you can build, playtest, and move the virtual camera around your Roblox world.

Explorer Window
The Explorer window shows a hierarchical list of every object inside a place. It can be toggled from the View tab. See the Explorer reference for more details on this window.

Properties Window
The Properties window, also toggled from the View tab, shows every detail about how an object looks and behaves. For example, a Part has properties such as Position, Color, and Size which define where the part is located and how it appears.

Asset Manager
The Asset Manager window lets you manage places, images, meshes, and packages in your game. It also provides a mechanism to bulk import large groups of articles/game assets|game assets . See the Asset Manager article for more details.

Toolbox
The Toolbox contains a selection of models, images, meshes, and audio made by Roblox or Roblox community members. It also includes all of the models, images, meshes, audio, and packages you’ve published or those published by groups you belong to. See the Toolbox article for more details.

Quick Open
The Quick Open window can be opened by pressing Ctrl + P ( Command ⌘ + P on Mac) or by adding its action button to the Quick Access Toolbar. This window lets you quickly find any instance or path in the game and it includes some useful options for searching:
- The matched part of a search shows up in bold text within the search results.
- Pressing ↓ selects an item and Enter or a mouse click opens/locates it. Scripts open in the script editor while other instances are highlighted in the Explorer.
- Recent items are floated to the top of the list.
- You can optionally respect case by toggling the button, enable regular expression searches by toggling the button, or select “space as wildcard” and/or script-only searches with the button.
Moving the Camera
Inside the game editor window, you can move the camera with these controls:
| Key/Shortcut | Action | Description |
|---|---|---|
| W | Forward | Move the camera forward. |
| S | Back | Move the camera back. |
| A | Left | Move the camera left. |
| D | Right | Move the camera right. |
| Q | Down | Move the camera down. |
| E | Up | Move the camera up. |
| Shift | Change camera speed | In combination with any movement key, changes the camera speed (camera speed can be customized within Studio settings). |
| F | Focus | Focus the camera on a selected part. |
| Right Mouse Button | Turn the camera | Hold and drag to freely move the camera view around. |
| Middle Mouse Button | Pan the camera | Hold and drag to pan (slide) the camera. |
| Mouse Scroll Wheel | Zoom in or out | Zoom the camera in or out. |
| Icon | Action | Description |
|---|---|---|
 | Select | Lets you select an object in the workspace. |
 | Move | Displays three handles which can be dragged to move the current selection along the corresponding X, Y, or Z axis. |
 | Scale | Displays three handles which can be dragged to resize the current selection along the corresponding X, Y, or Z axis. Note that Model|Models can only be scaled uniformly. |
 | Rotate | Displays three handles which can be dragged to spin the current selection about the corresponding X, Y, or Z axis. |
 | Collisions | Toggles the collisions state. If collisions are off, objects can be moved, scaled, or rotated so that they overlap each other; If collisions are on, objects cannot be manipulated so that they overlap other objects. |
Saving and Publishing
The best way to save your work is to publish it to Roblox’s online servers. This lets you edit it from any computer that can run Studio. Publishing also lets others find and play your creations.
Select File → Publish to Roblox to publish your work. This will open a window where you can set the creation’s name, description, creator, genre, and which device types it should run on. If you already published your place in a session of Studio, this will publish the creation to the same slot.
Playtesting
There are three options for articles/game testing|playtesting a game, all accessible from the Home and Test tabs. Click on the small arrow below the button to choose one of the three options.

| Action | Description |
|---|---|
| Play | Starts simulating the game, inserting your avatar at either the SpawnLocation or coordinates of 0, 0, 0. |
| Play Here | Starts simulating the game, inserting your avatar at the current camera position. |
| Run | Starts simulating the game but does not insert your avatar. The simulation begins at the current camera position and you can navigate around the game world using the Studio camera controls. |
Customizing Studio
Studio Theme
Studio features both a light theme and dark theme. To change themes:
- From the Studio menu bar, select File → Settings .
- On the left side of the popup window, select the Studio tab.
- On the right side, locate the General section.
- For Theme, select either Default, Light, or Dark. If your operating system supports light and dark modes, the Default option will mirror your system mode.
Moving Windows
The windows in Studio can be customized to fit your ideal work style.
Uh oh! Your browser doesn't appear to support embedded videos! Here is a direct link to the video instead.Quick Access Toolbar
The top-left region in the Studio menu bar is called the Quick Access Toolbar and it contains shortcuts to various buttons and commands in Studio. You can freely add, remove, and rearrange actions in this section.

To quickly customize the Quick Access Toolbar, click the small arrow to the right of the toolbar. This will reveal a drop-down menu that lets you enable and disable items. You can also add and remove buttons, as well as change the order of the buttons, by selecting Customize from the drop-down menu.

Studio Shortcuts
All of the shortcuts in Studio can be customized. There are also many Studio actions without default shortcuts that can be tied to any key combo. See Roblox Studio Shortcuts for a complete list of these actions.

Roblox Studio (рус. - Студия Роблокс) - программа, автоматически устанавливаемая при скачивании ROBLOX Launcher, нужна для создания плейсов.
Содержание
Разделы
Открыв приложение Roblox Studio

При входе в Редактор можно увидеть 7 основных окон:
5. Окно Редактора
6. Окно Файла, Изменения размера и Поворот предмета, изменение Terrain'a, тест игры.
7. Окно выбора типа редактора.
Строительство
.jpg/revision/latest/scale-to-width-down/220?cb=20200627123155&path-prefix=ru)
Новый вид кирпича.
.jpg/revision/latest/scale-to-width-down/220?cb=20200627123039&path-prefix=ru)
Старый вид кирпича.
Кирпич
Для начала строительства модели нужно создать кирпич. Кирпич можно
растягивать, менять позицию, переворачивать, менять цвет или материал.
Terrain
Terrain обычно используется для создания ландшафта (горы, поля и т.д) имеется несколько инструментов для работы с Terrain:
- Generate - Автоматически создаёт ландшафт
- Add - Создаёт шары/кубы из различных материалов
- Subtract - Удаляет ландшафт который находится внутри шара/куба
- Paint - Меняет материал поверхности.
- Grow - "Вытягивает" ландшафт.
- Erode - "Втягивает" ландшафт.
- Smooth - Делает ландшафт ровнее.
- Flatten - Делает ландшафт плоским.
Материалы
Материалы можно переключать как и у Terrain, так и у Кирпичей.
Ниже представлен список материалов:
Материалы кирпича
- Brick - текстура строительных кирпичей.
- Cobblestone - текстура булыжника.
- Concrete - текстура бетона.
- Corroded Metal - текстура ржавого металла.
- Diamond Plate - текстура металлической пластины протектора.
- Fabric - текстура ткани.
- Foil - текстура фольги.
- Forcefield - текстура силового поля.
- Glass - текстура стекла.
- Granite - текстура гранита
- Grass - текстура травы.
- Ice - текстура льда.
- Marble - текстура мрамора.
- Metal - текстура металла.
- Neon - текстура неона.
- Pebble - текстура гальки.
- Plastic - текстура пластика.
- Sand - текстура песка.
- Slate - текстура камня.
- Smooth Plastic - текстура гладкого пластика.
- Wood - текстура дерева.
- Wood Planks - текстура деревянных досок.
Текстуры Terrain
- Asphalt - текстура асфальта.
- Basalt - текстура базальта.
- Brick - текстура строительных кирпичей.
- Cobblestone - текстура булыжника.
- Concrete - текстура бетона.
- Cracked Lava - текстура застывшей лавы.
- Glacier - текстура ледника.
- Grass - текстура травы.
- Ground - текстура тропы.
- Leafy Grass - текстура травы с листьями.
- Ice - текстура льда.
- Limestone - текстура известняка.
- Mud - текстура грязи.
- Pavement - текстура тротуара.
- Rock - текстура камня.
- Salt - текстура соли.
- Sand - текстура песка.
- Sandstone - текстура песчаника.
- Slate - текстура камня (гладкий)
- Snow - текстура снега.
- Water - текстура воды.
- Wood Planks - текстура деревянных досок.
Toolbox
Toolbox является библиотекой моделей в Roblox Studio. Некоторые модели могут иметь знак, что были проверены и не имеют вирусов. Использование моделей из Toolbox очень критикуется игроками.
Исключение
Исключение в том, что Toolbox поможет, если вам ОЧЕНЬ нужна модель/скрипт и т.д., но вы не знаете, как это сделать.
Скрипт
Скрипт используется для создания различных вещей для плейса и является основой для создания плейса. Пример скрипта:
Explorer
Вы выбираете объект в Exploler и информация о нём показывается в Propeties. Например, если вы добавили в модель скрипт, в Properties будет храниться информация о нём, а в Exploler вам надо лишь найти эту модель.
Properties
В Explorer надо выбрать, о какой модели вы хотите узнать, а в Properties уже показывается информация: Прозрачность, имя, цвет и т.д. Также с помощью Properties вы можете изменять всё это.
Плагины
Это очень хороший инструмент, который поможет вам не начинать с нуля: например, вы можете установить плагин, который делает на вашем плейсе смену дня и ночи, реалистичную смерть, кровь при уроне и т.д. Плагины может установить каждый, так как они не стоят робуксов.
Во вкладке View можно открыть другие различные вкладки (такие как Game Explorer, Chat)
Бонусы BC
Без клуба строителей вы можете сделать только один активный плейс. То есть на нём можно будет играть, а на неактивных нельзя. Если вы купите клуб строителей за реальные деньги (доллары США), вы можете сделать активными плейсами больше, например 5 или 10*.
С сентября 2017 года, все игроки, включая NBC, могут сделать 200 открытых плейсов.
Бонусы Premium
После добавления Премиума в плейсе можно было добавить различные функции, доступные для пользователей с Премиум-подпиской.
Roblox Studio в 2013 году.
Примечание

Roblox Studio в 2006 году
Roblox Studio можно запустить только на компьютерных устройствах, ОС Windows или Mac. Если вы хотите запустить Roblox Studio на мобильных устройствах, у вас ничего не получится.

Окно ошибки, всплывающее при попытке запуска Roblox Studio без интернет-соединения

Всем привет новые игры, открывать существующие и просматривать последние статьи в Wiki. Чтобы создать новую игру, нажмите на один из шаблонов игры. Вам предоставлен широкий выбор: Обычная заготовка, включает в себя пустую игру; Тематические заготовки, включают в себя основы игр, которые определенно настроены; и Геймплейная заготовка, включающая в себя встроенный пользовательский геймплей.
Управление камерой. [ ]
Камера в Studio свободно плавает, потому вы можете свободно перемещать ее туда, куда вам нужно. Зажав правую кнопку мыши и перемещая ее, вы можете повернуть камеру. Используя колесико мыши вы можете приближать или отдалять камеру.
Также для камеры существуют некоторые команды. Камера двигается вперед и назад при помощи клавиш [W] и [S], в стороны при помощи [A] и [D], и вверх, вниз при помощи [E] и [Q]. Если вы зажмете [Shift], во время движения камеры - она замедлится.
Вы также можете вертеть камерой используя команды. Нажатие [,] и [.] повернет камеру, а [Page Up] и [Page Down] наклонит камеру вверх или вниз.
Фокусирование камеры. [ ]
Вы можете сфокусировать камеру на определенном объекте во время 3D-просмотра. Щелкните по Детальке или Модели и нажмите клавишу [F]. Эти действия заставят вашу камеру сфокусироваться на выбранном объекте и приблизит камеру, для детального осмотра модели. Если вы используете клавиши, для поворота камеры ( [,]; [.]; [Page Up]; [Page Down] или Нажатие правой кнопки и движение мышью ), то камера будет двигаться вокруг выбранного объекта.
Вы можете выйти из фокусировки при помощи любой из клавиш, для передвижения камеры: [W]; [A]; [S]; [D]; [Q] или [E] .
Создание новых деталей. [ ]
Нажмите на кнопку Part, чтобы вставить новую детальку в вашу игру. Вы можете нажать на стрелочку под кнопкой, чтобы выбрать тип детальки: Прямоугольник, Сфера, Треугольник или Цилиндр.
Туториал [ ]
Вы можете перемещать детальку по нажатию на нее и передвижению мыши. Также вы можете использовать инструменты Move и Rotate. Вы можете изменить внешний вид детальки, при помощи инструментов: Scale, Color и Material tools.
Инструмент Move позволяет вам двигать выбранную детальку по осям.

Инструмент Scale позволяет вам изменять размеры детальки.

Инструмент Color позволяет вам изменять цвет детальки.

Инструмент Material позволяет вам изменять материал детальки.

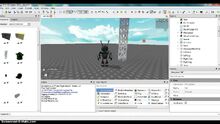
Toolbox. [ ]
Toolbox содержит библиотеку моделей и текстур, сделанных Roblox-комьюнити. Эти вещи - бесплатны для использования в вашей игре. Позже, когда вы начнете публиковать собственный модели, у вас также будет доступ к Toolbox. По нажатию на любую вещь из Toolbox, она переместиться в вашу игру.
Несколько моделей в Toolbox помечены, как "Высококачественные" и отмечены специальной иконкой
Эти модели были проверены Roblox для обеспечения качества и будут работать сразу же после перемещения в вашу игру.
Play. Вы можете играть в игру прямо в Studio. Когда вы хотите начать играть в вашу игру - нажмите на кнопку Play. Это воссоздаст вашего персонажа в вашей игре.
Когда вы наиграетесь или захотите отредактировать что-нибудь - нажмите на кнопку Stop. Это отменит все изменения, сделанные во время игры.
Читайте также: