
Farmers dynasty где купить животных
Обновлено: 07.07.2024
"Food" is distinct from "crops" (grown in a field, that you can only sell at market by the tonne),
Food is divided into three "tiers" or levels of processing.
- raw food
- canned food
- fully cooked meals
You have to eat in order to stay strong and able to work at maximum capacity.
Contents
Selling Your Food [ ]
You sell your food to vendors, like John the general store owner, just northeast of your farm. This is a significant source of short-term income (as opposed to farming field crops, which is more of a year-long endeavor). Unlike other games, selling off your food supplies is not only prudent, it's kind of your JOB, Mr. Farmer! Keep back a few prepared foods for yourself, of course.
When selling your food, you should cook it to the maximum tier you can, as the more prep you put into the food, the more you will get. Be sure to obtain all the recipe books (More info under cooking below.) and set up you're farming habits around them for maximum returns.
September is verry important for the selling of food, as it is where you can really rake in the cash thanks to the summer festival in the Town of Redberry. As all food is bought by Rose at a much better price then you get from other venders, It is a good idea to hoard food to sell to Rose at the summer festival. So, if you're not struggling for cash, or if you're getting close to September, it's time to stock pile. (Remember to have a cat if you are hording in your pantry!)
Now you're playing the food market like a true capitalist champ.
Where to obtain raw food. [ ]
- Foraging (Wild Mushrooms & strawberries are found in grassy areas just about anywhere. Wild animals (Such as dear and bores) can be seen hanging around places where there are mushrooms / strawberries to forage. Use your Engineer's Sight to highlight all of these.)
- Orchards (You can pick apples from the orchard in the NW corner of your farm, and also on other people's farms. The folk here don't seem to mind if you clean them out dry, so go nuts.)
- Fishing (Raw fish; two varieties. The fishing pole can be bought from John. The pond next to your farm is a fine place to fish, though there's lots of other bodies of water around. It doesn't seem to make any difference where you fish though; which type of fish you get is random. See the Farm Buildings page for "how to fish".)
-Build bee hives (honey. Use your Engineer's Sight to find 4 locations around the perimeter of your farm to build 11 hives. They produce honey only rarely, so it's best to build all 11 and check them daily.)
- Greenhouse (Vegetables and some fruits. We may just lump them together as "vegetables" for the sake of convenience. See the Farm Buildings page for more details.)
- Animals (Milk, chicken eggs. See Animals page)
- Trading with NPCs (generally a last resort if you have no food and are starving. You're a farmer; you're supposed to sell food TO them!)
Cooking [ ]

Raw food (Tier 1) is neither very filling or very valuable if sold, and it is not recommended for you to do either with it. Using the stove in your kitchen, you can process raw food into simple canned food (Tier 2) which is worth something both to NPCs, and to your stomach! Full meals (Tier 3) are the most filling and valuable to sell, but require three different (raw) ingredients for each meal, so you're not likely to be able to make many of these until you've harvested (or bought from an NPC) some greenhouse vegetables.
If you get married, your Wife will produce a few meals once a day, (using raw food you have stored in the Pantry downstairs. don't forget to buy a cat!) She's also a better cook than you are, and her meals will restore +100 of your food conditions, which should certainly be enough to keep your own status up, but to make enough food to sell, you will need to make it yourself, just like when you were a bachelor!
Cooking food into full meals (Tier 3) requires you find recipe books to teach yourself how.
There are three:
- Egg-based Recipes: This book is easiest to find; John at the store next to your farm sells it. Eggs are also the only of these 3 foods that can be easily produced in large quantities, so you'll be making a lot of these, I think.
- Honey-based Recipes: Several different NPCs (all women, I think?) have an option to Trade in their dialogue, and can sell you this book. Time to run around town, chatting up the ladies! I think I usually find someone hanging out in a church yard selling it. (These ladies can also sell you a few greenhouse veggies immediately).
- Fish-based Recipes: This book is the least convenient to get, as it is available only from the harvest vendor Rose, only during the month of September. However, it contains magic plates that can be used to become fricking Jesus (More info on this bug below).
As stated above in Selling Your Food, Rose buys all tiers of food products at higher prices than any other NPC, so it's worthwhile to hold some back to sell to her at the end of the year if you can. There's a large balloon that reads "HARVEST", visible from considerable distances, hovering above Rose in September to help you notice her.
Holy Mackerel, Fish Cooking bug. [ ]
Somehow, the recipes from some old forgotten testament found its way into the fish-based recipes book, because it lets you perform big J's second favourite party trick, Splitting fish into two. (His favoured being the turning of H2O into a fine Cabernet sauvignon (Red wine you uncultured swine) of course).
When you fish, there are two types you get, the light gray and the dark gray fish with red fins. By most part, you will get the bigger light gray fish, and the occasional red fin. The game seems to check your inventory for both fish to work out the total amount of dish's you can make, However, it makes the fatal flaw of only consuming the stack of red fins when making that batch. This means that as long as you have a few red fins around, you can dupe an arbitrary number of fish into existence.
Hens are a reliable source for food and income. You are able to buy them at the beginning of the game, but it is recommended to repair the hen house first before you buy any hens.
The hens can be bought at the agricultural store for 25 euro per hen. You also get 100 kg chicken food when you buy a hen. Your hen house has place for 20 hens.
Once you have acquired the maximum of 20 hens, they will produce 40-60 eggs per day, every morning at 6:00am.
Rooster [ ]
Unlike hens, only one rooster can be bought at the agricultural store for €95.
The rooster lives in the hen house, and on sunny days can be seen perched up on the corner of the hen house fence.
With a rooster present, there is a small chance that an egg your hens have laid will hatch into a new hen. If this happens when you already have the maximum number of hens, a notification will appear that the new hen has been sold for €60-70.
Cows are a good source for milk. and manure (for fertilizing)! That's why they are very important to create a good farm.
The appropriate source of food for cows are straw bales. Every bale adds 200 kg of food to the storage in the cow barn. Cow food can also be purchased at the Agricultural Store.
Cows can be bought at the agricultural store for 470 euro each.
Cows produce 1080 manure everyday. (Needs confirmation whether hens, ducks and geese also contributes, pigeons do not.)
Across the road from the store near your farm, a dog named Rex can be initially found.
In order to befriend Rex and have him live on your farm, he must be fed sausages four times. Sausages can be bought at the store or from some NPCs.
I can't confirm his new locations aren't randomized, but on the off chance they're not, here's where I found him:
Location 2: in the garden at the foot of the white house, at the farm just WSW of yours, north side of the road.
Location 3: In front of the metal gates of Oliver's homestead (remember repairing his barn in return for a tractor?) which is almost due south of the previous location, on the other side of the wheat field,
You may regularly see a notification that mice are eating the food stored in your pantry. Buying a cat from the agricultural store for €140 will prevent this loss of food.
The grey cat, named James, will then be seen resting in a number of places near the middle of your buildings. (Use Engineer Sight to help find him quickly).
Occasionally, you will have to feed him a fish to. keep him hungry enough to eat mice. (No, that doesn't make any sense; just go with it!)
Ducks and Geese [ ]
Ducks can be bought at the agricultural store for 33 euro each, while Geese cost 47 euro each.
You may purchase a maximum of 10 of each and they will nest in the straw barn next to each other, visiting the pond during the day.
Both will occasionally lay an egg (MUCH less often than hens) in the straw where they gather in the hay barn (one per animal). The eggs can be eaten raw. Duck eggs gives 15 nutrition while Geese eggs gives 20 nutrition. It does not seem to be usable in any recipes even though the game says it can, "Food. Can be eaten raw or used to prepare delicious dishes." Maybe the wife knows how to cook this (needs confirmation).
After collecting all the eggs you'll still see 20 uncollected eggs in Farm Statistic regardless whether you own any pigeons or not, it may be a bug that's related to Ducks and Geese since you can have 20 total and they all lay one egg each.
Pigeons [ ]
Pigeons can be bought at the agricultural store for 28 euro each.
Your Pigeon roost (a tall birdhouse next to the Gazebo) has a maximum of ten perches.
Pigeons do not appear to serve any purpose beyond decoration in the current game build.
The pricing for all items in this game changes (usually every two weeks), the values you see below are the standard prices and can differ in your game depending on price fluctuation. and since we're talking about prices, note that while the game allows you to change the currency between USD, EUD, and GBP, there's no conversion happening; just a different symbol being displayed in front of a number, so if the prices seem unrealistic or off to you, don't sweat it.
All attachments (and vehicles) can be sold back to the vehicle stores (including the quest-given "old" equipment) by bringing them to the sales floor area. Walking up to the thing gives an option to sell it. As you will no longer be able to move around something you've sold, be mindful of where you dump your old stuff, or you may have difficulty getting your new stuff out of the lot! Pick an out-of-the-way spot. Selling the old equipment is worth doing if you no longer need it; they're worth more than you might think (if still less than the modern equipment, obviously). As a side benefit, selling off all your unused equipment thins out that opaque mass of map markers around your homestead!
All Old attachments are acquired through quests (if not found lying around your farm) and are hitchable to the Jack Bear tractor. Gathering them all up is one of your main objectives for your first year of the game. Search the map for markers with a person icon. The marker text sometimes tells you what the job they want you to do in return for the old farm equipment is, and whether you should drive your old pickup or your Jack Bear tractor to the quest (if in doubt, take the truck to talk to the quest giver first. It's much faster! Although if the quest giver is located close to one of the bus stops, using that method to instantly move there may be even faster.) Regardless, after quest completion, you'll need your tractor to take your reward home.
As of the current build, modern tractors can hitch all the Old attachments, but the old Jack Bear tractor cannot pull any of the modern attachments. Your first vehicle upgrade should therefor be a tractor (the attachments can come later).

The plow is used to prepare fields to be cultivated. Plowing is the first stage in preparing a field for planting.
(Note: If the field you're given or purchased already has crops in it, harvest them first before plowing! Even if the yield is low, they're worth money!)
Lemming J17 [ ]
Available at the Vehicle Shop in Redberry. Plows a wider furrow than the Old Plow, allowing you to finish a bit faster!
Cultivator [ ]

The cultivator is used to break up the large clumps of dirt left by the plow, and is the 2nd step in readying a field for planting.
Each cultivator upgrade is a little wider than the less expensive one, allowing you to finish cultivating a field a little faster.
(Note: Since the cultivators themselves are not outrageously expensive, it's probably more worthwhile to save up a bit and buy the biggest one than to pay for either of the mid-range ones.)
Harrow (the Old cultivator) [ ]
Found in the grass between your hay barn and your starter fields.
Amazone Cenius 3002 [ ]
Available at the Vehicle Shop in Redberry, Wheatford and in North Lakeside.

Amazone Cenius 3002
Boxer GF XL [ ]
Available at the Vehicle Shop in South Lakeside.
Amazone KG4000 [ ]
Available at the Vehicle Shop in South Lakeside.
The largest cultivator available.
Fertilizers (the mechanical attachment) [ ]
Fertilizing (with artificial fertilizers) and manure spreading (a natural fertilizer) are the 4th and/or 5th step in planting a field. Combing both types results in the field being 200% fertilized, and is very recommended. Technically, fertilization is not required to grow crops, but it will significantly increase the amount harvested.
To fill your fertilizer attachment, back it into the Magazine (brick room at the end of your Garage). Fertilizers are purchased from the Agriculture Store.
Fert-ex (R) is a product that combines both types of fertilizer into one, allowing fertilizing to be a single step process instead of two. It can be bought from the Agriculture Store. if you have at least 55,000 social standing, you can also hire a cropduster plane to spray Fert-ex R over a field for a monetary fee. Not only does the helper supply their own Fert-ex R, but the plane is MUCH quicker, so it's actually a pretty good deal.
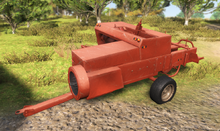
The (old) Fertilizer [ ]
Acquired by quest. Capacity of 250kg.
Amazone ZA-M 1501 Centrifugal Fertilizer [ ]
Available at the Vehicle Shop in South Lakeside.
Fertilizer Capacity: 3,000 kg
Rauch TWS 7000 Centrifugal Fertilizer [ ]
Available at the Vehicle Shop in Wheatford.
Fertilizer Capacity: 8,560 kg
Liquid Manure Spreaders [ ]
Fertilizing (artificial fertilizers) and manure spreading (natural) are the 4th and/or 5th step in planting a field. Combing both types results in the field being 200% fertilized, and is recommended. Technically, fertilization is not required to grow crops, but it will significantly increase the amount harvested.
Manure is generated by your cows, and spreaders can be filled with the pipe mechanism beside the cow barn. However cows don't produce large quantities, or very quickly, so by year 2 you may want to purchase more from the Agriculture Store.
Alternatively, Fert-ex (R) is a product that combines both types of fertilizer into one, allowing fertilizing to be a single step process instead of two. It can be bought from the Agriculture Store, or a helper can be hired to cropdust a field with it in minutes.
The (old) liquid manure spreader [ ]
Acquired from quest. Uses manure produced by cows and can be refilled next to the barn. It has a 10,000kg capacity. Repainted (/renewed) version = 12500kg.
Zunhammer 18500 Liquid Manure Spreader [ ]
Available at the Vehicle Shop in Redberry and Wheatford.
The Zunhammer 18500 is an upgrade of the small old liquid manure spreader.
Manure Capacity: 18,500 kg
Seeders [ ]
After you have cultivated the field, (and ideally fertilized it as well) the final stage is to seed the field. While it is technically possible to plant different crops in the same field, it is not recommended, as you can only harvest one type of crop at a time, and cannot mix them at any point in their processing or transport.
Back the Seeder into the Magazine (brick room at the end of your garage) to fill it. Seeds are purchased from the Agriculture Store and automatically delivered to the Magazine.
The (old) Seeder [ ]
Capacity: 360 kg of seeds.
Amazone D9 4000 Seed Drill [ ]
Available at the Vehicle Shop in Redberry.
Seed Capacity: 860 kg
Amazone D9 6000 seed drill [ ]
REQUIRES Grain Wagons & Trailers [ ]
The grain wagons/trailers are used to transport your crops to The (old) Grain Wagon [ ]
Grain capacity: 4,200 kg (or 5250 kg after repair in your garages)
This wagon can be attach in the front or at the back of Fliegl DK 180-88.
Fliegl DK 110-88 trailer [ ]
REQUIRES Fliegl DK180-88 trailer [ ]
Two are available at the Vehicle Shop in North Lakeside and one at Wheatford.
Grain Capacity: 11,000 kg
This is the only trailer besides the old wagon that can be attached to the back of Old Tractors.
Note that there are more than one of these, and if you're VERY good at backing up with a trailer attached, you can hitch two together and double your hauling capacity and cut your trips to the market/mill in half. (three is possible but requires a lot of patience and practice).
In theory, you may be able to attach 5 trailers. Three Fliegl DK 180-88, one Fliegl DK 110-88, one Old Grain Wagon. So far, I've only manage to attach one of each. Will update this info when or if I manage to do so.
Lining up multiple trailers over a dumping grate may seem tricky at first, , but there is a way to predict which one raises up or comes undone when you select "unhitch". It entirely depends on where the camera angle is focus on. First, start by changing camera to first person view. Now keep pressing until the camera angle starts focusing on each of the trailers starting from the one attached to the back of the tractor vehicle. Then either raise or unhitch any of the trailer as necessary.
Or you can skip all that headache, spend a bit more to buy the biggest trailer (see below), with almost triple the capacity at 32000kg. VERY highly recommended!
Krampe Big Body 500 Grain Trailer [ ]
Available at the Vehicle Shop in North Lakeside.
Grain Capacity: 16,000 kg
Krampe Big Body 900 trailer [ ]
REQUIRES Fliegl Bull 371 trailer [ ]
Available at the Vehicle Shop in South Lakeside.
Grain Capacity: 32,000 kg
Price: €19,000 or €9,500 +19,000 SP
Square Balers [ ]
After harvesting a field of a grassy type crop (ex: wheat, barley) you will notice greyish lumps of straw scattered all over the field. Run the baler over those lumps and it will spit out square bales.
Fun Fact: In the real world, hay is the preferred feed for livestock, and wheat straw has almost no nutritional value (but in an emergency is preferable to starving the lifestock to death). The game only deals in "straw" however.
To use Square Balers effectively, you need to learn how to accurately reverse with trailer type equipment hitched. This is because you need to perform a double hitch, turning your tractor into a bail gobbling power train. First hitch a Square Baler to your tractor, then hitch a bail waggon to the back of the bailer.
Bails will now automagicly load onto the bail wagon without the need to tediously pick the bails up one by one.
The (old) Square Baler [ ]
Acquired by quest.
Square Hay Baler [ ]
A new Square Hay Baler is available at the Vehicle Shop in North Lakeside. It is presumably more efficient, although it is difficult to say just how.
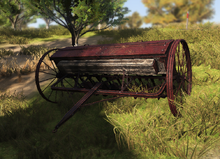
Bale Wagon [ ]

The Bale Wagon/trailers are used to transport straw bales created using the Baler. Unfortunately, they don't magically pick them up off the ground for you on their own. However, as mentioned above, they can be double hitched to the back of Square Balers allowing the bails to be auto loaded onto the wagon.
It is a good idea to take them to your cow barn and fill your cow food storage first. Manually unload them one at a time, dropping them anywhere inside the cow barn. (The bale disappears as it is added to storage).
Whatever is left over after the cow barn is full to capacity, (takes about 50 bales) you can sell at the Agricultural Market, by driving close to the awning with stacked bales under it. the old bail wagon will fetch around $500 per full load, (20 bails at €25 each) give or take depending on current market prices.
The (old) bale wagon [ ]
Can hold a total of 20 bales.
Boxer HT40 Square Bale Trailer [ ]
Available at the Vehicle Shop in South Lakeside.
Fliegl ZPW100 Square Bale Trailer [ ]
Two are available at the Vehicle Shop in North Lakeside.
Can hold a total of 39 bales.
Note that there are two of these, and that if you're fairly good at backing up trailers, you can hitch one behind the other, bringing the total number of bales you can take to market in one trip to 78! Most fields produce somewhere between 39 and 78 bales, so now were making just ONE trip (unlike the smallish pair of grain trailers, these are the largest bale wagons, so buying both is might actually be worthwhile!) Managing them both is tricky, however. You'll probably never be able to back up with both of them connected, and it seems difficult to predict which trailer will disconnect when you press the "unhitch" button. I'm also finding it was much easier to back one up into the other on the perfectly flat vehicle store lot, than it is to reconnect them on a lumpy hill next to the field full of straw bales I'm hoping to load them with. Maybe double the trips is worth half the frustration? That'd be a definite player's own judgement call. As one bonus tip for managing these doubled trailers, before you leave them (or log off) always remember to find a very flat spot to park them. If they stop on a hill, they tend to slide a bit before settling, and when you next log back in, not only are they all disconnected (normal) but they're not aligned neatly to easily re-connect them anymore.
Grass Mower [ ]

Sells for: €1,250 - €1487.76 (sell price fluctuates? needs more research, renew and repaint has no effect on selling price)
The grass mower is a attachment which can be used to remove sizable grass patches. The old version is found in the Hay Barn, and can be hitched behind your Jack Bear tractor. It's rather awkward to use though, so you may wish to wait to cut your grass until you can afford the modern version. It's better to just sell this equipment because using it with old tractor is painfully slow at 12 kph. If you really have to cut grass early in the game but can't afford new tractor vehicle (required for Boxer 275 Mower) then consider getting a Lawn Mower. It cuts about the same size as old grass mower but moves way faster at 23 kph, plus it doesn't leave tire marks on the ground unlike tractor vehicles.
(Note that, just like in real life, the best way to trim grass in those hard to reach corners and edges next to buildings and other obstructions is the weed trimmer tool found in the side-building of the Hay Barn. Mowers are for cutting large patches at a time.)
Boxer 275 Mower [ ]
A new Mower is available at the Vehicle Shop in Redberry and Wheatford. Cannot be attached to the old tractors vehicles. It pairs well with the little red Lindner 94ep tractor. Movement speed with modern tractors can go from 16 kph (cruise control) up to
(Note that there is actually a dedicated vehicle called the Lawn Mower; no attachments, very nimble and good at edging, slower traveling speed. Cut's 20% less wider than the Boxer mower attachment above. See the vehicle page).
Чужой компьютер

Farmer’s Dynasty
вернуться к странице

Анна Якунина запись закреплена
можно ли продавать сено в тюках? и где купить коров и кур?
Нравится Показать список оценивших
Сначала старые

сено продовать нельзя им коров кормить, животных покупать надо в магазине с рассадой
Нравится Показать список оценивших

Нет, Максим неправ. Продавать сено как раз можно. На Западе имеется элеватор, куда зерно на продажу свозят. Там при входе присутствует Сенной рынок (работает до 21 где-то). Туда свозите и сено и траву, если будете ее косить на чьих-нибудь полях.
Нравится Показать список оценивших
Сельскохозяйственный магазин - там можно выбирать 3 уровня товаров: семена для полей, животные, семена для теплиц
Читайте также: