
Demon tower night in the woods прохождение
Обновлено: 06.07.2024


Night in the Woods
Статистика: Night in the Woods > Общие обсуждения > Подробности темы 21 фев. 2017 в 13:36 Demon Tower Full Walkthrough Отредактировано VideoGameNews; 21 фев. 2017 в 14:19 21 фев. 2017 в 13:52 Wow that was fast. 21 фев. 2017 в 14:02 Woah, so you don't get an achievement for beating it? That's weird. 21 фев. 2017 в 14:06 Also, you're missing lv. 7: Blood Moat. :) 21 фев. 2017 в 14:14 9 levels? That's a lot. I just gave up on the 3rd boss. 21 фев. 2017 в 14:19 Also, you're missing lv. 7: Blood Moat. :) Thank for letting me know, I add it. Отредактировано VideoGameNews; 21 фев. 2017 в 14:19 21 фев. 2017 в 14:22Do you get anything by activating 8 skulls on the last level? Or it's just a waste of time?
Edoted: I just killed the last boss and checked your video. I get the same ending but I did not activate the skulls because it was taking too much time for each try. Guess they really do nothing.
Отредактировано Kligan; 21 фев. 2017 в 14:28 21 фев. 2017 в 15:46 Woah, so you don't get an achievement for beating it? That's weird. I think they might be broken right now. 21 фев. 2017 в 15:49 Woah, so you don't get an achievement for beating it? That's weird. I think they might be broken right now. Yeah, think you're right; the Demon-something achievement seems to refer to this minigame.Might have to play again after someone posts a guide. It's awfully annoying how all achievements are hidden, too. 21 фев. 2017 в 15:51
To get the achievement and the real ending, do not kill the sneaky-looking bird at the beginning of level 2. Every even level, he'll give you a hint about which skulls to activate on level 10. You do that, then you can probably figure out the rest.
Edited for spoiler cover. Sorry, I'm not used to posting on communities!
Отредактировано Porygon-Z; 21 фев. 2017 в 19:51 21 фев. 2017 в 15:51 Lol, wow, that was fast. Nice. :P 21 фев. 2017 в 15:53To get the achievement and the real ending, do not kill the sneaky-looking bird at the beginning of level 2. Every even level, he'll give you a hint about which skulls to activate on level 10. You do that, then you can probably figure out the rest.
I love you right now, thanks! Will restart my game tomorrow; accidentally killed the thing. 21 фев. 2017 в 22:39To get the achievement and the real ending, do not kill the sneaky-looking bird at the beginning of level 2. Every even level, he'll give you a hint about which skulls to activate on level 10. You do that, then you can probably figure out the rest.
Edited for spoiler cover. Sorry, I'm not used to posting on communities!
Is there a locked door you're supposed to go to after you get the key? I unlocked the key and defeated the final boss, but still got the "bad/false" ending. not sure else to do ¯\_(ツ)_/¯ 22 фев. 2017 в 4:37To get the achievement and the real ending, do not kill the sneaky-looking bird at the beginning of level 2. Every even level, he'll give you a hint about which skulls to activate on level 10. You do that, then you can probably figure out the rest.
Edited for spoiler cover. Sorry, I'm not used to posting on communities!
Мэй, разбивающая статую
На протяжении всей игры Мэй будут сниться несколько странных осознанных снов.
Содержание
Часть 1: Снова дома [ ]
День 3 [ ]
Мэй испытает свой первый страшный сон после того, как напьётся на вечеринке, из-за чего Би пришлось отвезти её домой. До этого Мэй рассказывает всем на вечеринке, как ей не нравилось в колледже: она описывала ржавую статую, которая вечно указывала на неё, что приводило её в бешенство.
Уже дома, она теряет сознание в своей кровати и, будучи пьяной, видит странный сон. В первом сне игроку предстоит встретится в конце с этой самой статуей. Задача игрока — найти и разбить статую, совершая удары по её конечностям.
Часть 2: Странная осень [ ]
Дни 1-3 [ ]
Мэй, нашедшая музыканта
Следующие несколько снов Мэй будут сравнительно спокойными. Задача игрока в последующих снах — создать песню для заднего плана, находя при этом музыкантов. При каждом найденном музыканте зажигается один из четырёх маленьких столбов, откуда начинается сон. Эти музыканты, как предполагается, участники группы "Deep Hollow Hollerers", которые могли покидать свои тела и играть музыку призракам.
Как только вы найдёте всех музыкантов, необходимо вернутся к столбам, чтобы завершить сон. В конце каждого из этих снов, появляется большое животное, которое должно представлять собой одного из друзей Мэй.
День 4 [ ]
После лицезрения похищения неизвестного жителя сразу после Харфеста и вынужденной поездки домой с Тётей Молли, Мэй при приходе домой сразу же засыпает. В отличие от её предыдущих снов, Мэй в этот раз находится в очень тёмном лесу, с возможностью идти лишь налево. Попытки идти направо приведут к тому, что она будет бежать в быстро замедляющемся темпе, пока не остановится окончательно. По мере продвижения Мэй к колодцу, рано или поздно появятся странные звуки. Подойдя к колодцу вплотную, игрок не сможет больше управлять Мэй, а устрашающий звук будет проигрываться до тех пор, пока экран игрока полностью не потемнеет.
Этот сон предвещает будущее Мэй. Мэй вновь встретится с тем же самым колодцем, когда она и банда будут выбираться из него в попытках покинуть шахту.
Часть 3: Длинная осень [ ]
День 1 [ ]
Этот сон практически идентичен подобному в начале второй части, где Мэй нужно найти музыкантов. Место действия — перемешанный город, где люди (или их души) медленно поднимаются ввысь. Во сне можно увидеть больших астральных рыб, плывущих через экран.
Заключительная сцена представляет собой поимку рыбы большой цаплей или журавлём.
День 2 [ ]

Странное богоподобное существо
Мэй встречается с таинственным существом, которое Мэй принимает за бога, несмотря на то, что само существо не позволяет ей называть себя подобным образом, объясняя, что бог в понимании Мэй — это иллюзия, созданная ей, и что ему не за чем наблюдать за людьми. Неизвестно, почему оно было в её сне, но оно утверждает, что вселенная постепенно забывает Мэй, и что даже сама вселенная постепенно забывается. Оно объясняет, что Мэй "медленно уплывает всё дальше в море", и что оно чувствует "дыру в конце всего сущего", упоминая, что она чёрная, как пространство между звёздами. Оно предупреждает Мэй о том, что рано или поздно она встретит это, и у нее нет шансов этого избежать. Однако, оно не хочет, или не в силах объяснить, почему Мэй была "выбрана" ради этого, всегда отвечая на любой ее вопрос достаточно туманно. Это богоподобное существо так же утверждает, что говорило с другими людьми, которых оно называет "маленькими существами".
Часть 4: Конец всего [ ]
После сцены в квартире Грегга и Ангуса, Мэй впервые проявляет признаки жизни и пытается медленно ползти в сторону дома. Сцена делает большие пробелы, от леса до парковки заброшенного "Food Donkey", и наконец, Кленовой улицы (Marple Street). Однако, окружение и здания, как привык видеть их игрок, исчезли: единственные остатки цивилизации, которые можно встретить — асфальтное покрытие, бетонные тротуары, почтовые ящики и столбы с проводкой, всё остальное либо исчезло, либо захвачено природой. Когда Мэй доходит до того места где должен стоять её дом, она падает на землю.
Следующая сцена показывает, как она лежит на скамье в церкви, где вокруг неё собрались все её друзья и семья. Эта сцена будет отличатся в зависимости от того, вступали ли вы в диалог с Сэлмерс, Мистером Чазоковым или Лори М, включая всех остальных персонажей. Эти персонажи появятся лишь в том случае, если игрок проводил с ними достаточно времени в течении прохождения, и каждый из них скажет что-то своё про Мэй.
Вскоре в помещение входит дворник, и обстановка сцены меняется на госпиталь, в котором находятся лишь Мэй, её родители и пастор Кейт. Дворник говорит, что с Мэй всё будет в порядке, после чего уходит. Мэй начинает говорить во сне про исчезнувший дом, оставляя наблюдающих за ней людей в непонимании.
После этого Мэй просыпается в своей кровати. Неизвестно, какие части её сна были настоящими или нет.

Демоническая башня (англ. Demon Tower) - мини-игра, доступная на ноутбуке Мэй после того, как Ангус починит его. Это игра жанра "рогалик" в которой нужно на каждом уровне найти ключ в склепе, чтобы открыть комнату с боссом. Позиция комнат с дверью и ключом остаются одинаковыми на каждом уровне, но остальной уровень произвольно генерируется. Если пройти игру, Мэй оставит запись в дневнике.
Содержание
Геймплей [ ]

Игра состоит из десяти уровней. На конце каждого уровня есть комната с боссом, которую можно открыть ключом, находящимся в склепе. Склеп - комната с несколькими противниками и саркофагом с ключом.
В начале игры у игрока есть девять единиц здоровья и один рывок. Начиная со второго уровня, число рывков будет увеличиваться на один. Также, начиная с третьего уровня, максимальное здоровье игрока будет уменьшаться.
На каждом уровне есть вазы, которые можно сломать и которые могут содержать в себе "огонёк", восстанавливающий здоровье.
- The Hole.
- The Cellar.
- Skellie Outskirts.
- Skellie City.
- Library.
- Church.
- Blood Moat.
- Leafy Graves.
- Cemetary Grounds.
- Corpse.
Персонажи [ ]
Союзные. [ ]

1. Бледный кот (англ. Palecat). [ ]
Описание: Протагонист Demon Tower, пришедший в башню с целью очищения её от зла.
Первое появление: Уровень 1 - The Hole.

2. Птица. [ ]
Описание: Безымянная птица, одетая в зелёную одежду с капюшоном. Даёт подсказки по порядку активации черепов на финальном уровне для получения истинной концовки.
Первое появление: Уровень 2 - The Cellar.
Стратегия: Появляется она через один уровень, начиная со второго. Разумным решением будет не убивать её, а записывать подсказки, что она даёт.
Враждебные. [ ]

1. Застреленный. [ ]
Описание: Птица в коричневом одеянии с торчащей из живота стрелой.
Первое появление: Уровень 1 - The Hole.
Стратегия: Т.к. убивается он с одного удара, а также он довольно медленный, самым лёгким вариантом будет просто быстро его убить.

2. Крысиный король. [ ]
Описание: Серая куча крыс. Встречаются в двух вариантах - маленькие и большие.
Первое появление: Уровень 1 - The Hole.

Стратегия: С маленькой кучкой лучше разбираться быстро, т.к. она очень быстрая и клеится к персонажу при атаке. Большая куча же гораздо медленней, но при смерти "разваливается" на 3 маленьких, поэтому, убивая большую кучу, лучше иметь пару заряженных рывков.
3. Призрак. [ ]
Описание: Призрак застреленного.
Первое появление: Уровень 1 - The Hole.
Стратегия: Наверное, самый легкий противник. Все параметры, кроме скорости и поля зрения, равны параметрам застреленного. С одной стороны, призрак медленней, но с другой стороны, может видеть на расстоянии всего поля зрения игрока и проходить сквозь стены. Его можно просто избегать и опасаться лишь в коридорах, где он может выйти из стены. Может перелетать над потоками крови.
4. Скелеты. [ ]
4.1 Скелет. [ ]
Описание: Самый первый и самый слабый вид скелетов.
Первое появление:
Стратегия: Первый удар сносит голову, второй убивает. Тело без головы имеет очень маленькое поле зрения. Главное не подходить в упор, а то получим дополнительную тычку, как собственно и от всех остальных врагов.
4.2. Скелет с мечом. [ ]
Описание: Всё тот же скелет, только теперь у него в руках будет меч! Его удары отнимают одно здоровье, так же, как и удары всех мобов в игре.
Первое появление:
Стратегия: Т.к. теперь скелет не просто делает "Кусь", а дерётся мечом, то область урона немного повышается. Первый удар сносит голову, второй убивает. Тело без головы имеет очень маленькое поле зрения.
4.3. Скелет в шлеме. [ ]
Описание: Всё тот же скелет, но теперь для его убийства нам понадобится три удара.
Первое появление:
Стратегия: Первый удар сносит шлем, второй голову, третий убивает. В остальном всё тот же скелет.
4.4. Скелет в шлеме и со щитом [ ]
Описание: Всё ещё наш любимый скелет, только этот обзавёлся красным шлемом и щитом! По моему мнению, красный ему весьма к лицу. Для его убийства теперь необходимо 4 удара
Первое появление:
Стратегия: Первый удар сносит щит, второй шлем, третий голову и только четвёртый убивает. Не плохим решением будет тактика "Ударил - отбежал"(как и со всеми врагами в этой мини-игре), ибо наши удары не прерывают его замах и у нас больше шансов попасть под удар.
4. [eror] [ ]
5. Птица колдун. [ ]
Описание: Закончил школу Винтерхолда и теперь может создавать заклинания школы разрушения. Выпускает в нашу сторону 2 огненных шара, которые после становятся огнём. И "фаерболы" и огонь могут навредить не только вам, но и всем остальным NPC.
Первое появление: После победы над 3-м боссом
Стратегия: Первым вариантом будет подбежать и убить его ещё до того, как он скажет заклинание. Второй вариант - после того, как шары будут выпущены, убить его во время перезарядки. Третий вариант - во время того, как он выпустил в нам "фаерболы" сделать рывок сквозь них, ГГ поглотит их не получив при этом урона, после чего мы окажемся рядом с врагом и во время перезарядки может его убить.
6. Старушки (Ведьмы) [ ]
6.1. Старуха - убийца [ ]
Описание: Милая старушка в капюшоне с окровавленным клинком в руке. Очень медленная и неповоротливая. Если вы подбираете ключ комнаты с боссом, то еще живые бабушки перерождаются в Элитных бабушек, сторожащие вход в комнату босса.
Первое появление:
Стратегия: Подошли и убили. Очень лёгкий враг.
6.2. Элитная старушка - убийца [ ]
Описание: Появляется возле двери, ведущей к боссу, причём только после того, как мы возьмём ключ. Визуальное отличие в их оранжевом одеянии, жёлтых глазах и более зелёной коже. Окровавленный клинок в руке неизменен! Обычно появляется сразу в количестве нескольких штук. Очень быстро перемещаются, скоростные атаки.
Первое появление:
Стратегия: стоять на расстоянии и при их приближении атаковать. После одного удара рывками отступать назад и снова ждать их приближения. После их убийства появляется "огонёк", которые восстановит вам одну жизнь.
Боссы [ ]
Описание: Монстр в виде крокодила(аллигатора), восстающий из грязи!
Первое появление(первое и последнее): Комната с боссом после Уровня 1 - The Hole.
Стратегия: Как только он появился подойти и ударить. Он умирает от одного удара! Я до сих пор так и не увидел сам, какие у него способности.
Описание: Большая птица на длинных ногах с мешком. Что у него в мешке никто не знает, но ходят слухи, что там непослушные дети! (Ладно, это я уже сам выдумал)
Первое появление(оно же последнее): Комната с боссом после Уровня 2 - The Cellar.
Стратегия: Ударил - убежал. Не очень сложно.
Описание: Птица, окончившая школу магов Винтерхолда по профилю "Колдовство" с отличием. Быстро движется по контуру пентаграммы на полу, останавливаясь на её углах в случайном порядке. Усложняет нам жизнь призывом множества различных скелетов.
Первое появление(Все боссы по одному разу встречаются, зачем этот пункт??): Комната с боссом поле Уровня 3 - Skellie Outskirts.
Стратегия: Игнорировать скелетов, при помощи рывков приближаться к боссу во время его остановок и бить.
Описание: Король скелетов! Сидит на троне и атакует нас своим жезлом. Трон носят 3 скелета поменьше, которые начинают нас атаковать после убийства короля.
Первое появление: Комната с боссом поле Уровня 4 - Skellie City.
Стратегия: Идеальным решением по прежнему остаётся тактика "Ударил убежал".
Описание: Ещё одна птица, которую поглотила огромная стая крыс. Наносит урон по 2 сердца. После смерти разделяется на 3 кучи поменьше, которые при смерти разделяются на ещё несколько куч крыс.

Первое появление: Комната с боссом поле Уровня 5 - Library Стратегия: Как и прежде - ударил и с помощью рывка убежал.

Demon Tower is a 2D action minigame accessible from Mae's laptop after Angus fixes it. Once the game is beaten, Mae will make a note of it in her journal.
Contents
Gameplay [ ]
Demontower is a 2D roguelike game in which the player must navigate through an enemy and hazard filled floor to obtain a key and defeat a boss in order to proceed to the next level. The position of the rooms with the door and key stay the same per level, but the rooms themselves are procedurally generated. The game consists of a total of nine levels and a final boss fight. Levels are marked with Roman numerals. In order, the levels are named:
- Level I: The Hole
- Level II: The Cellar
- Level III: Skellie Outskirts
- Level IV: Skellie City
- Level V: Library
- Level VI: Church
- Level VII Rivers of Blood
- Level VIII: Leafy Graves
- Level IX: Cemetery Grounds
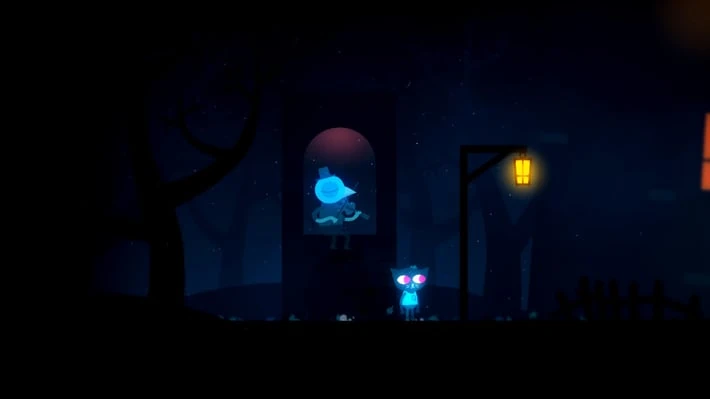
Demon Tower gameplay.
The Palecat protagonist has a single, wide arc slash and can also dash to avoid attacks and obstacles. These dashes can be used in succession one after another, but the number of which is determined by a naturally recharging meter under the player's health represented by three cyan lines. The player starts off with nine total health points and one dash but will gain an additional dash charge every level, while continually losing one maximum health point after each level starting at level three. When taking damage, the player is temporarily stunned for about half a second.

healing vase (left) and a tall regular vase (right)

A single-use heal.
The Player and Abilities [ ]

The player facing forward.
The Player [ ]
The only playable character in Demontower is Palecat, who wears a blue tunic that has a green shawl over it and a red pointed hat. There is also some kind of red wrap on her tail.
Abilities [ ]
In Demontower, the player has three available abilities. They are dashing, swiping, and swift striking. The names for these abilities are not canon, they're fan-given.
The dash ability is used by using the key/button associated with jumping. Dash can be used to quickly traverse the map, jump over obstacles that are not walls or pots, distract enemies, and absorb projectiles. The player is invulnerable only while dashing, there is no grace period whatsoever with this ability. If the player swipes while dashing, they are no longer invulnerable. All projectiles (such as fire balls, ashes, heals, and knives) dissipate when dashed over; they cannot harm the player or detonate. One dash depletes one part of the blue meter in the upper left corner of the screen.
Swipe is the only attack that the player has and it is used by using the primary key/button associated with interacting. It deals one damage to everything it touches, the player can swipe around corners, over lava, but not through walls. There is no cooldown on this ability, but if the player swipes too many times in quick succession they become tired and slowed.
Enemies [ ]
In Demontower there are several enemies that can attack or make contact with the player, which causes them to lose one health point. Some enemies have armor, weapons, spells, and shields while some simply walk or float around. Enemies can hurt and kill (potentially) themselves and other enemies, and they can be environmentally killed. All enemies that can live through it are stunned for half a second and knocked back when attacked. Knives stay on the ground after being thrown, and sometimes Skellie heads and helmets can stay on the ground.
None of these names are canon, they are common nicknames afforded to each enemy by players.
Ghosts [ ]

Basic Ghosts [ ]
Basic ghosts are one-hit enemies that are purple/translucent and have the ability to float through walls. They have no weapons or spells and when they touch the player they lose one health point.
Invulnerable Ghosts [ ]
Invulnerable ghosts only make an appearance in the King Fire Bird boss fight. They behave the same way as basic ghosts, but they cannot be killed. When attacked, they bounce 3 tiles backwards in the direction they are hit from. They harm the player if they make contact with them, and move to them regardless of where they are in the room and if any obstacles are in the way. They move slowly.
Skellie Warriors [ ]

Basic Skellies [ ]
Basic Skellies are two-hit enemies that move at a slow speed. They're perfect-white skeleton cats and when hit once their skulls pop off. Even with their head popped off, they can still attack the player and notice them when facing their direction. They have no weapons or spells.

Basic Skellie warrior.
Basic Skellie Warriors [ ]
Basic Skellie warriors are two-hit enemies that move at a slow speed, they are the same as Basic Skellies but with swords that they can thrust at the player, moving ahead 3 spaces. They can thrust themselves into lava. Their bones have a yellow undertone.

Each color of armored Skellie warrior.
Armored Skellie Warriors [ ]
Armored Skellie warriors have helmets and/or shields. Each added protection requires one more hit to kill them. Their armor can be either red, blue, or green. Only red Skellie warriors can have shields, and only blue Skellie warriors can have spears. The undertone of their bones is the color of their armor.
Fire Creatures [ ]

Fire Birds [ ]
Fire birds are teal birds with red caps and green capes. They can be killed with one hit, move at slow speed, and can kill themselves. When they notice the player, they pause for one second to cast a spell. This cannot be cancelled by moving out of their line of sight. The spell they cast causes two fire balls to shoot in the player's direction, which then detonate and stay lit for about two seconds. Walking into this fire causes any entity (save bosses) to lose one health point. When killed, they leave a small fire.

Armored Skellie fire cat.
Armored Skellie Fire Cats [ ]
Armored Skellie fire cats are a mixture of fire birds and armored Skellie warriors. They require three hits to be killed, and they can kill themselves. They have green helmets, a teal cape, and usually have a sword (or wand). They cast three fire balls towards the player when noticed, which detonate and stay lit for about two seconds. Oddly when their headless body is attacked, the entire thing is killed rather than only the cape. When killed, they leave a small fire.
Ratballs [ ]

Basic ratballs [ ]
Basic ratballs are small, blob-like cloudy grey enemies with pink flecks that inch around the map at a very slow pace. They can be killed with one hit. When killed, they release three baby ratballs. Each smaller ratball is killed with one hit. They have no weapons or spells.

Small ratballs [ ]
Small ratballs are small, squeaky enemies that move very quickly. They take one hit to kill. They have no weapons or spells.
Guards [ ]

Basic Guards [ ]
Basic Guards are brown birds in a brown robe that have no weapons or spells. They move slowly, and can be killed for one hit point. Basic ghosts are almost identical to basic guards.

Knife Guards [ ]
Knife Guards are enemies whose faces are obscured by a red robe. They move very fast and can be killed with one hit. They throw knives at the player, and they can dash for four spaces and through walls. They can kill themselves by dashing into lava or other enemy projectiles.

Weak Guards [ ]
Weak Guards are green birds in a light blue robe that have no weapons or spells. They move slowly, and can be killed for one hit point. For each weak guard killed, one fewer strong guard appears at the door to the boss after the player collects the key.

Strong Guards [ ]
Strong Guards are green birds in a red robe that have no weapons or spells. They move fast and can be killed in two hits. Killing one will allow a single-use heal to spawn. They always guard the boss fight door and do not move unless they notice the player. They move individually, not as a unit.
Bosses [ ]
Level I - Lava Crocodile [ ]
The first level boss is a red lava crocodile that can be killed with one hit, before it properly finishes spawning.
Level II - Krampus [ ]
The second level boss is a blue bird with long legs that carries around a brown sack. When in close proximity to the player, it smashes its bag down on the ground in the direction it last saw the player in. It takes it half a second to recover from this. It is very similar in looks to fire birds.
Level III - Pentagram [ ]
The third level boss is another blue bird in a darker blue cape that is similar in looks to fire birds. It dashes around the boss room in a pentagram and spawns green armored Skellie warriors, basic Skellie warriors, and basic Skellies. It takes it half a second to cast the spell that spawns the Skellies. When dashing through the player, it deals damage.
Level IV - King Skellie [ ]
King Skellie is a large Skellie that sits in a throne, carried by four basic Skellies. He holds a golden staff and he can dash. His attacks work in the same way that basic Skellie warrior attacks do, but on a larger scale. It takes him 3/4 a second to recover from his attacks. He cannot be attacked from behind his throne, however if the player touches the back of his throne they take damage.
Level V - Mega Hairball [ ]
The Mega Hairball has one health bar and when it subdivides for the first time it loses it. Each time it subdivides, it loses health and gains speed. A small bird skeleton briefly appears when subdividing for the first time. It appears to be shocked, then it melts into the floor and dissipates.
Level VI- King Fire Bird [ ]
King Fire Bird is a fire bird that's carried on a throne and is accompanied by five invulnerable ghosts. He has a pink cape, a golden L-shaped staff, and a large crown. He dashes around the room and casts a spell that sends out three fire balls, which detonate and light for about two seconds. His boss room is the first to have breakable vases and health vases. When he casts his spell, his eyes open wide and the player can see that they're light pink. When killed, he leaves a small fire.
Level VII - Upgraded Lava Crocodile [ ]
This boss is a more dangerous version of the first level one. It can move all around the room and leaves behind a two-tile thick trail of lava that damages the player if they touch it. It spews fire balls in all directions.
Level VIII - Monster Knife Guard [ ]
This boss is identical to the knife guard, but it has bull horns and skinny yellow legs. It has the same abilities, but it throws three knives. It can dash farther than the regular knife guard and can kill itself in the lava.
Level X - The Blood Thief [ ]
This is the final boss. It is a white cat with thick eyebrows wearing a red collared cape and holding a white staff. It can dash, and its attacks are similar to basic Skellie warriors.
Possible Endings [ ]
This is NOT a guide. If you are looking for one, check here.
True Ending [ ]
The "true" ending is the ending of the game in which the player takes hints from a friendly bird in a cloak every second level except the last, and uses these hints to interact with a room of tombstones at the final level. The pattern you must input is randomly generated for each playthrough.
After the player does this, a chest with a white key spawns in the center of the room. The player can take this key and use it on the large bleeding cat that's sitting just before the final boss' door, healing them and removing the "lava" from the level. After this, the player can proceed to the boss.
After defeating the boss, the player exits the room and goes onto a cliff. It's dark/night and they're facing a tower with red windows.
"The doom spire stood empty.
The blood thief was no more.
The palecat's quest was over."
Finishing the game with this ending will unlock the achievement Palecat.
Bad Ending [ ]
The neutral or "bad" ending is the ending in which the player does not do the aforementioned healing.
After clearing the final boss level, the player will exit the room and face a screen with a sword sticking out of the ground in a pool of blood. Its handle is red and the markings on it are a blue plus sign and two orange dots on the left and right. At the very tip of the handle, there is another blue plus sign.
"The Palecat was tired.
The climb had cost her dearly.
She rested in the shadows,
and wondered if her quest
was truly at an end. "
Achievements [ ]
You can earn two achievements from this game, Palecat and
after finishing the game regardless of which ending you get, but in order to get Palecat you have to achieve the "good ending".
Читайте также: