
No minigames mass effect 2 как установить
Обновлено: 06.07.2024
Classic implementation was coded by Dybukk for ME2. Ported to LE2 with his permission. This does not apply to the modern implementation.
Donation Points system
This mod is opted-in to receive Donation Points
Premium membership donations accepted
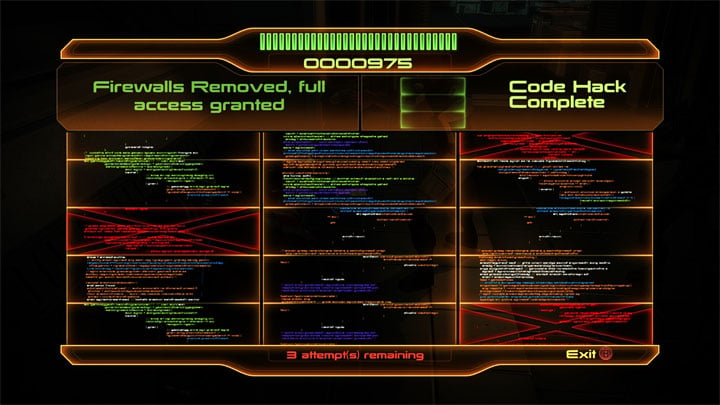
Skip Minigames for LE2 skips the hacking and bypass minigames, automatically providing you with a win. This mod does NOT modify the galaxy map probes; that is a different mod.
This mod has two options to install from:
Classic
Classis is the same style as the version from ME2, made by Dybukk, where the minigame UI opens up, and you win when you click start. This mode makes it feel like you at least did something to hack or bypass something.
Modern
Modern is the same style as Mass Effect 2 Randomizer, where the minigame is entirely skipped. There is no UI, you immediately win when you click on the object. This mode is faster and completely removes the minigame concept.
How to install
You must use ME3Tweaks Mod Manager to install this mod. It cannot be installed manually. Drag and drop the archive onto the interface and either import and apply, or press install.
This MOD adds an auto win of any bypass or hack mini game in Mass Effect 2.
After a few play throughs they become quite tedious. Lets face it. They are not gwent.
Version 2 also increases the planet scan range such that a single probe will scan an entire planet.
2.0.2 Release Notes
- Fixes planet scanning for non-me2controller version.
2.0.1 Release Notes
- Increase planet scanning range. A single probe will scan an entire planet.
Installation
Install order: Game => DLC => Launch/Login to validate DLC => ME2Controller (Optional) => NoMoreMiniGames
IMPORTANT Do not backup your original files inside the game folder. The game will try to load both files and
cause a crash on startup.
Non-English/French/German/Italian/Polish Versionss
This MOD has only been localised to English, French, German, Italian and Polish. To get it to work with other languages it might be possible
to just copy the Startup_INT.pcc file over your Startup_<Langugage>.pcc file.
If you would like to help me produce a version for you locale please send me a copy of your Startup_<Language>.pcc file.
The file No MiniGames v.2.0.2 is a modification for Mass Effect 2, a(n) rpg game. Download for free.
file type Game mod
file size 181.8 MB
last update Monday, January 21, 2019
No MiniGames is a mod for Mass Effect 2, created by Dybuk.
Description:
This MOD adds an auto win of any bypass or hack mini game in Mass Effect 2. After a few play throughs they become quite tedious. Lets face it. They are not gwent. Version 2 also increases the planet scan range such that a single probe will scan an entire planet.
Instructions:
Install order: Game => DLC => Launch/Login to validate DLC => ME2Controller (Optional) => NoMoreMiniGames
1. Copy the Vanilla\BioGame directory to your Mass Effect 2 install directory overriding the originals (Back them up first).
If you are using the ME2Controller mod copy the folder from the ME2Controller directory.
Example directory : D:\Steam\steamapps\common\Mass Effect 2
IMPORTANT Do not backup your original files inside the game folder. The game will try to load both files and
cause a crash on startup.
This MOD has only been localised to English, French, German, Italian and Polish. To get it to work with other languages it might be possible
to just copy the Startup_INT.pcc file over your Startup_<Langugage>.pcc file.
If you would like to help me produce a version for you locale please send me a copy of your Startup_<Language>.pcc file.

If you bought your game through ORIGIN :
1) Open Origin
2) Click on “Origin” in top left corner
3) Click on “Application settings ”
4) Disable “Automatic Game Updates ” * (it is located under Application tab)
5) Disable “Origin Overlay” ** (it is located under Origin In-game tab)
6) Run your game at least once before progressing any further
* “Automatic Game Updates” may uninstall your mods
** “Origin Overlay” is known to reduce frames-per-second when in-game
____________________________________________________________________________________
If you bought your game through STEAM :
1) Open Origin (YES, you read that right…)
2) Click on “Origin” in top left corner
3) Click on “Application settings”
4) Disable “Origin Overlay” * (it is located under Origin In-game tab)
5) Run your game at least once before progressing any further
* “Origin Overlay” is known to reduce frames-per-second when in-game

1) Download the latest ME3Tweaks Mod Manager (aka M3) from Nexus Mods, ME3Tweaks or GitHub
2) Run downloaded executable → leave/change installation location and click on OK
3) Run freshly installed mod manager
4) Backup your game:
a) it is not required for you to backup your game but it is highly recommended
b) backup allows you to uninstall mods or revert your game to vanilla if something goes wrong
c) when backup window appears select your Mass Effect 2 main game directory folder. It should be:
d) click on Backup and choose folder to which you want to save your backup to (this folder has to be empty)
e) OR create a new folder and save your backup there. I usually call it “Mass Effect 2 BACKUP”
5) If you haven’t created a backup, make sure that your mod manager detected correct installation target (or your mods will not get installed properly):
6) Enable “Binkw32 BYPASS ” (missing this step will result in Failed DLC Authorization whenever your game is launched, meaning that no DLCs or mods will appear in your game):
a) Run M3Tweaks Mod Manager
b) Click on “Tools” and than click on “Binkw32 Bypasses”
c) Enable “Binkw32 ASI loader” for Mass Effect 2

NOTE: Unlike any other games, Mass Effect 2 has a very specific mod installation order. Installing your mods in incorrect order will break your game. The general order is the same for all Original Trilogy (OT) games and it looks like this:
1. Content mods (aka DLC-mods or unofficial DLCs)*2. A Lot of Textures (aka ALOT)
3. Additional texture mods**
* If you install any content mods after installing texture mods, than your textures will become broken.
** If you install any texture mods before installing A Lot of Textures (ALOT), than ALOTInstaller will not allow you to install main A Lot of Textures file or any other texture files.

NOTE: Below are mods that I usually play with. They are compatible with each other. I will tell you which files to download and how to install them. If you decide to not install some of those mods, than you will have to choose proper patches yourself when installing mods.
RED - required steps/mods or your game will not work properlyGREEN - recommended mods
YELLOW - optional mods
1) Early Recruitment by becatorria –
Drag&drop “Early Recruitment” into ME3Tweaks Mod Manager and click on Import mods → select “Early Recruitment” and click on Apply mod
2) Expanded Shepard Armory (ESA) by Khaar Machinima and others –
Drag&drop “Expanded Shepard Armory (ESA) Mod” into ME3Tweaks Mod Manager and click on Import mods → select “Expanded Shepard Armory” and click on Apply mod
3) Modern Weapon Pack by Tajfun403 –
Drag&drop “Modern Weapon Pack v2.6” into ME3Tweaks Mod Manager and click on Import mods → select “Modern Weapon Pack” and click on Apply mod
4) Tali Remastered by Creative Machinima –
Drag&drop “Tali_RemasteredME2_DLC_V1.1” into ME3Tweaks Mod Manager and click on Import mods → select “Tali Remastered ME2” and click on Apply mod
5) Recovered Powers by Tajfun403 –
Drag&drop “Recovered Powers” into ME3Tweaks Mod Manager and click on Import mods → select “Recovered Powers” and click on Apply mod
6) Advanced enemy factions by Ravager –
Drag&drop “ME2 Advanced enemy factions. V1.2 Mod manager support” into ME3Tweaks Mod Manager and click on Import mods → select “Advanced enemy factions” and click on Apply mod

Drag&drop “ME2Controller” into ME3Tweaks Mod Manager and click on Import mods → select “ME2Controller” and click on Apply mod
8) Relay Jump Remaster (1080p) by Audemus and others –
Drag&drop “Relay Jump Remaster (1080p)” into ME3Tweaks Mod Manager and click on Import mods → select “Relay Jump Remaster (1080p)” and click on Apply mod
9) No Mini Games by Dybuk –
Drag&drop “NoMiniGames” into ME3Tweaks Mod Manager and click on Import mods → select “No Mini Games” and click on Apply mod → select “No Mini Games - Controller” than click on Install
10) Vignette Remover by MGamerz –
Drag&drop “ME2Vignette Remover 1.0” into ME3Tweaks Mod Manager and click on Import mods → select “Vignette Remover” and click on Apply mod → select “No Vignette – Controller + No Mini Games” than click on Install
11) First Person Mode for Mass Effect 2 by Jade –
Drag&drop “Compatibility Patch for ME2Controller and No Minigames” into ME3Tweaks Mod Manager and click on Import mods → select “First Person Mode – Exploration” and click on Apply mod
12) FemShep Appearance Consistency Project by anshela –
Drag&drop “FemShep Appearance Consistency Project” into ME3Tweaks Mod Manager and click on Import mods → select “FemShep Appearance Consistency Project – ME2” and click on Apply mod → select “ME3 Vanilla Complexion – Controller Support” than click on Install

NOTE: You must install MEUITM2 and choose its corresponding textures if you install any of the below meshes!
1) Jack MEUITM2 Blur Tribute by Catachrism – install “Jack MEUITM2 Blur Tribute Mesh Mod” with ME3Tweaks Mod Manager
3) Grunt Blur Studio Tribute Mesh Mod MEUITM2 by Catachrism – install “Grunt Blur Tribute Mesh Mod MEUITM2” with ME3Tweaks Mod Manager
4) Thane MEUITM2 with Eyes Fix by Catachrism – install “Thane Eyes and Eyelids Mesh fixes MEUITM2” with ME3Tweaks Mod Manager
5) T.I.M. Blur Studio Tribute Mesh Mod MEUITM2 by Catachrism – install “T.I.M. Blur Studio Tribute Mesh Mod MEUITM2” with ME3Tweaks Mod Manager
6) Miranda Neck Mesh Fixes MEUITM2 by Catachrism – install “Miranda Neck Mesh Fixes MEUITM2” with ME3Tweaks Mod Manager
7) Aria Mesh Clipping Fixes MEUITM2 by Catachrism – install “Aria Mesh Clipping Fixes MEUITM2” with ME3Tweaks Mod Manager
8) Casual Hubs for ME2 by rondeeno –
Drag&drop “Casual Hubs for ME2” into ME3Tweaks Mod Manager and click on Import mods → select “Casual Hubs for ME2” and click on Apply mod → select correct compatibility patches and your preferred options and than click on Install
9) Project Variety by Khaar Machinima –
Drag&drop “Project Variety for ME2” into ME3Tweaks Mod Manager and click on Import mods → select “Project Variety for ME2” and click on Apply mod → ME3Tweaks Mod Manager will automatically detect required compatibility patches (you can also select your preferred options ) and than click on Install
10) Hairy Sheploo by Khaar Machinima and others –
Drag&drop “Hairy Sheploo for ME2” into ME3Tweaks Mod Manager and click on Import mods → select “Hairy Sheploo ME2” and click on Apply mod → select “No Minigames, Controller & First Person Mode Patch” than click on Install

NOTE: Before progressing any further I will recommend you starting and testing out your game to see if it works properly. Keep in mind that after you install texture mods you can't install any more content mods without breaking your game.
3) A Lot of Videos (ALOV) for ME2 by Audemus and others – download main ALOV for ME2 - 2.5 (either 1080p or 4K variant)
Detailed ALOT Installation Guide is found here
1) Download ALOT Installer (it comes with A Lot Of Textures (ALOT) for ME2; you can also download it with ME3Tweaks Mod Manager, you can find it on Nexus Mods or download it directly from GitHub)
2) Run ALOT Installer than click on ALOT mode at the top of the window
3) Optionally click on Settings in the bottom left corner and than under File Filtering disable “Show Mass Effect files” and “Show Mass Effect 3 files” (this is optional step but it will make texture mod list within ALOTInstaller clearer to read)
4) Download additional texture files that you want to install showed in ALOT Mode list . Whilst you don’t need to download anything apart from main ALOT for ME2 12.0 file, additional texture files will increase texture quality greatly
5) To import texture files into ALOT Installer simply drag&drop downloaded texture files in ALOT Installer ( DO NOT CHANGE TEXTURE FILE NAMES OR UNPACK TEXTURE FOLDERS MANUALLY. ). If done correctly texture files will get detected automatically, which will be prompted with green check marks next to their corresponding names
6) To install textures after they are properly imported into ALOTInstaller click on Install Textures → select “ALOT for ME2 12.0”, “ALOTAddon”, “ALOV”, “4K Texture LODs” and “Optimize texture library”, than begin and finish installation

NOTE: If you want MEUITM textures in your game, ensure that you install it after ALOT.
1) Run ALOT Installer and than click on MEUITM mode at the top of the screen
2) Drag&drop “MEUITM2” in ALOT Installer ( DO NOT CHANGE TEXTURE FILE NAME OR UNPACK TEXTURE FOLDER MANUALLY ). If done correctly, texture file will get detected automatically, which will be prompted with green check mark next to its name
3) Click on Install Textures → select “MEUTIM”, “4K Texture LODs”, “Compress game files” and begin installation
4) Choose your preferred installation options ( NOTE: if you installed any Blur Tribute meshes, you must select corresponding Blur Studio Textures (5 total) , otherwise some of your textures will become broken) and than click onInstall with selected options and finish installation

NOTE: If you want additional textures in your game, ensure that you install them after ALOT and MEUITM2.
1) Quarian Armour Lights by CreeperLava – file is located under Miscellaneous files - install “Quarian Lights ME2.mem” with ALOT Installer
2) Tali Remastered Patch by Creative Machinima (this is ONLY NEEDED if you have installed “Tali Remastered” content mod by this point) – file is located under Optional files - install “Tali Remastered Patch.mem” with ALOT Installer
3) ALOV for ME2 - ALOT Addon by Audemus and others – file is located under Optional files - install “ALOVforME2-ALOT_Addons_2.1.mem” with ALOT Installer
4) New Eyebrows For FemShep by lumad11 – install “New_Eyebrows.tpf” with ALOT Installer
5) Facial Hair HD (ME2) by JimbobJeffers – install “Facial Hair HD 3.0 (ME2).mem” with ALOT Installer
7) Goodbye Lens Flares by Wisegal – download “Goodbye Lens Flares MEM version” → install “GoodbyeFlare.mem ” with ALOT Installer
1) Run ALOT Installer and than click on Free mode at the top of the screen
2) Download all custom texture files that you want to install
3) Unlike previously, manually unpack texture folders (you will need either WinRAR or 7-Zip for that)
4) Carefully drag&drop texture files that you want to install in ALOT Installer ( ALOTInstaller supports .mem, .tpf and .mod files formats ) → simply drag&drop any .mem , .tpf or .mod file in ALOT Installer and than textures shall become ready for install, which will be prompted with green check marks next to their corresponding names
5) You can import and than install multiple texture files at once!
6) After textures are properly imported to ALOT Installer, click on Install Textures → select “User files” and “4K Texture LODs”, than begin and finish installation

NOTE: I personally don't use any ENBs or Reshades but nothings stops you from doing so ;)
1) ENB or Reshade with SweetFX for Mass Effect 2 by Carinth01 – due to many different installation possibilities you will need to follow installation instructions from the mod page directly
2) ME2 Graphics tweaks by Carinth01 – fully optional, but following this guide may improve overall image quality. Just like with ENBs, you need to follow installation instructions from the mod page directly
Leave e ndorsement s to all listed mods and leave kudos to their authors. It is thanks to them that Original Trilogy is reaching its maximal potential <3
Читайте также: