
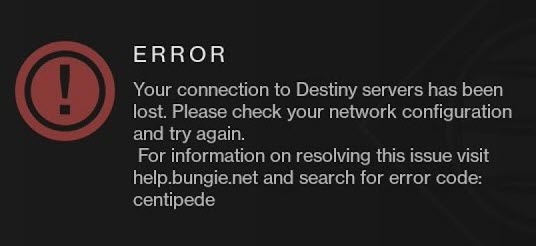
Destiny 2 ошибка centipede
Обновлено: 04.07.2024


Method 2: Restart Your Console Completely
You can also fix Destiny 2 error code Centipede by restarting your console completely. (This method is only applied to users playing Destiny 2 on Xbox) Here is what you do.
Tip: Make sure all games are synced online and backed up, as this process may eventually delete them from the local Xbox One memory.
Step 1: Press and hold the power button on the front of the Xbox console until it turns off completely.
Step 2: Unplug the power brick from the back of the Xbox. Press and hold the power button on the Xbox a few times to make sure that there is no battery left, which will clear the cache.
Step 3: Insert the power brick and wait for the light on the power brick to change its color from white to orange.
Step 4: Reopen Xbox as usual and check if the error code Centipede Destiny 2 still appears.
If you use PlayStation 4 to play Destiny 2, please make sure to perform a hard reset on PlayStation 4 according to the following instructions, because PS4 does not have an option to clear the cache:
Step 1: Turn off PlayStation 4 completely.
Step 2: After the console is completely closed, unplug the power cord from the back of the console.
Step 3: Let the console be unplugged for at least a few minutes.
Step 4: Plug the power cord back into the PS4, and then turn on the power in the usual way.
Destiny 2
30 окт. 2020 в 11:04 Meanwhile I have no problems playing other games online.Wtf Bungo?

It is not usually recommended to try and play other online games to try and troubleshoot connectivity issues with one. It may tell you that your internet is working, but that is about it.
Error Code CENTIPEDE usually occurs when your console or PC has lost communication to the Destiny 2 servers.
What is your NAT as reported by the game? What region are you in?
30 окт. 2020 в 11:43It is not usually recommended to try and play other online games to try and troubleshoot connectivity issues with one. It may tell you that your internet is working, but that is about it.
Error Code CENTIPEDE usually occurs when your console or PC has lost communication to the Destiny 2 servers.
What is your NAT as reported by the game? What region are you in?


Destiny 2
9 июл в 2:42 9 июл в 5:44 27 июл в 21:03I've been repeatedly getting this error since the launch of the Solstice event. I try to log in, but it kicks me before I even get to the character screen.
I have found a fix for me at least. What I've been able to do is go to my task manager and end every instance of steam. To make sure you get all of them scroll down through background processes and make sure the "steam client webhelper"s (there will be multiple) are closed as well. When you relaunch steam, it should do the whole checking for updates.
What I think is happening is there's a desync between steam servers and destiny servers, where steam thinks you're somewhere else than destiny does (I think for me this is the use of a vpn, but not to play destiny) so steam would think I'm in Toronto or something and the game still knows I'm in the US, since I never tried to play it with a vpn.

Destiny 2 error code Centipede is a common problem and can be fixed easily. If you are facing this error, then you should read this post carefully. MiniTool has provided two efficient methods for you to deal with this issue.
Destiny 2 is a free online multiplayer first-person shooter game for PlayStation 4, Xbox One, and Microsoft Windows. But you could meet different error codes when playing Destiny 2, such as error code Cabbage, error code chicken.
This post is mainly talking about Destiny 2 error code Centipede, which is more annoying compared to other errors. But luckily, there are multiple methods for you to solve the issue, so make sure you have tried all of them before giving up. Now follow the guide below to fix the error.
Method 1: Update Your Game Entirely
First of all, you should update your game entirely to fix Destiny 2 error code Centipede. Bungie often releases in-game patches, which help improve your overall game performance, while also fixing some of the most common error codes during this period.
If you have turned off the automatic update option or turned it off by default, follow the instructions below to update your game:
Step 1: Turn on the Xbox One system and log in to the required Xbox profile.
Step 2: Press left on the D-Pad and go to the Settings menu. Find the All Settings option and click on it.
Step 3: Click Power & startup and then click Power mode & startup.

Step 4: Check the box next to Keep my console, games & apps up to date.
Final Words
How to fix Destiny 2 error code Centipede? This post has offered two methods for you with detailed instructions. If you have any confusion about this post, leave a comment below and we’ll reply to you as soon.
Fix 1: Check Destiny 2 server status
You can refer to the Bungie Help page and Bungie Help official Twitter for upcoming maintenance schedules and real-time notifications.
If Destiny 2 servers are working as intended, then the problem may be with your Internet connection. Read on for some fixes to configure your Internet settings and resolve the Error Centipede on Destiny 2.
Fix 5: Use a VPN when your Internet access is restricted
Hopefully this article is helpful and you can now enjoy Destiny 2 without the annoying Error Centipede!
ABOUT THE AUTHOR
Position: Columnist
Author Sonya has been engaged in editing for a long time and likes to share useful methods to get rid of the common problems of Windows computers, such as Windows Update error. And she aims to help more people to protect their data. What’s more, she offers some useful ways to convert audio and video file formats. By the way, she likes to travel, watch movies and listen to music.
Fix 3: Choose NAT Type 1/Open NAT
Option 1: Enable UPnP
You can now test a game to see if you still get the Centipede Error.
Option 2: Port Forwarding
Step 1: Get IP address information
Step 2: Assign a static IP address
Step 3: Set up Port Forwarding
Ports that should be OPEN
Ports that should be FORWARDED
Fix 4: Update your network adapter driver
There are two ways you can get the right driver for your network adapter: manually or automatically.
Automatic driver update – If you don’t have the time, patience, or computer skills to update your driver manually, you can, instead, do it automatically with Driver Easy. Driver Easy will automatically recognize your system and find the correct driver for your network adapter and your Windows version, then it will download and install it correctly:
1) Download and install Driver Easy.
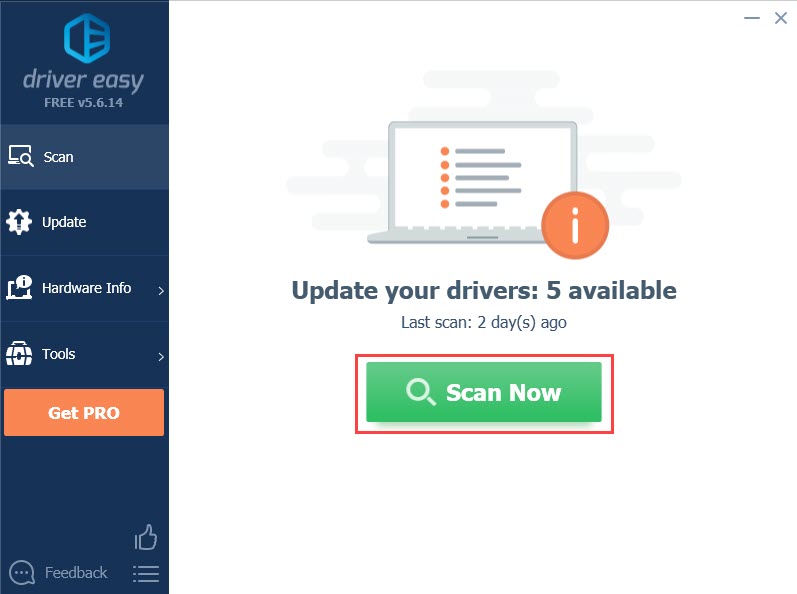
2) Run Driver Easy and click the Scan Now button. Driver Easy will then scan your computer and detect any problem drivers.
3) Click the Update button next to the flagged network adapter driver to automatically download the correct version of the driver, then you can manually install it (you can do this with the FREE version).
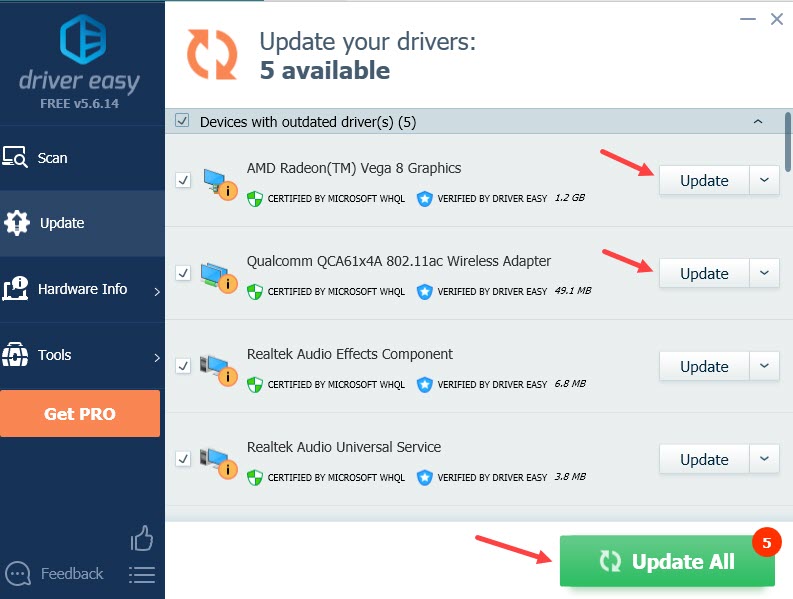
Or click Update All to automatically download and install the correct version of all the drivers that are missing or out of date on your system. Here for example, I can update the graphics driver on my PC as well. (This requires the Pro version which comes with full support and a 30-day money-back guarantee. You’ll be prompted to upgrade when you click Update All.)
Fix 2: Check your Internet connection
If your Internet connection is unstable or slow, you may get the Error Centipede when trying to log in to Destiny 2. There are a few things you should pay attention to and configure as needed:
If you still get the Error Centipede, try the next fix.
Читайте также: