Как забрать кровь у пациента в payday 2
Обновлено: 26.04.2024
11 июл. 2019 в 3:09
Объясните мне пожалуйста некие тонкости в описании классовых навыков (КН).
КЛАСС "ТЕХНИК" - ТИР "ПРИТЕСНИТЕЛЬ"
Есть такой навык - "Хирургическая точность" - и в описании написано, что под действие навыка подпадают только пистолеты-пулеметы, штурмовые винтовки и пулеметы. Это означает, что только оружие принадлежащее к описанным внутриигровым классам (оно разделено соответствующими названиями в меню магазина) будет работать с этим КН или любое оружие, подпадающее под описание, скажем, пулемета может подойти для этого КН? К примеру многоствольные пулеметы из раздела "особое" будут работать с этим КН?
Так же, в этом же тире КН'ов есть два таких навыка, как "Шквальный огонь" и "Оружие к бою". В описании первого сказано, что КН не работает с ПРО-версией последнего - значит ли это, что если я прокачал КН "Оружие к бою" до его ПРО-версии и при этом взял ПРО-версию КН "Шквальный огонь", то все бонусы последнего не будут работать? Или, быть может, будет работать только ПРО бонус второго навыка? Эмпирически "почувствовать", работает ли эта связка, у меня не получилось.
Заранее благодарю всех. кто поделится своим опытом или знаниями.
11 июл. 2019 в 4:28Из особых точность рабтает только с луками.
Шквальный огонь при взятом эйсе оружия к бою не рабатает полностью т.е это выброшенные в пустоту скиллпоинты и тут нужно либо убирать ШО либо эйс с оружия к бою. и это не тир , а скиллтри т.е древо навыков, тиры же находятся внутри т.е 1,2,3,4
Связанные достижения [ ]
| Left for dead Завершите любое ограбление в команде из 4 человек, когда вы находитесь под стражей, а остальные игроки — нет. |
| Last man standing Завершите любое ограбление, оставаясь единственным выжившим игроком. |
| Don't panic Завершите ограбление No Mercy так, чтобы никто из гражданских не нажал на кнопку сигнализации на сложности Hard или выше. Вы должны играть с начала ограбления. |
| . or was it the blue one? На ограблении No Mercy обрежьте правильный провод сигнализации, чтобы дверь с нужным пациентом не закрылась. Вы должны играть с начала ограбления. |
| That's the wrong door, again! Завершите ограбление No Mercy, открыв все двери в ICU пилой на сложности Overkill или Overkill 145+. Вы должны играть с начала ограбления. |
| Afraid of the dark Завершите ограбление No Mercy на сложности Hard или выше, вернув электричество в первые 5 секунд с момента выключения. Вы должны играть с самого начала ограбления. |
| Last Christmas В сетевой игре на любом ограблении найдите Рождественский подарок. Открывает маску Santa. |
| Don't panic Завершите ограбление No Mercy так, чтобы никто из гражданских не нажал на кнопку сигнализации на сложности Hard или выше. Вы должны играть с начала ограбления. |
| . or was it the blue one? На ограблении No Mercy обрежьте правильный провод сигнализации, чтобы дверь с нужным пациентом не закрылась. Вы должны играть с начала ограбления. |
После того, как вы выслушаете врача, обратите внимание на цвет провода, который идет к нужной палате. Если вы выбрали верного пациента и перерезали нужный провод, то получите достижение. Нужный пациент всегда находится в критическом состоянии с нестабильным артериальным давлением. Врач может сказать, что они не смогли определить болезнь.
| That's the wrong door, again! Завершите ограбление No Mercy, открыв все двери в ICU пилой на сложности Overkill или Overkill 145+. Вы должны играть с начала ограбления. |
Чтобы получить достижение, вам нужно успешно завершить побег живым.
| Afraid of the dark Завершите ограбление No Mercy на сложности Hard или выше, вернув электричество в первые 5 секунд с момента выключения. Вы должны играть с самого начала ограбления. |
Для достижения считается только первый случай выключения электричества полицейскими. Вам нужно завершить побег живым, чтобы получить достижение.
| Last Christmas В сетевой игре на любом ограблении найдите Рождественский подарок. Открывает маску Santa. |
Подарок содержит в себе маску Санты и может быть найден в следующих местах:
Overview [ ]
Overall, the heist is the same as it was in the original, in that it allows for a pseudo-stealth playthrough. While it is entirely possible for the crew to go in loud, the first half of the heist can be carried out without the alarm being raised if they are careful, though the police will inevitably arrive once the second part begins.
Содержание
Прохождение [ ]
Если вы провалите план [А], тогда начнется план [Б].
Идите к ресепшену и ищите камеры. В начале ограбления будет три камеры для каждого игрока-человека, максимум 9 камер (количество камер зависит от количества игроков). Камеры расположены вокруг приемной, в северном коридоре, главном коридоре и в соседних комнатах. После того, как вы нашли каждую камеру, расположитесь так, чтобы каждый игрок смог контролировать кнопки тревоги и уничтожить свою часть камер. Вы должны уничтожить каждую камеру своим оружием или атаками ближнего боя в течение семи секунд; в противном случае сработает тревога.
После того, как камеры уничтожены, каждый игрок должен охранять кнопку, чтобы ни один гражданский не активировал тревогу. Три кнопки всегда находятся под стойкой администратора, в северном коридоре и в комнате у лифта.
Убедитесь, что вы контролируете всех гражданских. В это время охранник или ремонтник могут подниматься по лестнице рядом с зоной возрождения, чтобы проверить неисправность камеры после телефонного звонка. Охранник должен быть быстро убит оружием с глушителем, а ремонтник должен быть взят в заложники (вы можете убить его, но вы понесете соответствующий штраф). Иногда случается, что Бэйн не предупреждает команду о ремонтнике, скорее всего в тот момент, когда он разговаривает по телефону. Однако, если он не дает вам дальнейших инструкций/напоминаний подозрительно долго, то есть большая вероятность, что ремонтник появится. Также может случиться так, что на лифте приедет гражданский, о чем оповестит характерный звук, но, несмотря на это, лучше периодически проверять лифт и лестницу. У вас всегда должна быть запасная кабельная стяжка, если появляется гражданский, потому как он будет находиться очень близко к кнопке тревоги.
После того, как файл пациента был найден, вы должны будете установить четыре поддельных турели, которые будут держать гражданских под контролем. После их установки гражданские не будут нажимать на кнопки тревоги.
После установки турелей войдите в раздевалку и наденьте докторские халаты, войдя в оранжевую зону. Таким образом вы вернетесь в скрытную фазу, в которой гражданские не будут активны.
Войдите в отделение интенсивной терапии и поговорите с доктором Эрикссон, встав рядом с ней. Следуйте за ней и слушайте, что она говорит. Она сделает два круга, описывая диагноз и симптомы пациентов, что должно помочь игрокам сделать верный выбор. Нужный команде пациент будет иметь следующие качества:
- Он не очень хорошо реагирует на лечение и пока не планируется его выписывать.
- Он страдает от «неизвестной болезни», бешенства, аномального сердечного ритма или ненормального уровня артериального давления.
- Редко упоминается, что пациент страдает от «зеленого гриппа».
После того, как вы определили правильного пациента, запомните цвет провода, подключенного к его палате; это будет красный, желтый или синий. Следуйте по проводу, пока не дойдете до щитка.
Запустите ограбление и взаимодействуйте с правильным проводом, чтобы разрезать его. Если вы не успеете вовремя перерезать провод или выстрелите из оружия без глушителя (будучи создателем лобби) прежде, чем перерезали провод, все заслонки закроются, и вы будете вынуждены использовать пилу. Обрезав верный провод, вернитесь в коридор и войдите в открытую палату.
Если вы активируете тревогу преждевременно или перерубите неправильный провод, то вы должны будете взять пилу, которая замаскирована под плюшевую игрушку, и использовать ее, чтобы прорваться в отделение интенсивной терапии, а затем также просверлить стальные ставни палаты. Когда вы закончите пилить одну из палат, разбейте стекло и проверьте, правильный ли это пациент. Если нет, то повторите со следующей палатой, пока не найдете нужного.
После выполнения планов [А] и [Б]
Пока лифт спускается на этаж 4, вы должны поддерживать электричество, заново включая щитки и вызывая лифт. Когда двери лифта откроются, поместите два готовых образца крови в держатель для пробирок и запустите лифт, когда все члены команды будут внутри.
Поднимите лом в углу лифта. Во время поездки лампы будут мерцать, а сам лифт дрожать в результате того, что армия выпустила ракеты по госпиталю. В это время остерегайтесь Клокеров, которые могут прорваться сквозь потолок и атаковать.
Есть два разных возможных сценария побега:
- Лифт останавливается на 33 этаже, который охвачен пламенем, а на вас могут выйти два Бульдозера. Используйте лом, чтобы опустить аварийную лестницу, а затем спуститесь по ней и бегите в зону побега, где будет ждать Бэйн.
- Лифт падает на первый этаж. Вы можете предсказать этот исход если обратите внимание на то, погас ли дисплей, показывающий этаж. Используйте лом, чтобы открыть люк лифта на полу, войдите в него и взломайте двери. Пробегите через морг, пока не дойдете до машины скорой помощи. Вы можете избежать получения урона от падения, когда выйдете из лифта, прыгнув на трубу, находящуюся на стене напротив.
Время побега составляет 1:05 независимо от сложности.
Variations [ ]
- The positions of the security camera will change. Possible locations include the room with the elevator, the main reception room, the ICU hallway, and the side office hallway.
- The target patient's location will be different each time. If the first section is stealthed, one can figure out which quarantine room holds the target; if not, one must saw through the doors randomly.
- The escape method will either be via helicopter, in which case the only priority the crew must look out is for a pair of Cloakers spawning in the vents; If via ambulance, the crew must open two hatches with the crowbar, being slightly more time consuming.
No Mercy

Objectives [ ]
Stealth [ ]
- Take out the cameras.
- The amount of cameras varies depending on how many human players are present, with 3 solo to 9 with 4 players. Use a silenced weapon to avoid alerting ICU guards.
- The majority of hostages are in the reception area, but there are some in the hallway, by the elevators, and in the break room. They can get up and sound the alarm, even if not fully alerted, so get them down ASAP.
- The phone will ring several times, and the results will be one of the following.
- Nothing happens.
- A civilian is sent up to check on the cameras. He will come up the stairs.
- A guard will come to investigate. He does not have a pager, but killing him will start an invisible timer. Once the timer is up, the alarm will go off. The guard is typically one of the last calls you will receive.
- This requires you to search various documents on the reception desk.
- Once done, civilians will no longer get up on their own.
- Continue answering the phone, and change into medical scrubs when prompted.
- Cut the wire that corresponds to the patient’s unit, and the alarm will sound.
- Saw open the ICU doors.
- Grab the Teddy Moo doll from the reception area, and mount it in the ICU doors. It will take a couple of minutes.
- Since the heist went loud, there is no way to tell which has the patient, aside from process of elimination.
- Draw blood samples from the patient.
- Each sample has a 28% chance to be valid, and invalid ones will "explode," causing the centrifuge to take a little bit of time to clean itself.
- This will trigger once the first valid blood sample is picked up.
- During this time, police will turn off the power. Once the power is back on, players will have to interact with the call button again.
- Continue validating samples until you have 2, and stash those in the cooler in the elevator.
- During this time, police will bomb the building, and the elevator will either make it to the roof or fall to the morgue.
- A Point of No Return timer will start, and you will have either 30 seconds (morgue) or 1 minute (roof) to escape.
Contents
No Mercy (Payday 2)
![No Mercy.jpg]()
After the PAYDAY crew rescues Bain in Hell's Island, it is discovered Murkywater and the Kataru have experimented on him with the same virus that the crew stole from Mercy Hospital a few years ago, and he only has a couple more days to live. This heist is a flashback of that event.
Strategy [ ]
- Anyone holding a blood vial must exercise extreme caution, as getting incapacitated will break said vial. If a player holding a vial is on low health, it strongly advised to heal, best with a first aid kit.
- One can simply not pick up more than one vial, as picking up one vial is enough for Bain to instruct the crew to call the elevator.
- Simply leave the second blood sample on the centrifuge until the elevator arrives, although this is only recommended if the centrifuge is not too far away, and if the crew has the situation under control and not getting overwhelmed by enemies. can also be a life-saver, especially to save a vial-carrying player.
- Snipers and Graze – The narrow corridors makes it so a correctly aligned headshot will be enough to kill almost every unit on its path. This heist, together with other interior-based maps, makes Graze as effective as it can get.
- Sniper-related achievements for kills-in-a-row are also easily achievable here.
- LMGs chew through ammo fast. Be sure to collect ammo every once in a while, at least above 50% ammo capacity, to prevent the possibility of running out of ammo in a critical scenario.
- Due to having a large field of view, they may run out of ammo rapidly. Have them set on AP mode, and keep in mind to refill their ammo constantly.
Differences from PAYDAY: The Heist [ ]
- Involvement of the US Army seems to have been retconned in favor of Murkywater private aircraft hitting the building with missiles.
- Security cameras and the guards in the ICU (if players have swapped their outfits for medical scrubs) will not detect players no matter their concealment value.
- However, getting too close to the security guard near the ICU door prior to changing outfits can cause the heist to go loud prematurely.
- In fact, if one wishes to start loud as soon as possible, one can walk straight to the guard to skip Bain's dialogue for the cameras, and then kill one random civilian in the lobby to skip Bain's countdown timer.
Mayhem+ Changes [ ]
- Greatly increased civilian count at the start of the heist, regardless of player count.
Note: Unlike regular stealthable heists on Mayhem+, the amount of cameras spawned is not based on the difficulty, but on the current amount of players that were identified at the start of the heist.
![]()
By destroying Mercy Hospital, the lore of PAYDAY no longer connects with Left 4 Dead.
In addition, OVERKILL implemented a method to allow for the No Mercy heist to be lore-friendly: Regardless of how the crew escapes, whether it be by the roof or escape by ambulance, Mercy Hospital will be destroyed. This is also one of the reasons as for why the heist was made from being a nightmare, into a real heist that took place canonically in the PAYDAY universe. In theory, this method scraps any possible conflicts between the lore of PAYDAY and Left 4 Dead, creating its own timeline where The Green Flu outbreak never begun.
However, PAYDAY 2's Mercy Hospital is located in New York City, according to the Breaking News website. This means it cannot be the same hospital from Left 4 Dead, which is located in the fictional city of Fairfeld. The nurse in the stealth portion of the heist may sometimes mention the Green Flu by name, implying the disease is far more common and not as deadly as the zombie virus in Left 4 Dead.
There are hints Murkywater are involved, as Bain may mention he saw "merc units surrounding the building", though he does not recognize the "shark logo".
PayDay 2 Нет милосердию
ПОМОГИТЕ!![]()
ЧТо тут нужно сделать? я уже всю больниц успел обойти с его кровью ни один анализ верным не оказался, это может быть баг? я все уголки уже перепроверил по миллион раз.
Эта игра чистый рандом, тебе может с первого раза дать кровь, а может и с 30.
я нашел решение случайно, выходи из этой камеры, налево, потом идёшь направо, проходишь через проломанную стену и на столе слева недалеко от двери центрифуга. тупа вставляешь образец и миссия продолжиться. Далее второй раз в ту же центрифугу несёшь и вставляешь, ну и по кругу, потом по идёшь по заданиям и все.
Walkthrough [ ]
Of note, not much has changed from the original. Players must disable the security cameras or, if the heist goes loud, they must obtain the teddy-moo doll to saw through the ICU doors.
If players wish to keep the heist in stealth longer, they must take note of each of the security cameras' positions in which they will be random. After taking note and upon masking up, only 7 seconds are given to disable them all. Silenced weaponry or/and melee strikes are the only way to destroy the cameras without breaking stealth.
Disclaimer: This stealth cannot be fully stealthed, despite the stealth icon in the heist contract. Dress to impress.
Plan A is the stealthy approach to the heist. If carried out correctly, the alarm will not be raised and the police will not arrive until the second phase of the mission.
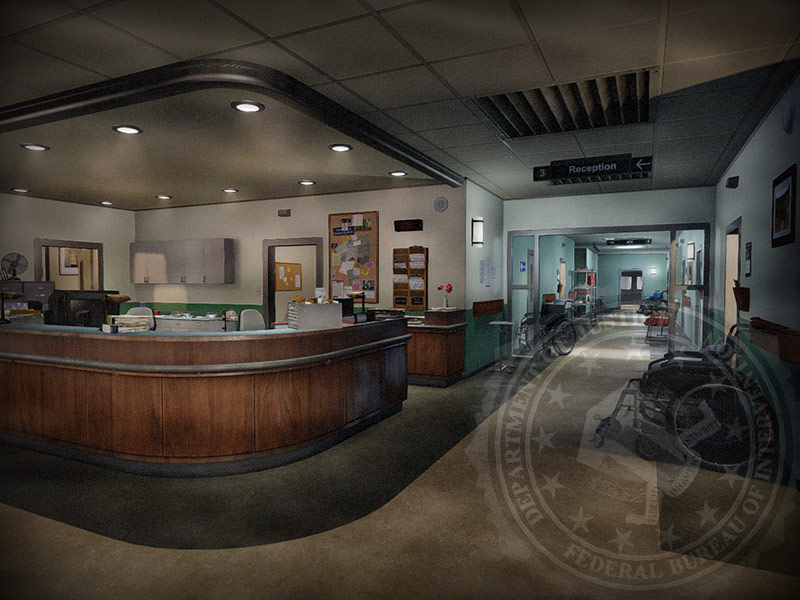
After exiting the elevator, the crew will find themselves in the lobby of Mercy Hospital. Civilians and doctors distributed randomly throughout the area, with the majority being located near the reception desk. Several security cameras will also be placed in random locations. Bain will alert the crew that once they begin the heist, they will have seven seconds to destroy every camera. He will also state how many cameras there are, this will vary depending on how many players are connected. There will be three cameras if the player is alone, six if there are two players present, and nine if there are three or four players. Bots do not count towards this.
Once the heist begins, the crew will have seven seconds to destroy every camera. Silenced weaponry and/or melee strikes are the only way to do so without breaking stealth. If the cameras are not disabled within this time, the alarm will be triggered. Afterward, the crew must keep the civilians down. Some of them will run for the three-alarm buttons; if any of them are hit, the alarm will be raised. These buttons are located near the elevator, in the hallway near the staircase, and behind the front desk. If any of the hostages are killed the alarm will go off, due to the stress causing heart attacks in patients with pacemakers.
If the crew manages to stop the alarm from being triggered, they can continue with Plan A. This involves checking the patient database to locate the infected individual, answering the phone and letting Bain deal with the callers, and locating a file on the target patient. There is a chance a guard will spawn from the bottom of the staircase, if he is not dispatched before he reaches the top, the alarm will go off, but he won't have a pager to be answered. There is also a chance of construction workers spawning in the same location, or civilians spawning from the elevator. They will all make a dash for the alarm, if not stopped by the crew first.
After locating the file on the target patient, the crew must set up four "fake sentries." These will stop the civilians from getting up, therefore stopping the chance that one may hit an alarm button. The crew then suits up in scrubs to infiltrate the ICU (Intensive Care Unit).
This begins the second phase of the mission. The crew will enter the ICU and be greeted by Doctor Schneider. She will give them a tour of the three Isolation Ward Units, and go into detail regarding the various patients' symptoms. After visiting the three units, she will return to her starting position. The crew may ask her to take another lap, where she will go into further detail about their blood pressure and how long they will have to stay in Intensive Care. After this, she will no longer give information about the patients. Based on the information she provides, the crew must decide which chamber locates the target. An alarm box located in an unfinished room will have three colored wires, each leading to a chamber.
Once the heist begins, the crew will have a short time to cut one of the three wires in the alarm box, thus disabling the shutter to the corresponding chamber. After a wire is cut the alarm will inevitably be triggered, thus ending the stealth portion of the heist, and the police will be alerted. Provided the correct chamber wire was cut, the crew will have access to the target patient. He can be identified by the tattoo on his neck. If the wrong wire was cut, the crew must use the saw hidden in a "Teddy Moo" doll located in the lobby to saw open the other chambers and find the target.
If done correctly, stealth is forced to end, and proceeds to Plan B, on the Blood Samples section.
Similar to other stealthable heists, some portions of loud can be skipped by completing them on stealth.
- If before dressing as medical personnel, then the crew will need to bring the saw, also known as Teddy Moo, to cut through the main door.
- The crew will require to cover the saw and be vigilant of the three corridors in which enemies may arrive. It is also recommended to escort a civilian to safety in case one is needed. All heisters must be proactively keeping control of the enemies, or else they risk getting swarmed.
- In addition, there is no way to tell in which room the patient might be, so the carrier of the saw must gamble to choose one of the three possible rooms that he may be located in. Once placed, the crew must wait, protect, and maintain the saw while it cuts through. Worst case scenario is having to cut through all three of them.
- It may be possible to use the clues that Dr. Schneider said, and select a possible second room. If not, then the gamble logic is applied once again, although this time it will be a 50/50.
- Proceed to Blood Sample section.
Regardless of which step was completed on stealth, all of the crew members must be aware of their surroundings, for while it being a corridor makes it easy to have control of, the many spawn points on the roof can make it so Bulldozers and other Special Units can appear all of the sudden, catching heisters by surprise.
At the same time, protect the corridors of the Intensive Care Unit. While there are other areas that are easier to defend than the corridors with a little bit too many roof spawn points, you must still protect Teddy Moo for cutting through the ICU. Even if already cut through and the correct patient, it's not wise to let the room get swarmed in case you need more blood for testing.
Assets [ ]
Purchasable [ ]
Intel [ ]
Описание [ ]
Перед началом ограбления Бэйн оглашает команде план. Она должна найти пациента, зараженного |зелёным гриппом, и взять у него две пробы крови.
Blood Samples [ ]
Once the target patient is located, regardless of which plan was executed to access him, the crew must extract blood samples from him. These samples must then be put in testers, which are available in various rooms around the hospital. The samples may break while being tested, leaving the tester temporarily unavailable. After a sample is successfully validated, it may be picked up by a heister. This will allow the crew to call for the elevator which will be used for the escape. At this point the police may cut the power to the hospital, stopping the elevator and killing the lights. The crew must locate a circuit breaker and restore power, and then recall the elevator.
Two validated blood samples must be acquired to proceed, they will be stored in a cooler in the elevator. If a heister is downed and enters bleed-out mode while carrying any blood sample, valid or untested, the vial will break and will be lost. Once two valid blood samples are placed in the cooler and the crew is in the elevator, the elevator will attempt to go up to the roof to be retrieved by Bain in a helicopter. At this point, the police will retreat, and the army will start firing missiles at the hospital. The elevator may reach its destination and the crew will escape in the helicopter, or the elevator may fall to the bottom. In either case, the crew must pry open the emergency hatch with a crowbar to escape the trapped elevator. In the event of the elevator falling to the basement level, the crew must make a breakthrough the morgue, passing by several squirming body bags. The heist ends once everyone reaches the end of the hallway.
Читайте также:
- However, getting too close to the security guard near the ICU door prior to changing outfits can cause the heist to go loud prematurely.